
Getting WordPress up and running on your domain is pretty straightforward. Below are step-by-step instructions for installing WordPress and removing any unneeded clutter once you’re up and running!
You’re going to start off by visiting your cPanel on Reclaim Hosting. It might have been a minute since you last logged into Reclaim Hosting, so here’s how you get to your cPanel:
Getting to your cPanel:
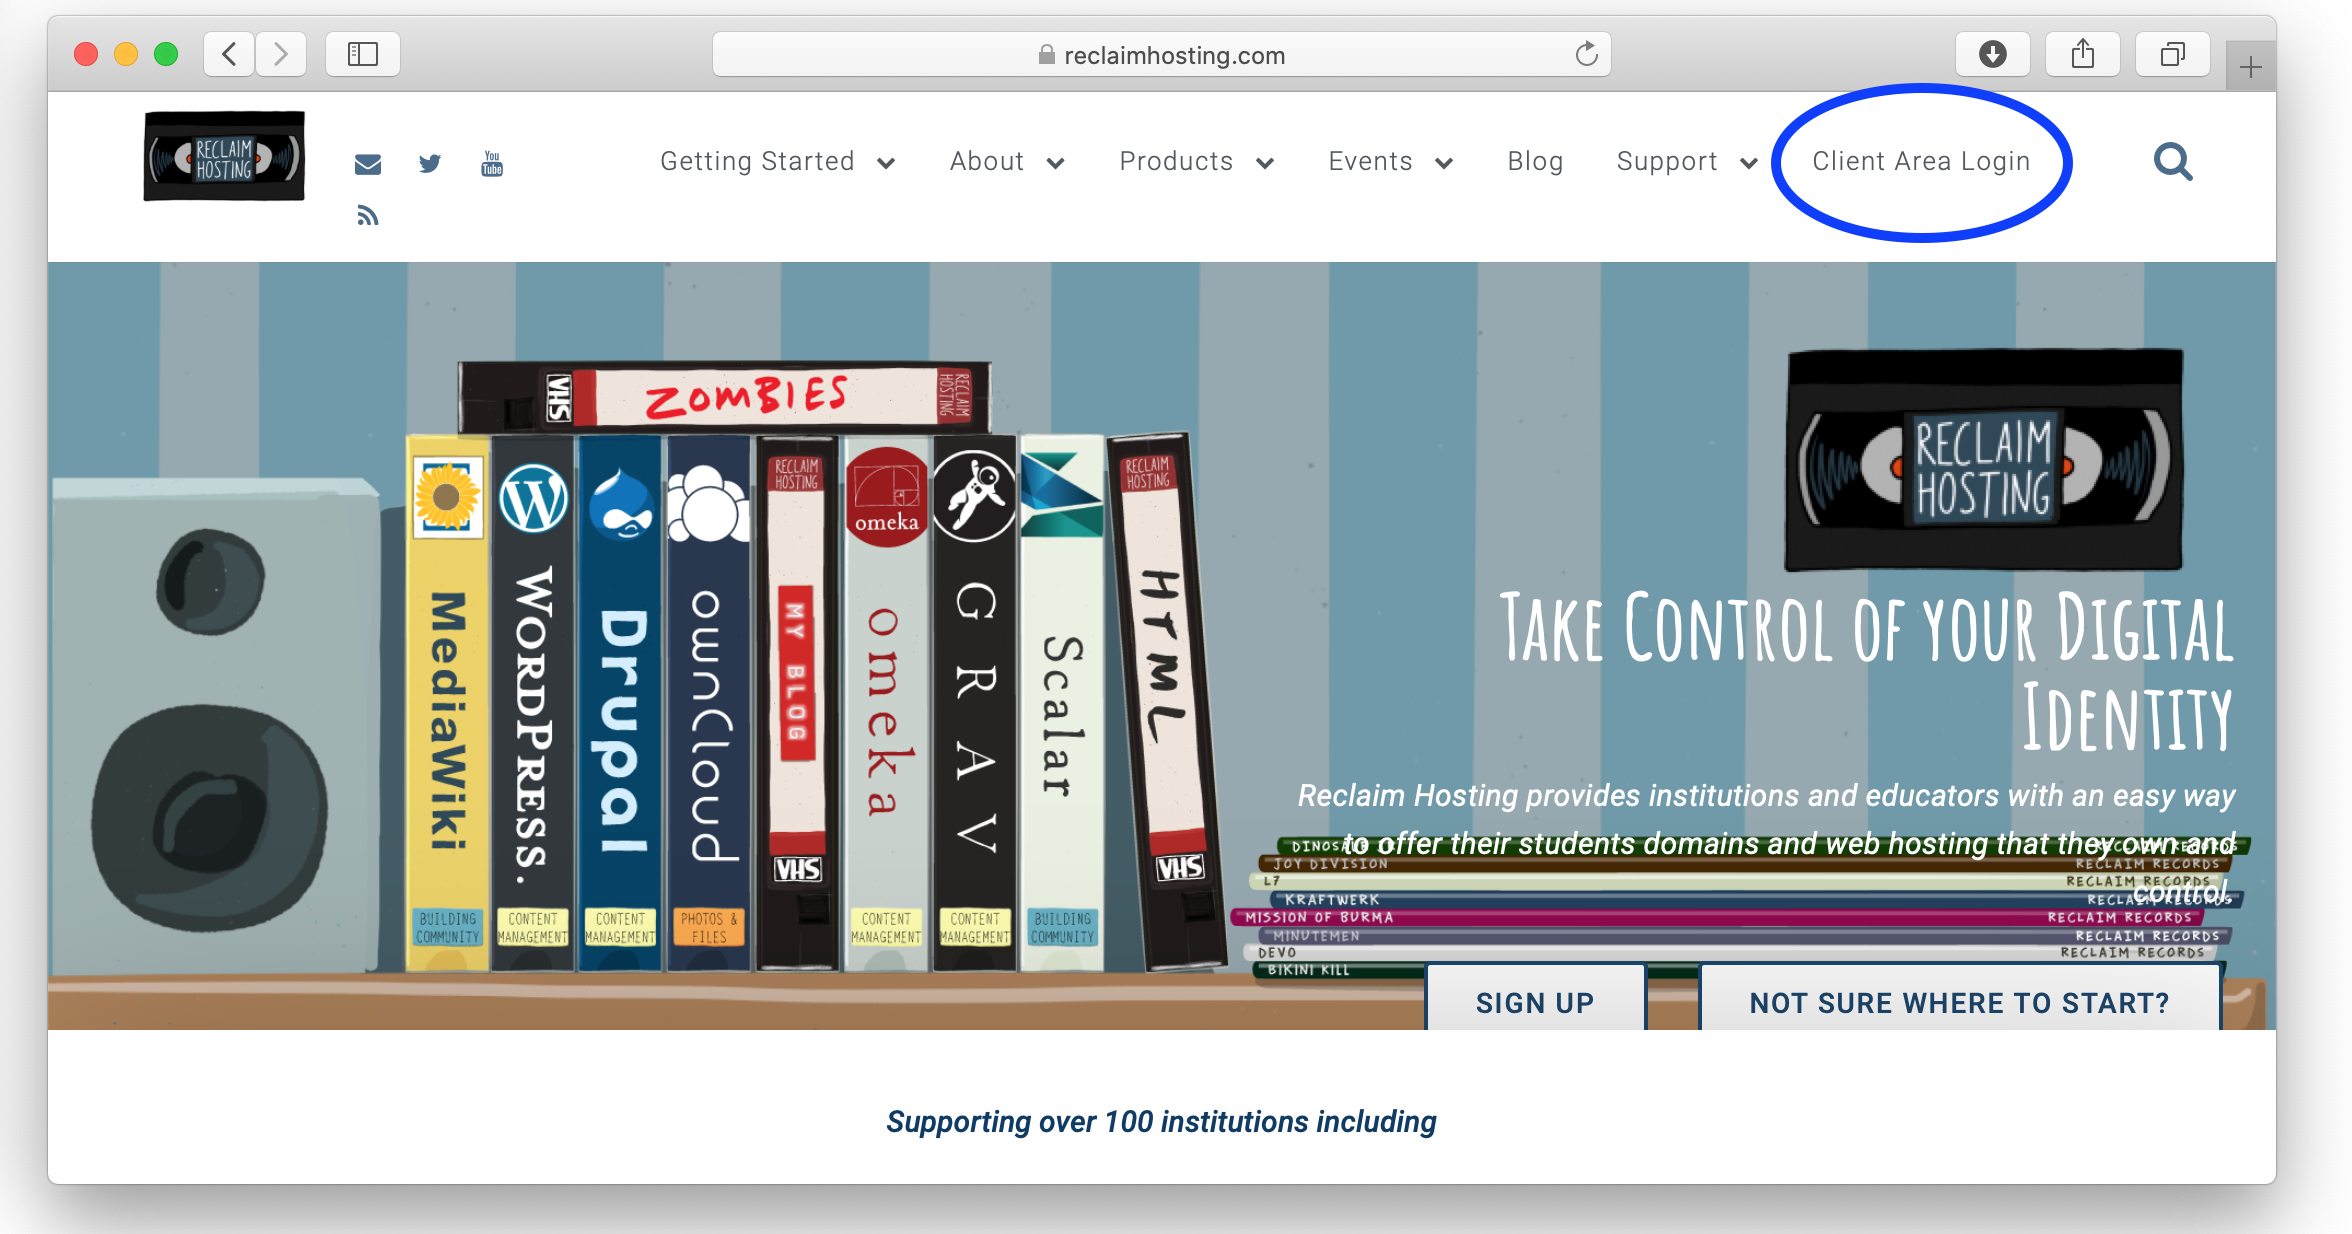
First, go to reclaimhosting.com and click on “Client Area Login” in the top-right corner.
Once logged in1, click on cPanel in the main menu bar.
Installing WordPress:
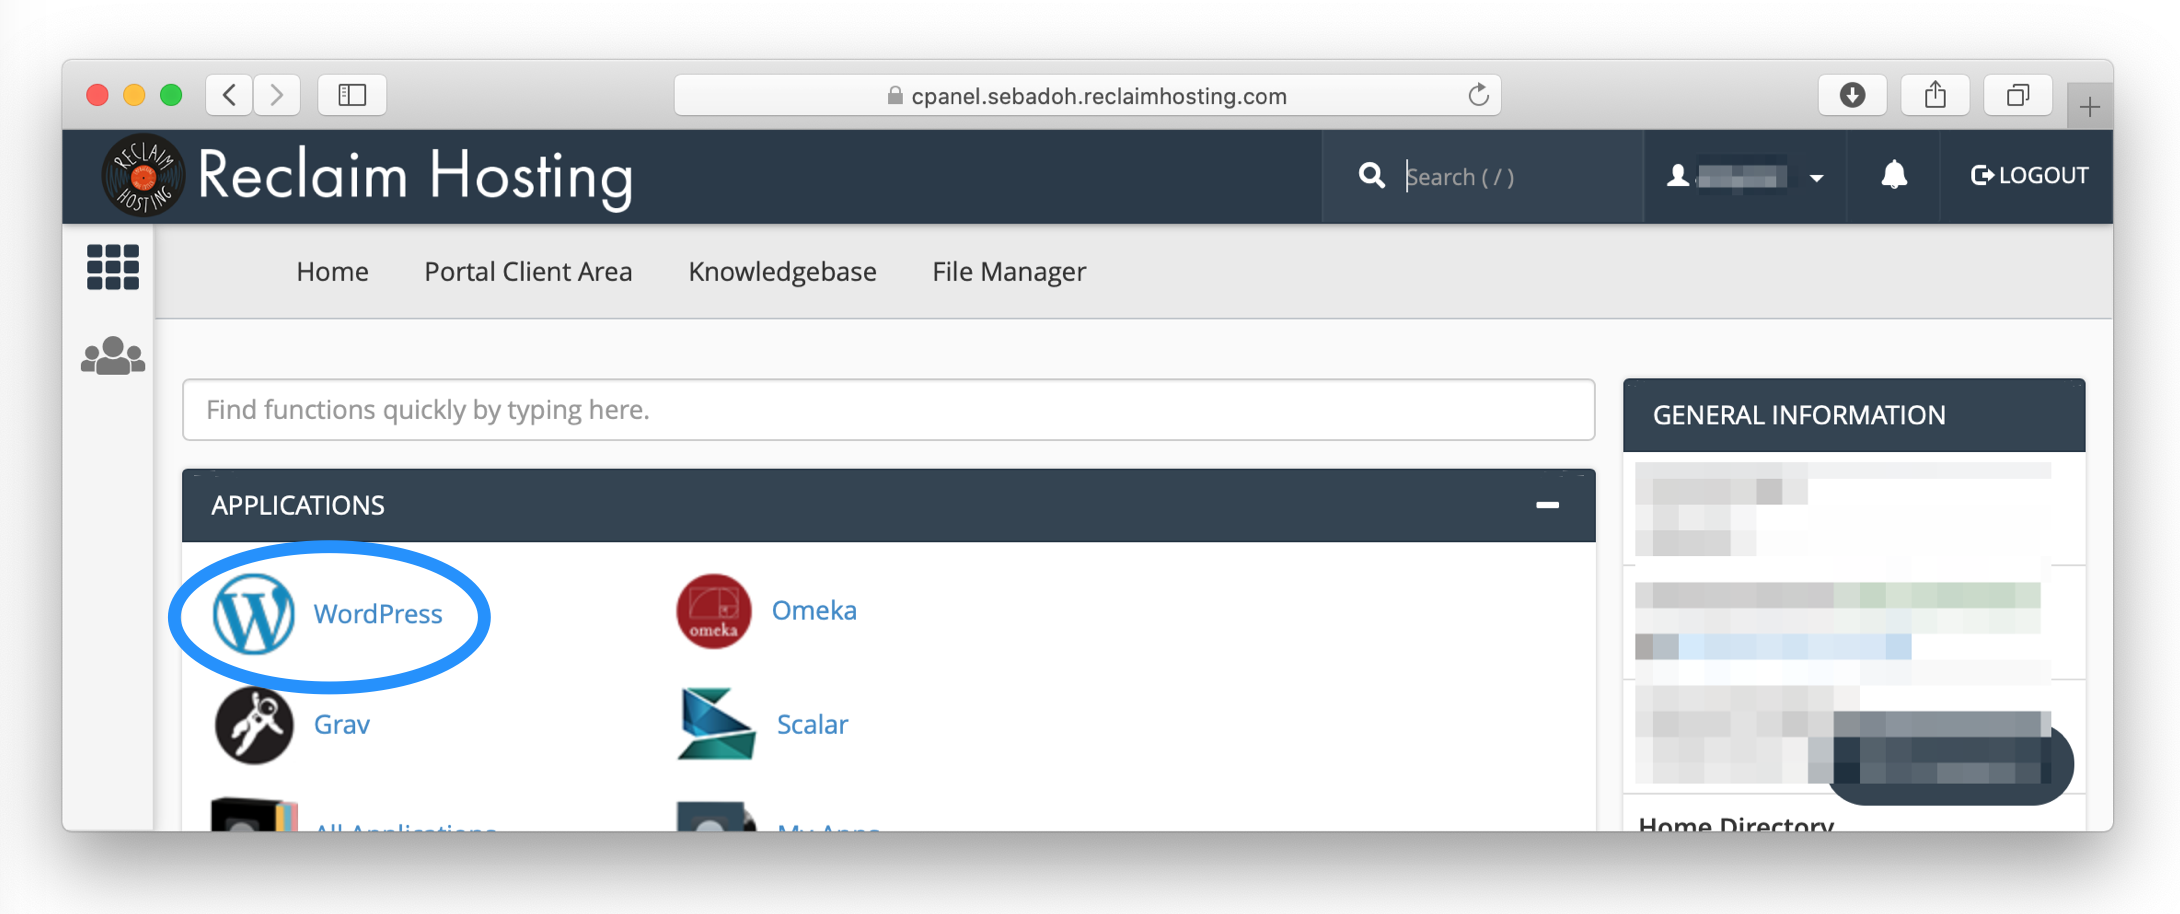
In cPanel, click on the WordPress icon under the Applications heading to go to the WordPress Installation page.
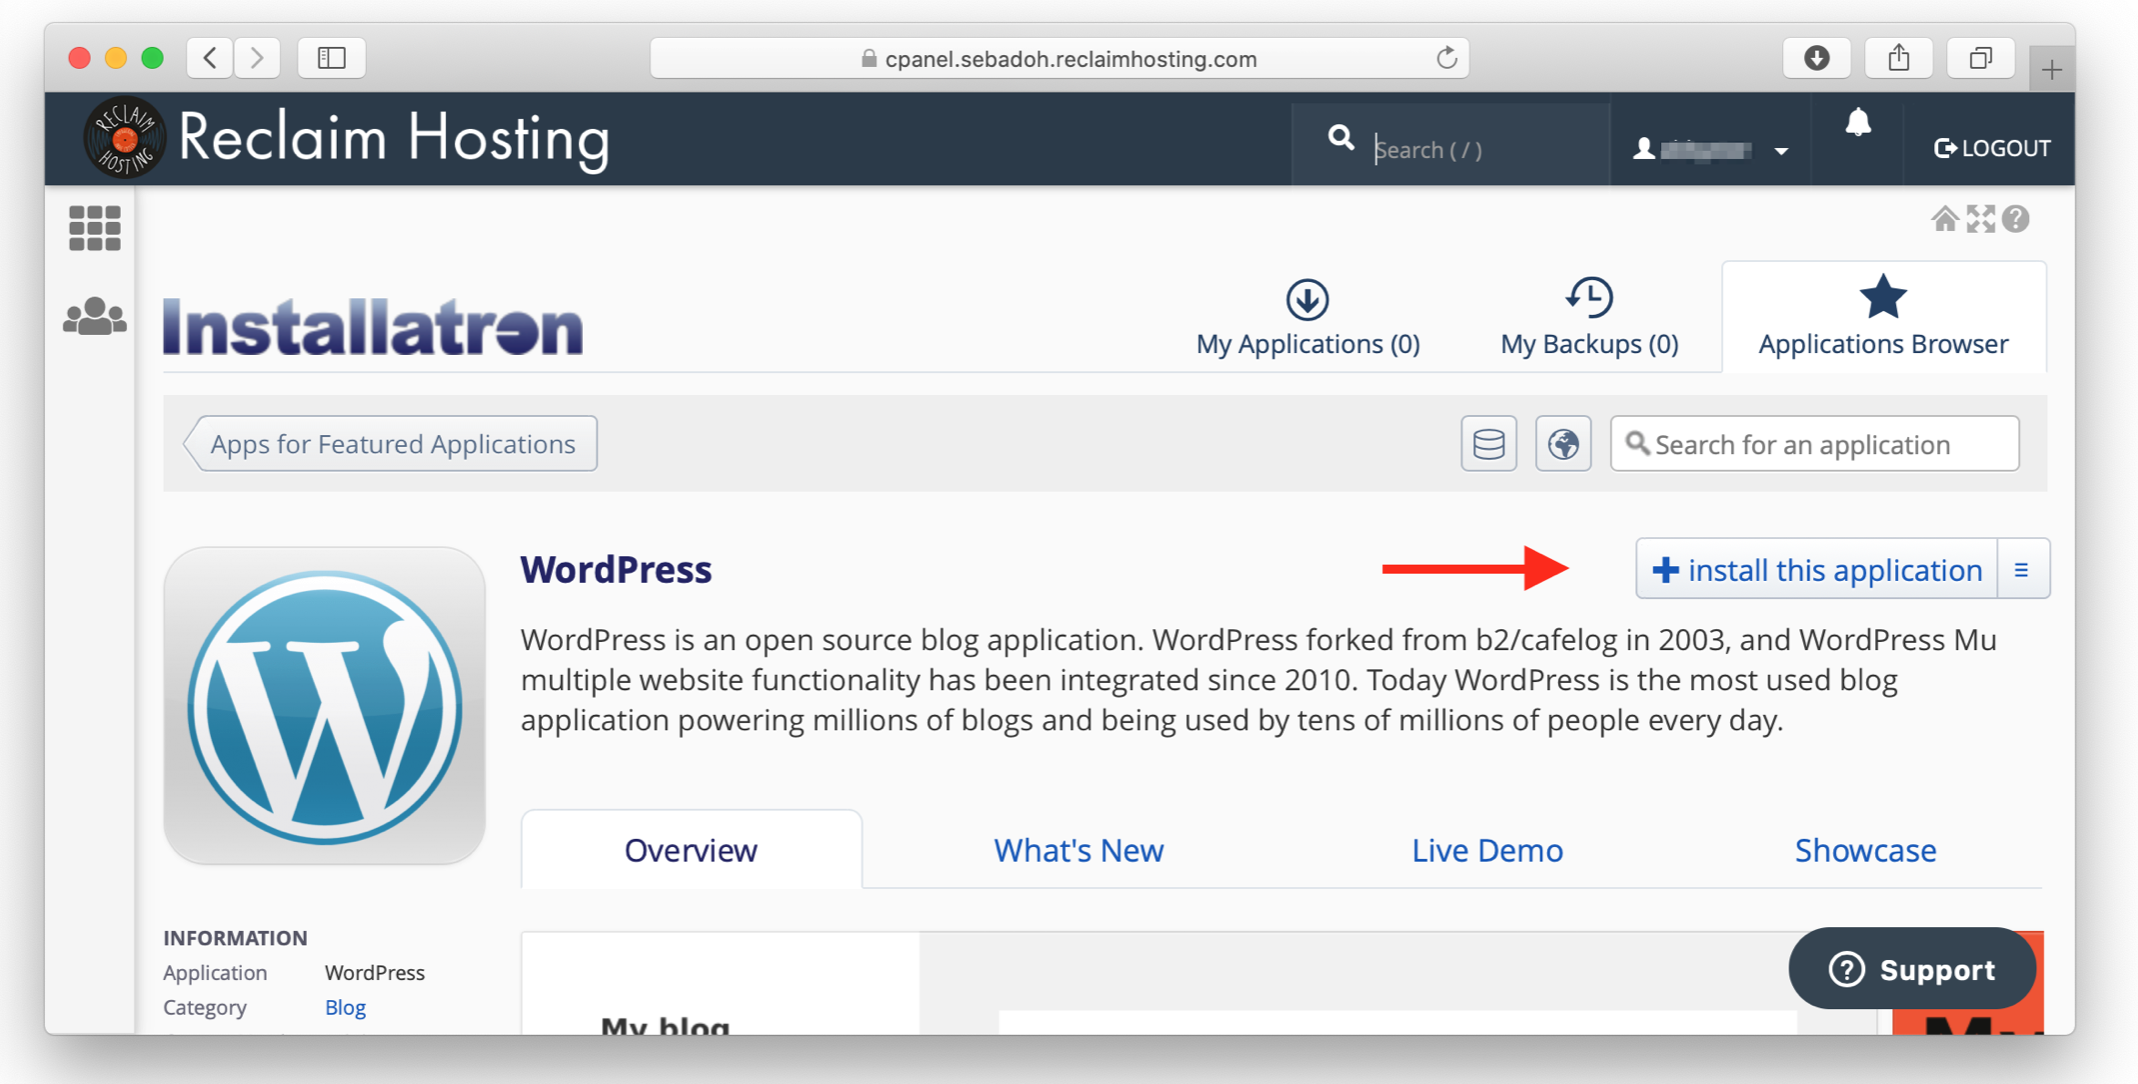
Then, click “Install this application.”
The next few steps will walk you through the selections you want to make for your installation.
Location:
Under Location you should see your domain in the domain field, so no need to make any changes there.
Directory is important so read the next step carefully. If you leave the directory field blank you can install WordPress at the root of your site (e.g. yoursite.com will lead to your WordPress site). Otherwise, you can specify a directory if you want WordPress installed elsewhere (e.g. specifying “blog” will install WordPress at yoursite.com/blog. For this first install, type: playground.

Content
Don’t make any changes to the Version or Language. In the screenshot below you’ll see version 6.8.3 was recommended, but there may be a newer recommended version by the time you’re reading this. The newest version will automatically be there, so no need to make changes.

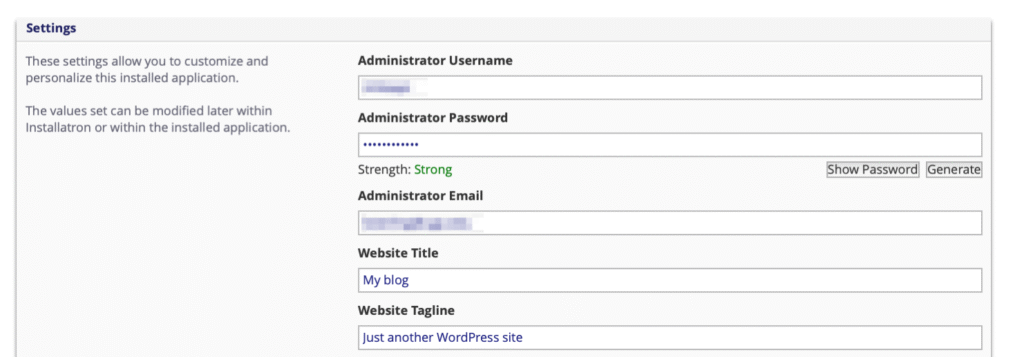
Settings
Choose an Administrator username and password that you’ll remember, and be sure to specify an email address that you regularly use. It will automatically provide something here; I suggest changing it to something you will remember easily!2
You can change the Website Title and Tagline now, or change it later.
Advanced
Advanced Setting Management: select “Let me manage these settings.”
Once you click this several new setting choices will appear:
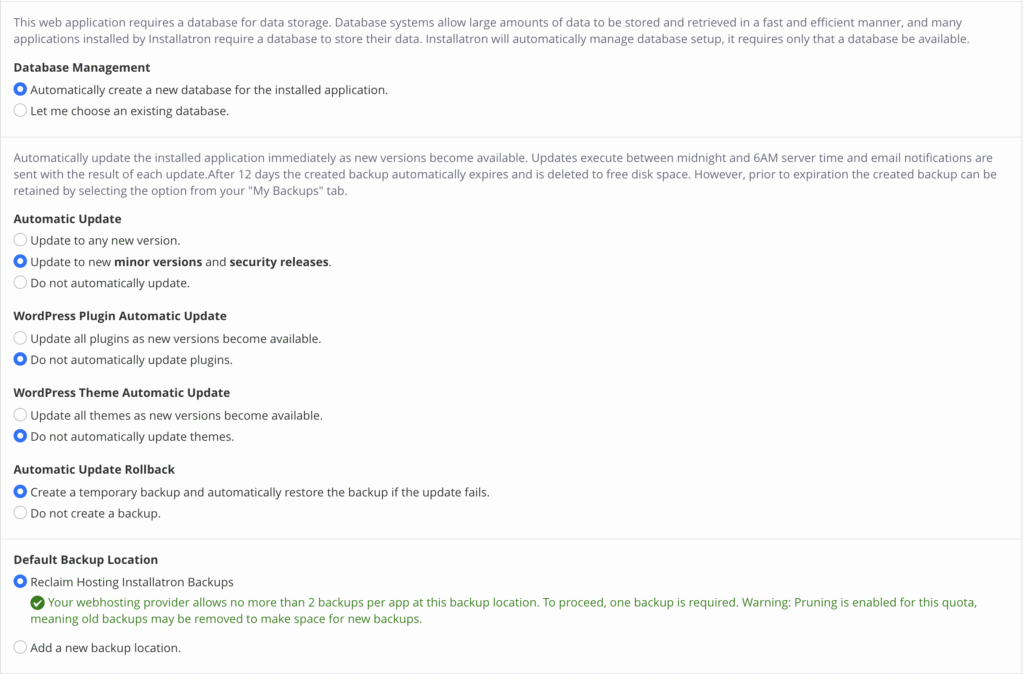
Database Management: select “Automatically create a new database for the installed application.”
Automatic Update: select update to new minor versions and security releases.
WordPress Plugin Automatic Update: select “Do not automatically update plugins.”
WordPress Theme Automatic Update: Do not automatically update themes.”
Default Backup Location: select “Reclaim Hosting Installatron Backups.”
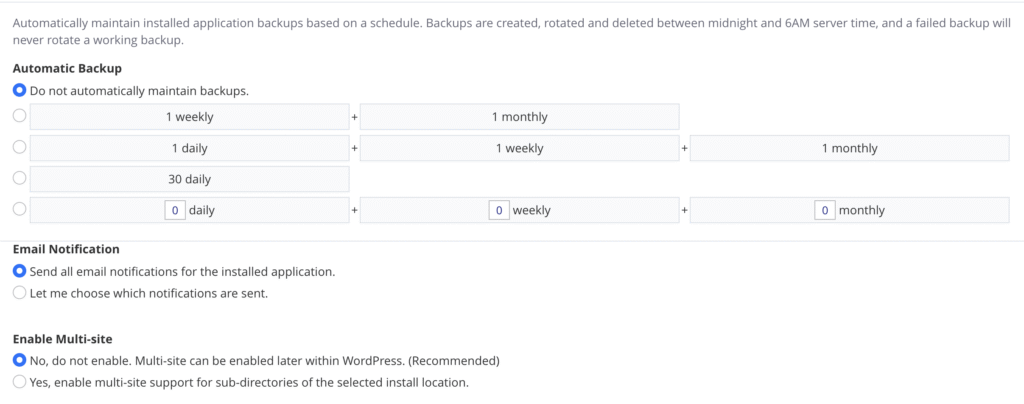
Automatic Backup: select “1 weekly + 1 monthly” (the first option)
Email Notification: select “Send all email notifications for the installed application.”
Enable Multi-site: select “No, do not enable. Multisite can be enabled later within WordPress.”
Install!
When you’re all set, click Install in the bottom right corner of the screen.
Congratulations! You’ve just installed your very first WordPress site! The next screen will give you a link to the admin dashboard for your site (see below). It’s a good idea to bookmark this link for future reference3
Let’s visit the site now so that we can adjust our settings and clean up the installation.

Cleaning up a new WordPress installation:
To get to the dashboard for your new WordPress site, you’ll enter the exact URL of your installation and add “/wp-admin” at the end. Alternatively, you can just click the link from our last step, or visit your cPanel to retrieve the link, if you forgot it. Here’s a look at the dashboard:
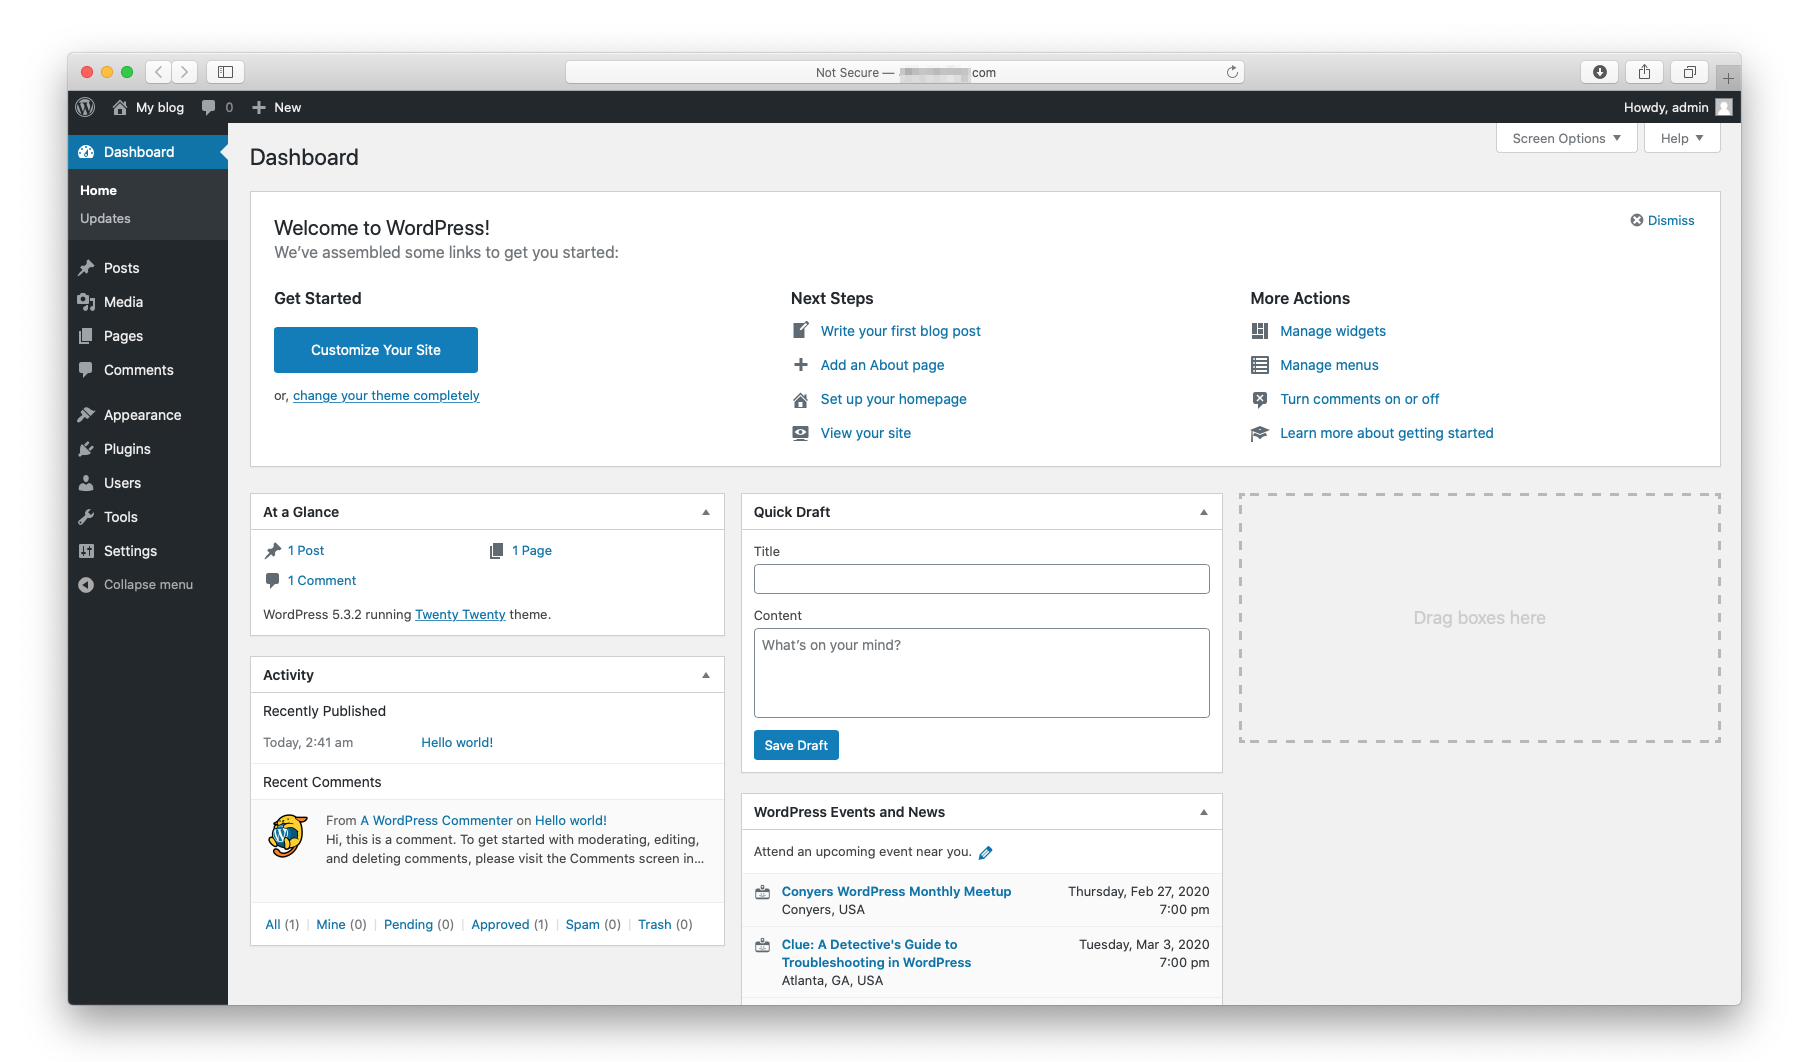
The next few steps will help you set up your WordPress site and clean up some unnecessary features that come pre-installed on WordPress.
You’ll want to make sure to familiarize yourself with the menu on the left side of the screen. We’re going to start with “Settings” (at the end of the list).
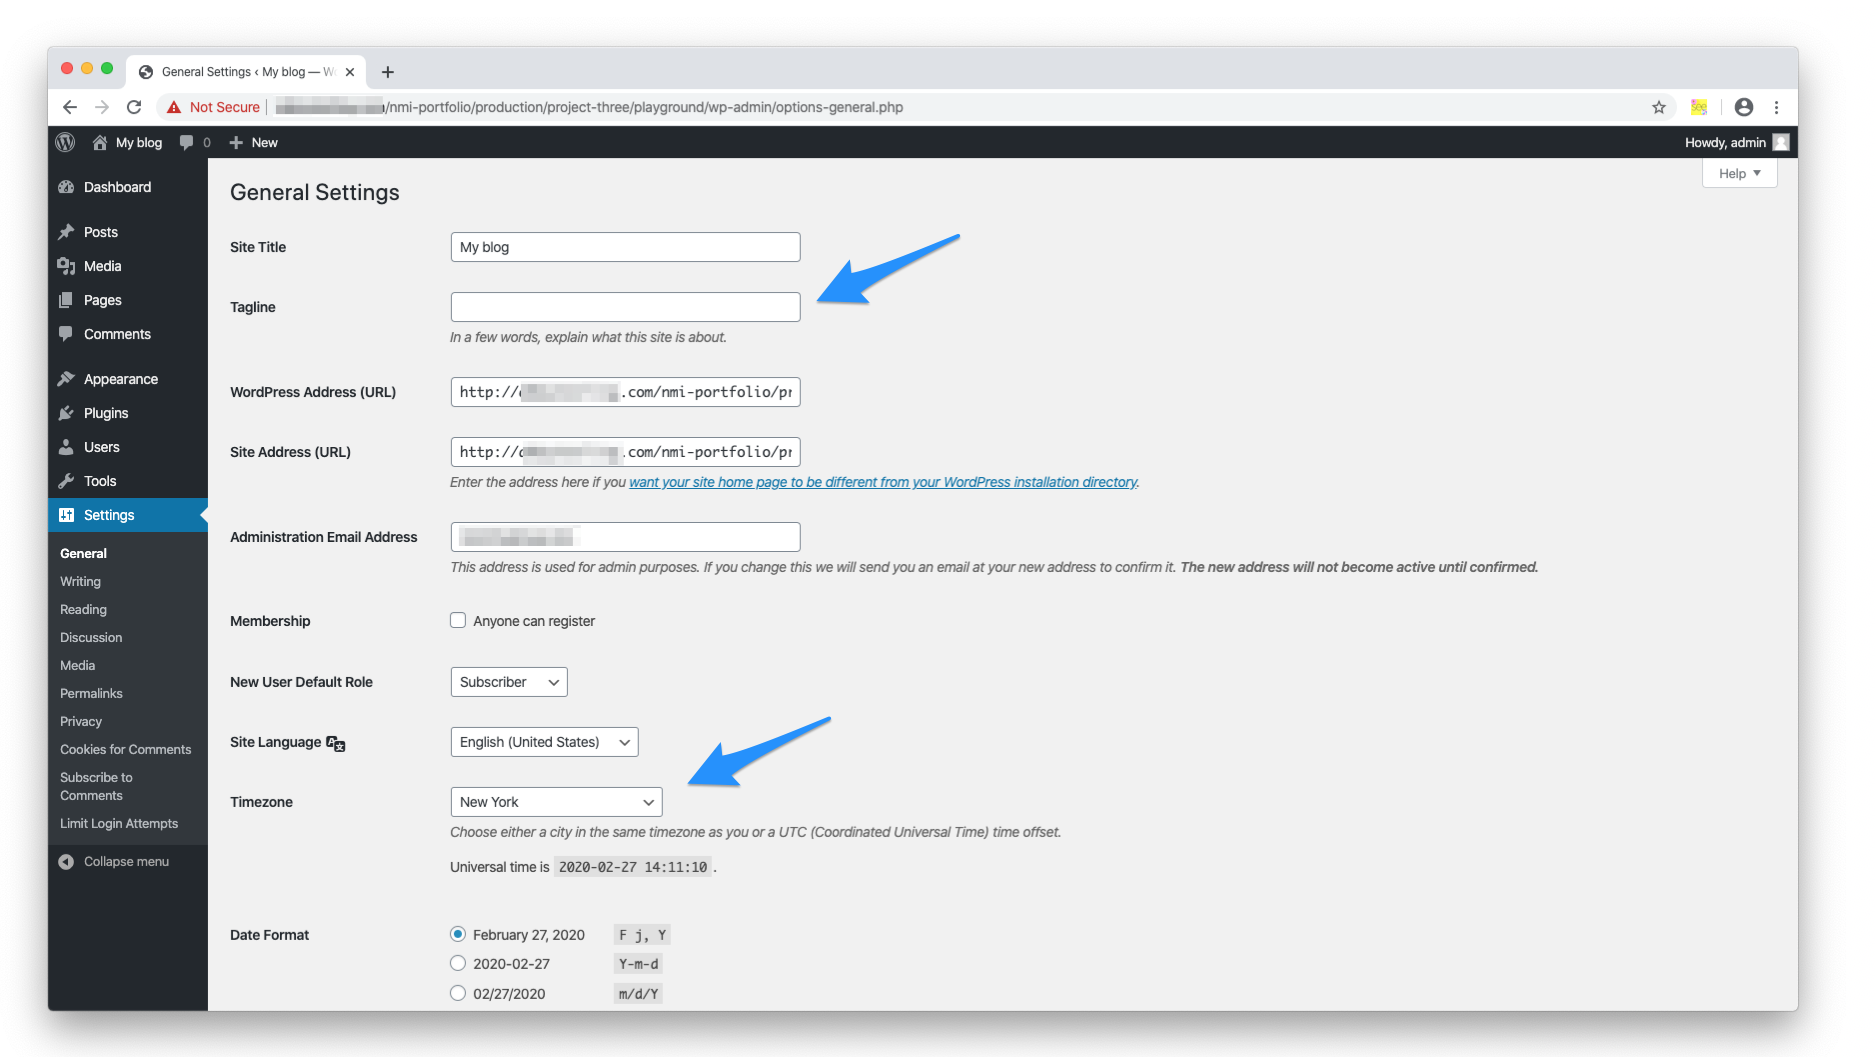
1. Select Settings, then General. You’re going to delete your tagline (unless you want one) and set your timezone to New York4. Click save when you’re done.
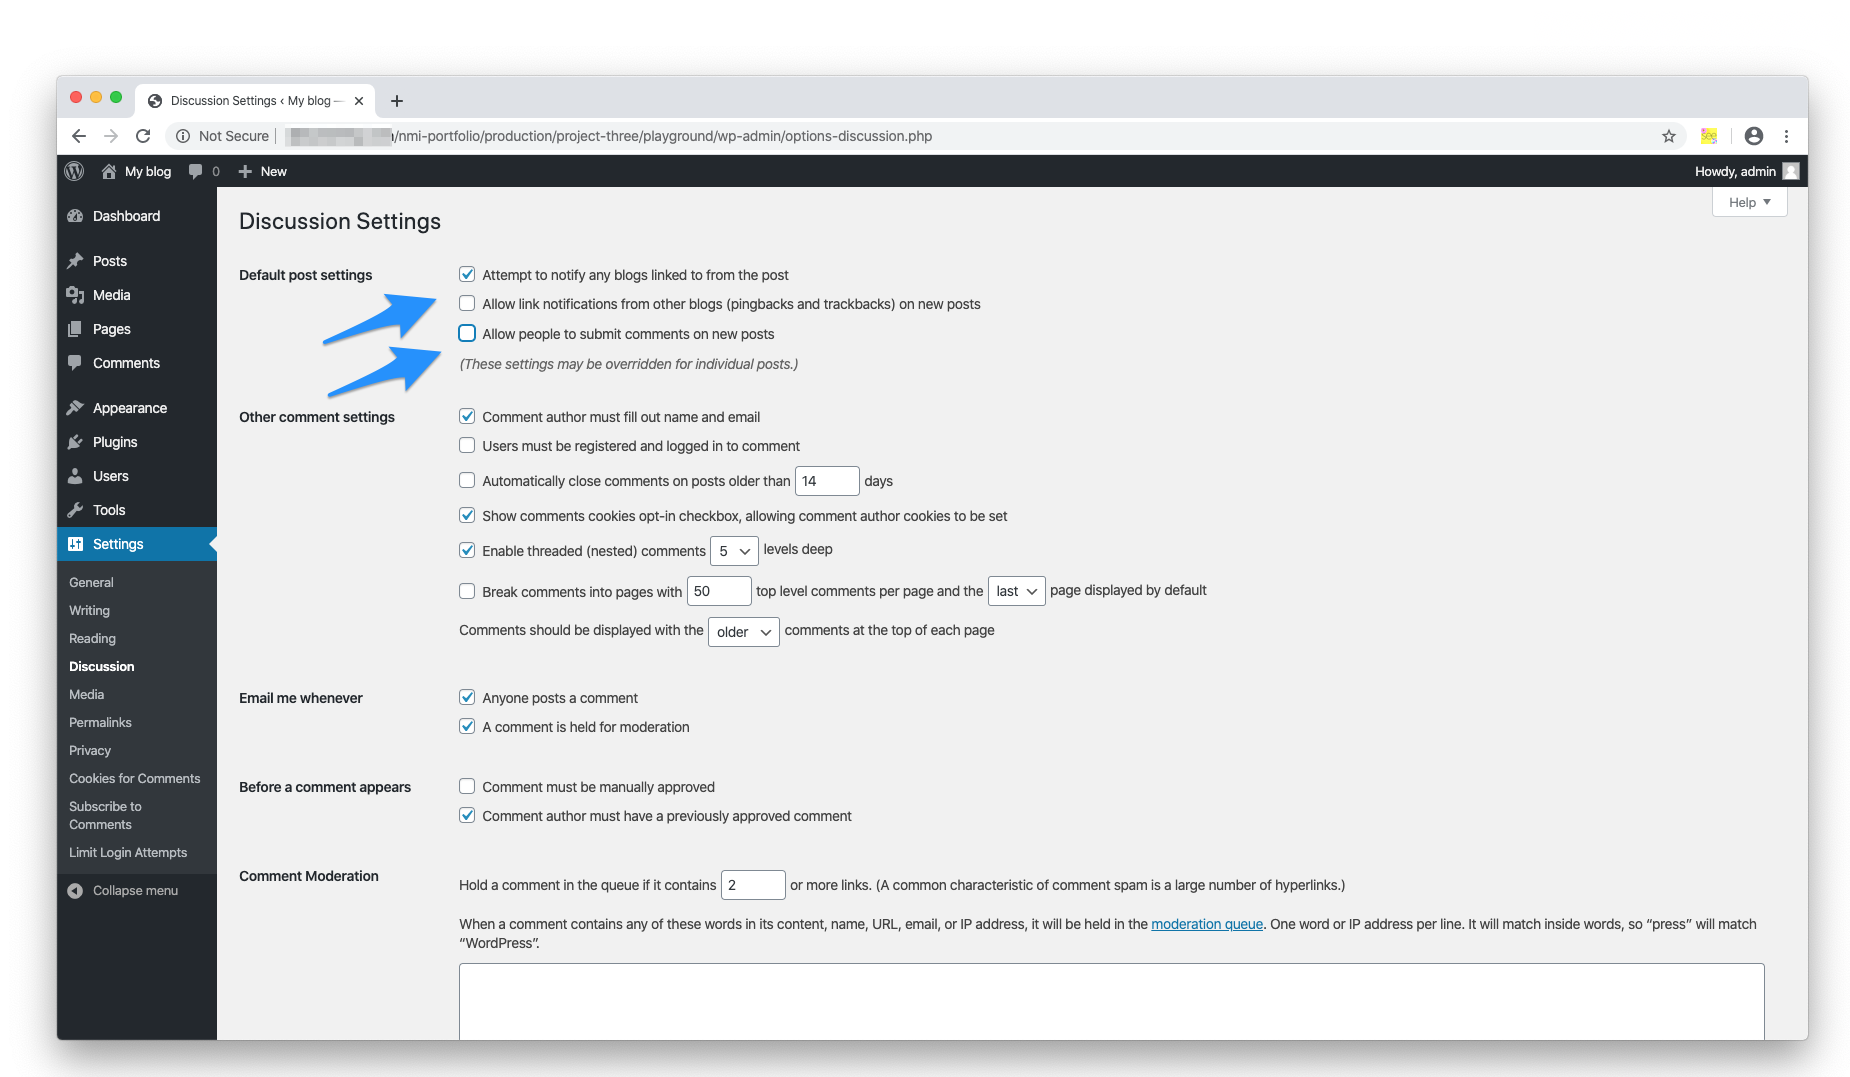
2. In Settings select Discussion and uncheck: “Allow link notifications from other blogs (pingbacks and trackbacks) on new articles” and “Allow people to post comments on new articles.” Save your changes.
3. Next, in Settings you’ll select Permalinks and choose the “Post name” structure. Click save when you’re done.
4. Next, click Plugins and deactivate “WordPress Importer.” Next, delete “Akismet” and “WordPress Importer.”
The only plugin you should have left is “Limit Login Attempts Reloaded.” Feel free to update it if WordPress is prompting you to do so.
5. Next, go to Posts and hover over the title “Hello World.” You’ll see a few options appear. Click “Quick edit” for the starter post and uncheck “Allow pings” and “Allow comments.” Click update.
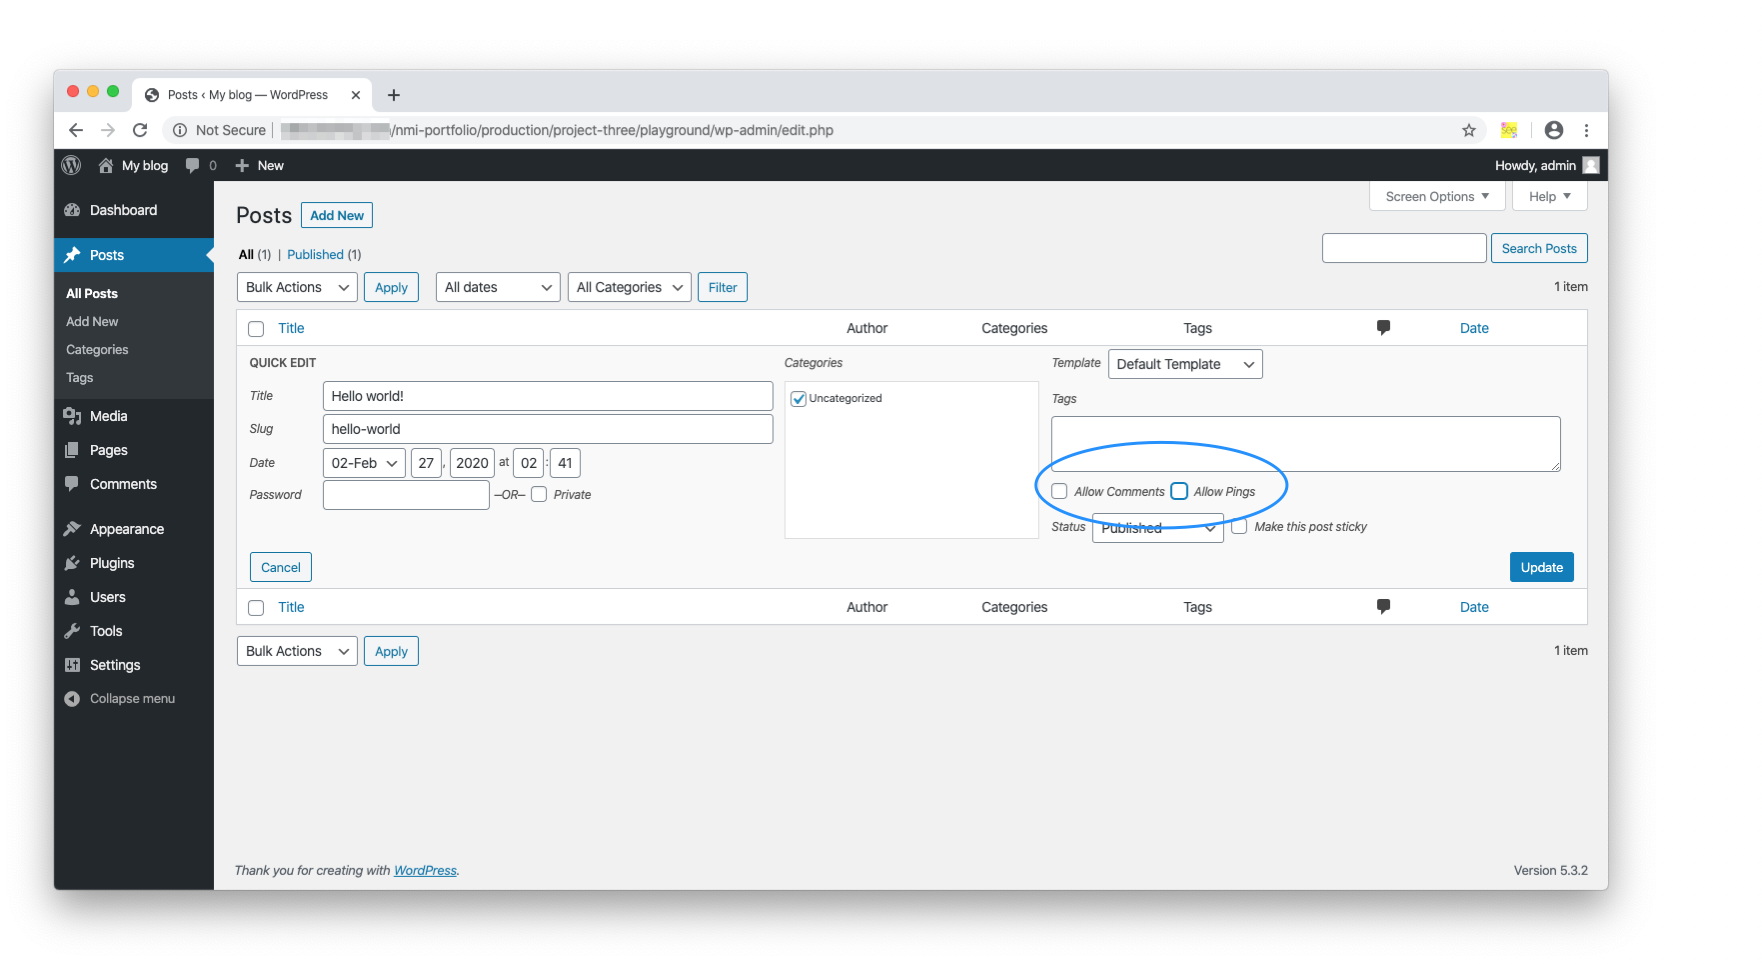
Hover “Hello World” again, and select Trash. That’s right! We are deleting this post!
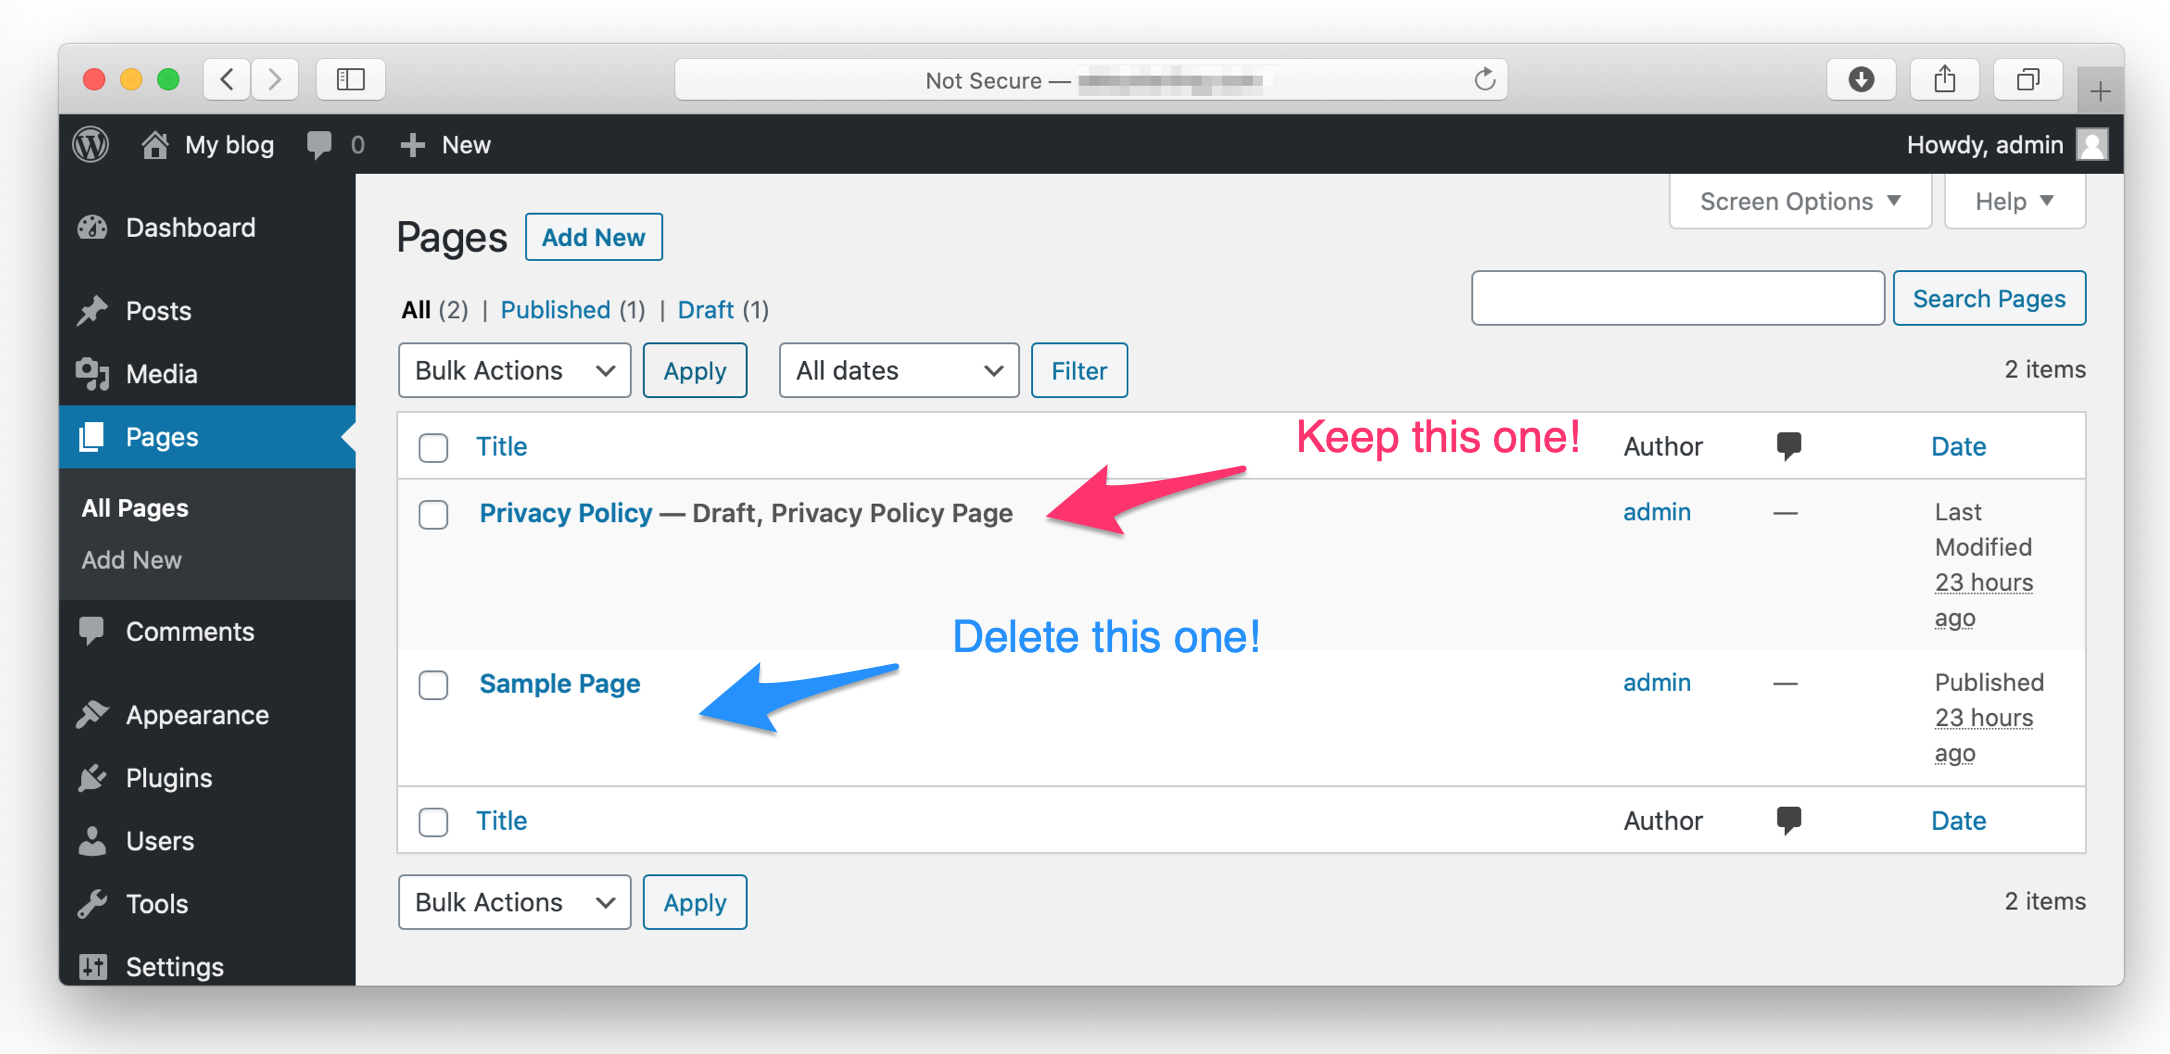
6. We are going to do a similar thing in Pages. You’ll see two pages waiting for you: “Privacy Policy” and “Sample Page.” We’re going to keep the “Privacy Policy,” so no need to touch it.
Hover over “Sample Page” and click “Quick edit.” Uncheck “Allow comments” (if it isn’t already unchecked), then select “Update” and then Trash the page.
7. Now, we’re going to create two new pages, one called “Home” and one called “Blog.” To create a new page click “add new.” Then you’ll type the name of the page and click “Publish.” Do this for both the “Home” and “Blog” pages.
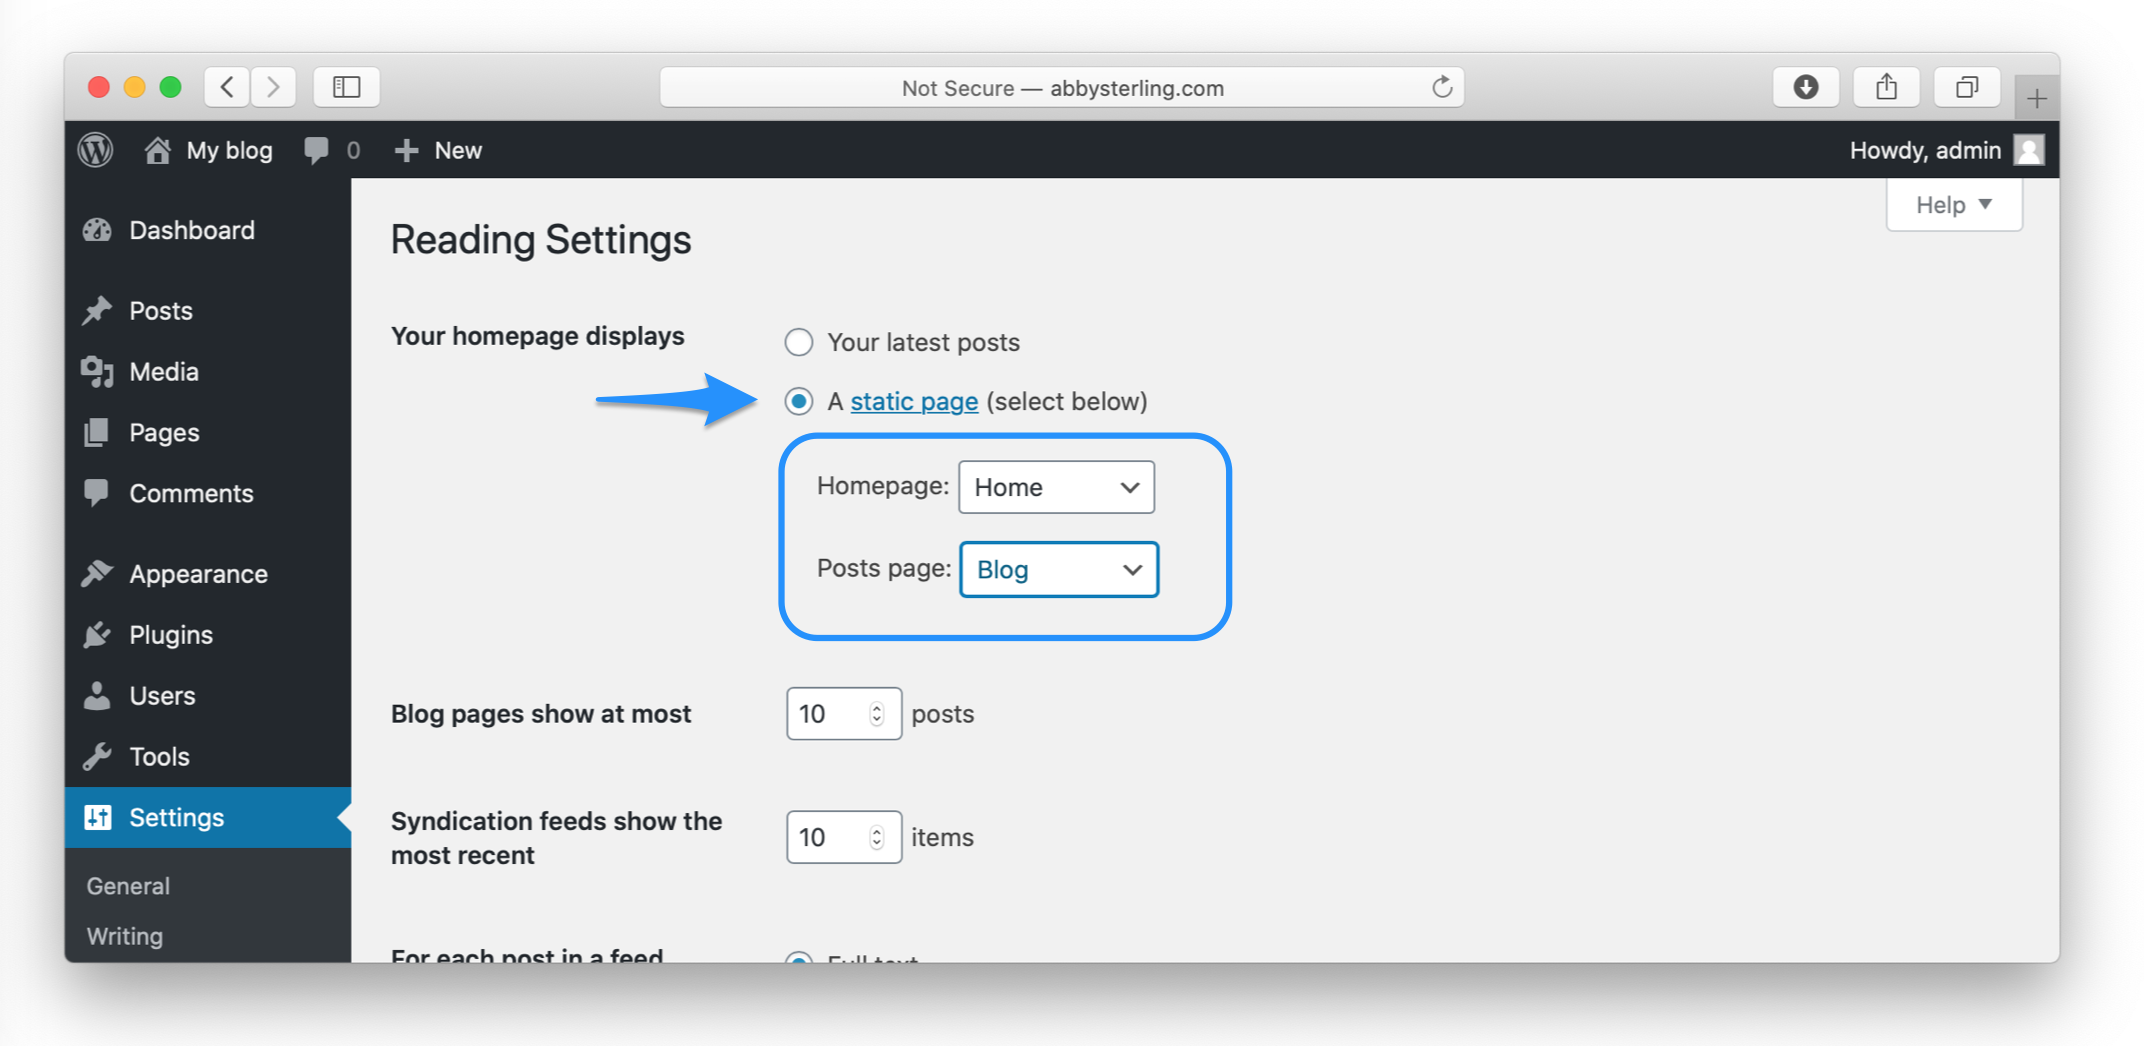
8. Finally, we’re going to head back to the “Settings” page, and then click the “Reading” tab. For “Your homepage displays” select “A static page”. For the Home page, select the Home page created above. For the Posts page, select the Blog page created above.
And that’s it! You’re all set up and ready to go with your new WordPress site!
This is the username and password you created when you signed up for Reclaim Hosting— not the password Reclaim Hosting sent you to log in to your server↩
Save this info somewhere easily accessible to you!↩
If you forget the link and need to return to this page you’ll enter the cPanel, click the WordPress icon, then click “My Applications.”↩
There’s a long list of cities broken down by country– keep scrolling until you find New York!↩