As you may have noticed, 401 is equipped with a beautiful iMac desktop for each student. We encourage you to use this desktop while you take this course.
Note: You do not have to use a Mac for this course. This lesson includes helpful hints and shortcuts for Mac users.
Even if you’ve been using a Mac for a while, chances are you can learn to use it more effectively and efficiently.
I’d encourage everyone working on a Mac this semester to try all of these settings and shortcuts for at least a couple weeks. If, after giving them a go, you develop your own preferences, by all means, use those!
Initial Set-up
- Enable right-click– You’ll work so much more quickly with this enabled. Go to: System Preferences > Mouse / Trackpad > Secondary Click.
- Set up Hot Corners– This is one of the biggies for taking advantage of all the drag and drop niceties the Mac offers. Go to: System Preferences > Mission Control > Hot Corners. I set the bottom-left corner to Mission Control and the bottom-right corner to Desktop.
- Just for fun, while you’re still in System Preferences, go to Accessibility, then choose “Zoom” and check the box next to “Use scroll gesture with modifier keys to zoom.” Once checked, you can hold down Control and then scroll your mouse wheel / swipe on your trackpad to zoom in and out on the screen. In addition to being kind of fun (Enhance!), this ends up being more useful than you might expect.
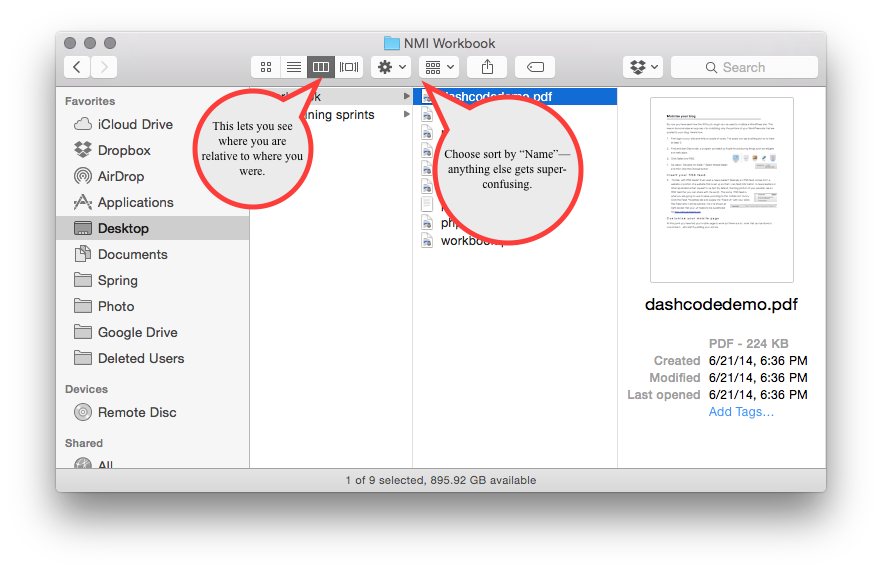
- Also in Finder, choose View > Show Path Bar
- You could also, for this class, type ⌘ + , (command and comma at the same time) and set “New Finder windows show…” to whatever folder you’ll be using for your class projects. This could be a local folder, your flash drive, OneDrive, Dropbox, etc. This just makes it a little easier to access your class work quickly.
- Set your Dock to the left by placing your cursor over the thin black divider bar between your app icons and the trash can, right clicking, and choosing “Position on screen > Left”. Then, shrink your dock down a bit by keeping your cursor over that thin black divider bar, clicking, and dragging.
- Next, remove (either by right-clicking or, more satisfyingly, by clicking and dragging toward the middle of your screen until a dust cloud appears) any applications you won’t be using every day.
- Finally, open Visual Studio Code and Cyberduck. Once each application is open, right-click on its icon in the Dock and choose “Options > Keep in Dock.”
- One last thing in Cyberduck: open Preferences, select Editor, click where it says “TextEdit”, choose “Other” and select Visual Studio Code. Then, make sure you check the box next to “Always use this application.”
Keyboard Shortcuts
You must must must must must learn to use keyboard shortcuts to use a computer at all efficiently. You’ll have to force yourself to do this at first, but once you learn these, you’ll wonder how you lived without them. Study and practice these until they become second nature. Some of the most frequently used shortcuts are below, but here’s a huge list of shortcuts in case you are curious!1
System-level
- ⌘ + C – Copy
- ⌘ + V – Paste
- ⌘ + X – Cut
- ⌘ + S – Save
- ⌘ + Q – Quit the current application
- Shift (Hold down) + Arrow – Select text
- ⌘ + Shift (Hold down both) + Arrow – Select text until end of line
- ⌘ + Tab – Alternate between current and previous applications
- ⌘ (Hold down) + Tab – Select among open all applications
- ⌘ + ` (To the left of the 1 key) – Switch among open windows within an application
- ⌘ + Space – Open Spotlight (Quickly find and open applications and files)
- ⌘ + Option + Escape – Force Quit (Brings up a dialog that lets you force a frozen application to quit / restart)
Google Chrome
- ⌘ + T – Create a new tab
- ⌘ + R – Refresh the current tab
- ⌘ + Shift + T – Reopen closed tabs
- ⌘ + 1, ⌘ + 2, etc. – Switch to the
System Utilities
Keychain Access
Have you ever taken up your Mac on its offer to save a password for you? If so, it’s been saved to your keychain.
Using Spotlight (⌘ + Space), open Keychain Access to view all passwords saved to your account. Scroll through the list or search in the box to find the site / app you want to see the password for. Double-click on its name, and when the window pops up, click the checkbox to “Show password” and then enter your user password (the one you use to log on to the computer) to display the password.
Not a Mac user? Here’s a handy list of shortcuts for PC/Window’s users↩