One of the most useful features of Javascript is the ability to load content dynamically. This allows you, the developer, to develop a web page (think framework) that can be repurposed over and over to load multiple blocks of content.
How it works
At the most basic level there are just two steps to this process. First you have to identify elements within your HTML file, such as a header or div tag, to place the data. Second, you inject the data into those elements. In this lesson, we do just that. First we create three HTML elements with ID tags. Next, in our JS file we create variables to target those ID and then use three additional variables to send content to them. Enough preamble. Let’s do it.
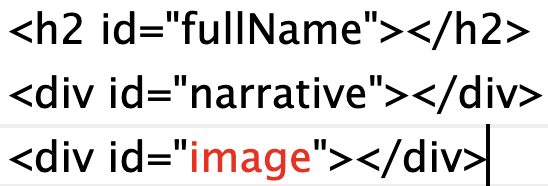
- Create a new HTML document and add the elements and ids shown below to the body. Those are the elements that you will populate with data from JS.
2. Below your closing </html> tag add the code shown below. This is our initial data just to get things started. The <script> tags allow you to put Javascript code directly into your html document. You could also store all of your Javascript in an external file and link to it, just like you do with CSS, but in this case we have so little Javascript
<script>
let narrative = "Tyler was first acquainted with the NMI as an EMST student. ";
let staffname = "Tyler Mazurek";
let staffimage = "https://nmi.cool/wp-content/uploads/2020/09/SS_Tyler-Mazurek-scaled-1.jpeg";
</script>
3. Target the IDs. Next, add the two variables shown below to your script, just below the Tyler data. The purpose of those variables is to allow you to target the fullName and narrative ID tags in your HTML document.

4. Now let’s put those variables to work. Add the code below which will inject data into two of those elements.

5. Save everything and open your html file with your browser. The data associated with narrative and name should appear on your page. If not, use your inspector to look for the problem.
6. Now it is time to insert the image. This one is slightly more tricky because, as you know, in order to insert an image you need specific code that looks something like:
<img src=”pathToImage.jpg”> . The staffImage variable contains the path to the image, but we need a strategy to add <img src=” in front of the staffImage variable and “>” after it in order to close the img tag. Create the two variables shown below to do that job.

7. Now put it all together with the statement below.

Refresh your browser and hopefully an image appears. Once everything works perfectly, inspect your code but look at the elements. You should see the HTML code that was generated by your Javascript. Pretty cool, but we’re just getting started!