It’s time to expand your files and folder knowledge and learn more about index files and the file structure we’ll be using for this class. You’ll also create your website’s homepage.
Homepages
Homepages operate a little bit differently than other files.
Homepage at the root directory
If we place a file called index.html in public_html, index.html would become the homepage of our website.
Meaning, that if you type in your domain, such as yourname.com, what you’re actually viewing is that person’s index file, located in the public_html folder of their server. Indexes are home pages.
Homepages in folders

You can create other homepages by placing index files in folders. For example, if you created index.html, placed it in the webdev folder, and navigated to yoursite.com/webdev, you’d see that index.html.
Essentially, you can have more than one homepage. Rather than the webdev homepage being at the root directory of our site, it would live in a subdirectory—the webdev subdirectory!
Subdirectory: a directory (fancy word for folder) located within the root directory.
TL;DR: indexes are home pages, and you can have more than one!
Still confused? Read more about directories and subdirectories.
Every other webpage
Most web pages we create for this class won’t be index files. If we wanted to view in the browser a file that is not an index file, we would type in the file path followed by the file extension.

To view project-one.html, which resides in two folders:
www.yoursite.com/webdev/project-one/project-one.html
This should sound familiar to the previous lesson on folders and file paths.
Course File structure
Download the file structure for this course.
Move the webdev folder into Dropbox, your flash drive, Google Drive for desktop, or the cloud/hard drive of your choice. Just don’t save it locally (to your desktop). Why? You will have a designated (more secure) location (cloud, hard drive, flash drive) as your homebase for your files for this course. You will also create a backup that you update regularly.
Create webdev homepage
You likely already have an index.html file that exists in the webdev folder, but if you do not:
Skip to this lesson and create one in Visual Studio Code. Save it as index.html.
Create a homepage at the root directory (your NMI portfolio homepage)
Create a second index.html (perhaps by copying and pasting that first file?) and save it, but not in the webdev folder.
This will become your website’s main homepage, which will appear when you navigate to yoursite.com. See the index located at the top level.

Add content to your nmi portfolio home page
Wouldn’t it be nice if the home page of your website said something like your name? Your major? Let’s edit the index.html—the one we just made.
Add your name as title between your title tags. In the body of your page, add:
- Name
- Major
- Year
- A fun fact about yourself
Here’s an example of the type of thrilling narrative to put on your homepage:
<!DOCTYPE html>
<html lang="en">
<head>
    <meta charset="UTF-8">
    <meta name="viewport" content="width=device-width, initial-scale=1.0">
    <title>Herbert Hoover</title>
</head>
<body>

Herbert Hoover
Engineering
1895
Fun Fact: Before becoming the 31st President of the United States, I was a successful mining engineer and led major humanitarian efforts during and after World War I.

</body>
</html>
Add content to your webdev homepage
Open the webdev index.html file with Visual Studio Code (File > Open). Remember, this index.html is what appears when people go to yoursite.com/nmc/webdev.
Go ahead and add the HTML boilerplate, a title, again, and add some thrilling content in the <body>. Here’s what to add:
If you don’t see the changes that you just made, double-check that you saved your file and that you’re trying to preview the correct file.
- Your New Media Institute status:
- New Media Certificate student
- Emerging Media Masters graduate student
- Emerging Media Double Dawg
- Something else entirely?
- Just taking this class for fun?
- Add what you hope to get out of this course!
Here’s an example:
<body>
I am pursuing the New Media Institute's New Media Certificate, Emerging Media Masters, or just taking this class for fun. I love technology and I'm excited to spend an entire semester learning how to make websites!
</body>
Eventually, as you move throughout the semester you’ll this page will also include links for all your projects and exercises as well as your project reflections. Right now, it’s totally fine if this page is VERY simple-looking— after all, we haven’t talked about how to make things look awesome yet! At some point, you may decide to add some CSS to this page, and that’s great, but isn’t required!
Previewing files
Wouldn’t it be nice to see what this file would look like without all the HTML tags?
You can use Visual Studio Code’s HTML Preview extension to do this, but the extension is notoriously buggy and there’s an easy way to preview html files that will become second nature in no time!
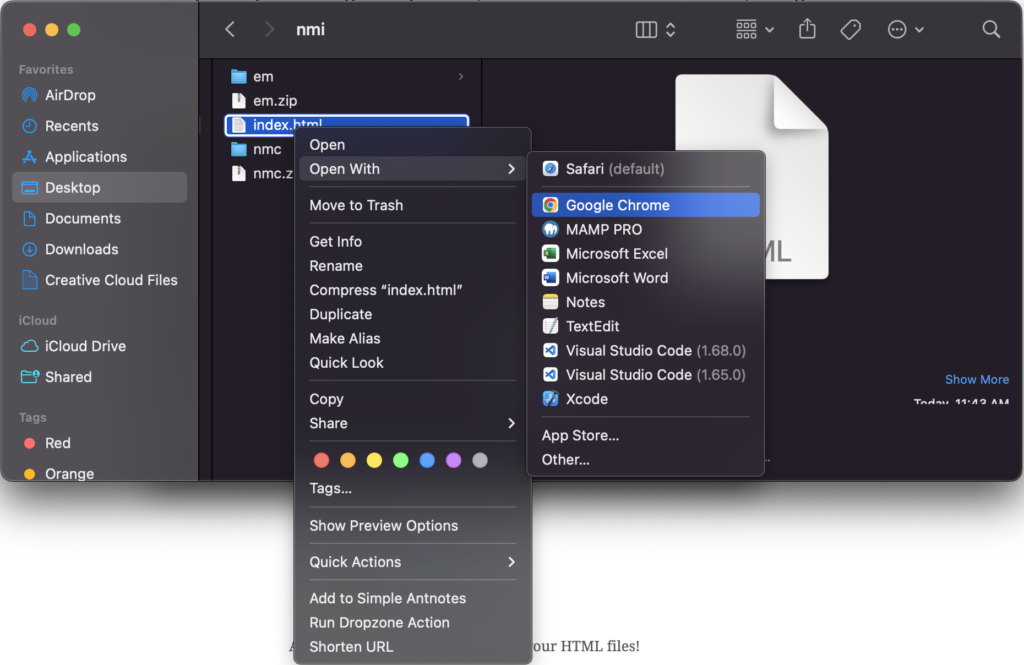
Simply make sure that your file is saved in Visual Studio Code. This step is important and an easy one to skip: use ⌘ + S on a Mac to save your file and Ctr + S if you’re on a PC. (Note: if you’re previewing multiple files, make sure to Save All!). Then, navigate to your finder window, right-click your file, and select “Open With” and “Chrome.”
You’ll be previewing pretty much every file you will create in this class, so make note of those keyboard shortcuts. Previewing files in this fashion lets you see a copy of the local version of your file. If you want other people to be able to see this version, you’ll have to upload it to your server.
Upload
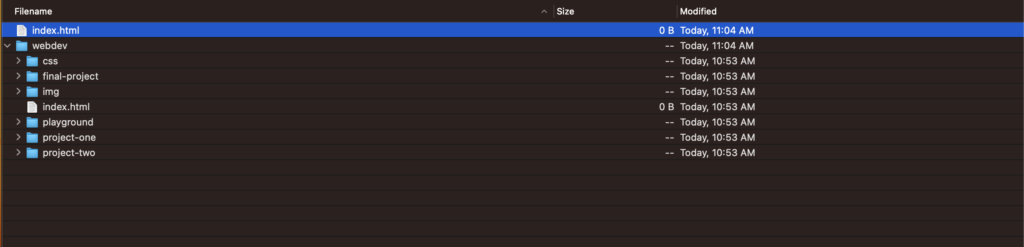
FTP (another word for upload) both index files to the server.
- Drag your website’s homepage, index.html, into the public_html folder.
- Drag your webdev folder into the public_html folder in Cyberduck.
Use the following as your guide:
Congratulations! You just uploaded something to the server for the first time. Test is out at yourdomain.com! (Note: troubleshooting options here)
Storage and the server: twins, not sisters
Your folder and file structure in storage (flash drive, cloud, hard drive, etc.) will mirror what you see on the server. It’s very important for your sanity and mine that these two remain identical. Do not go rogue and start saving files locally (ie, somewhere on your personal computer, on the lab computers, you get the idea).