
So what is the CSS Box Model?
You might have noticed that CSS treats HTML elements as if they are enclosed in rectangles or boxes. In the example below, the background-color CSS declaration helps illustrate the point. CSS is applied to the HTML file as if all the text were enclosed in a rectangle or a box.
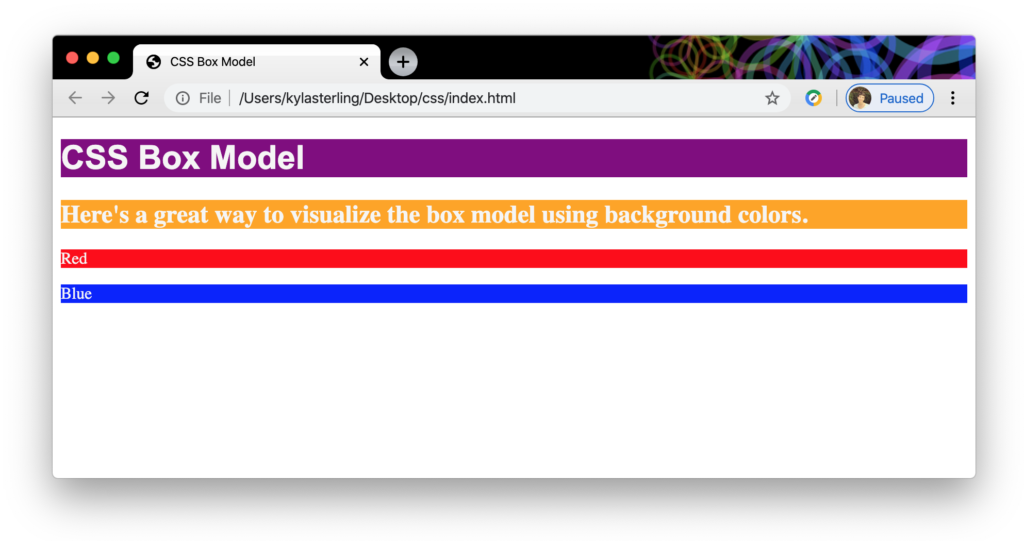
It’s important to understand that these boxes exist because they allow us to use CSS to alter the layout of our website. We can actually move these boxes around on the page instead of just having everything stacked on top of each other.
Content, Padding, Borders, and Margins
Additionally, these boxes have four specific properties that help define how they look and interact with other boxes. These include content, padding, borders, and margins. Here’s a handy diagram to illustrate the point:
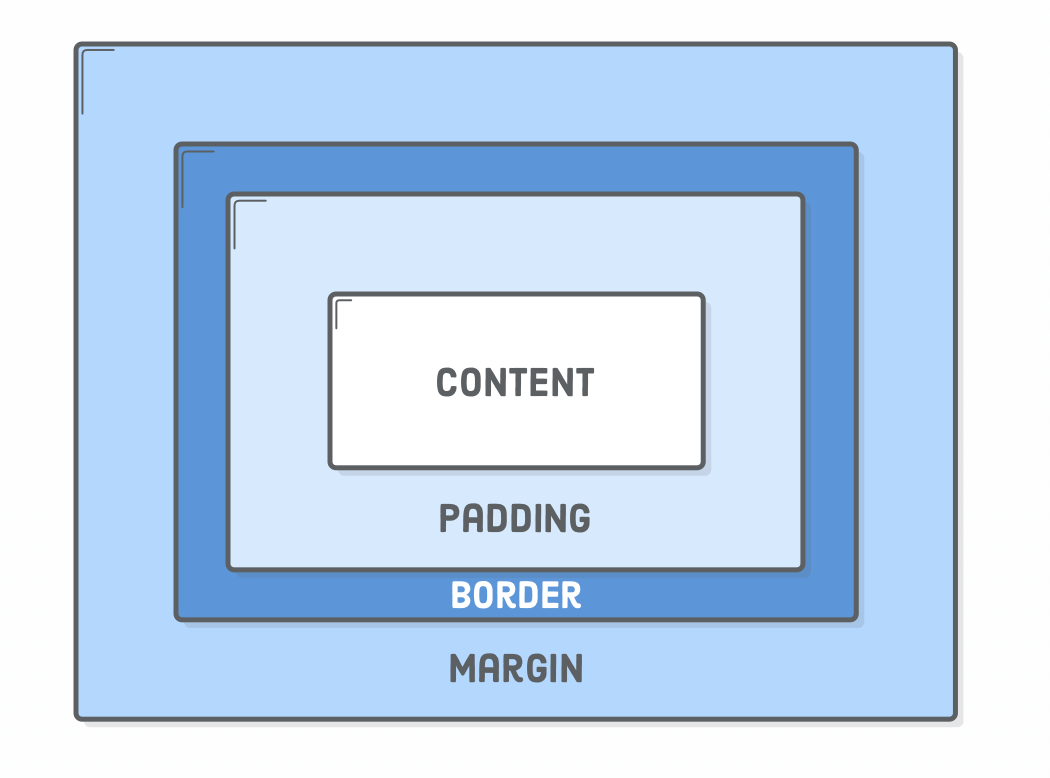
The content is simply the text or media that appears within the element. The <h1> in our first example has “CSS Box Model” as the content. The words “Red” and “Blue” are also content.
Padding is the space between the content and the border. It “pads” the content from the border kind of like how bubble wrap protects a fragile item inside a shipping box.
The border is nothing more than a line enclosing the padding and the content. We’ll look at an example in a minute.
Lastly, the margin exists outside of the border, and is the space between two boxes.
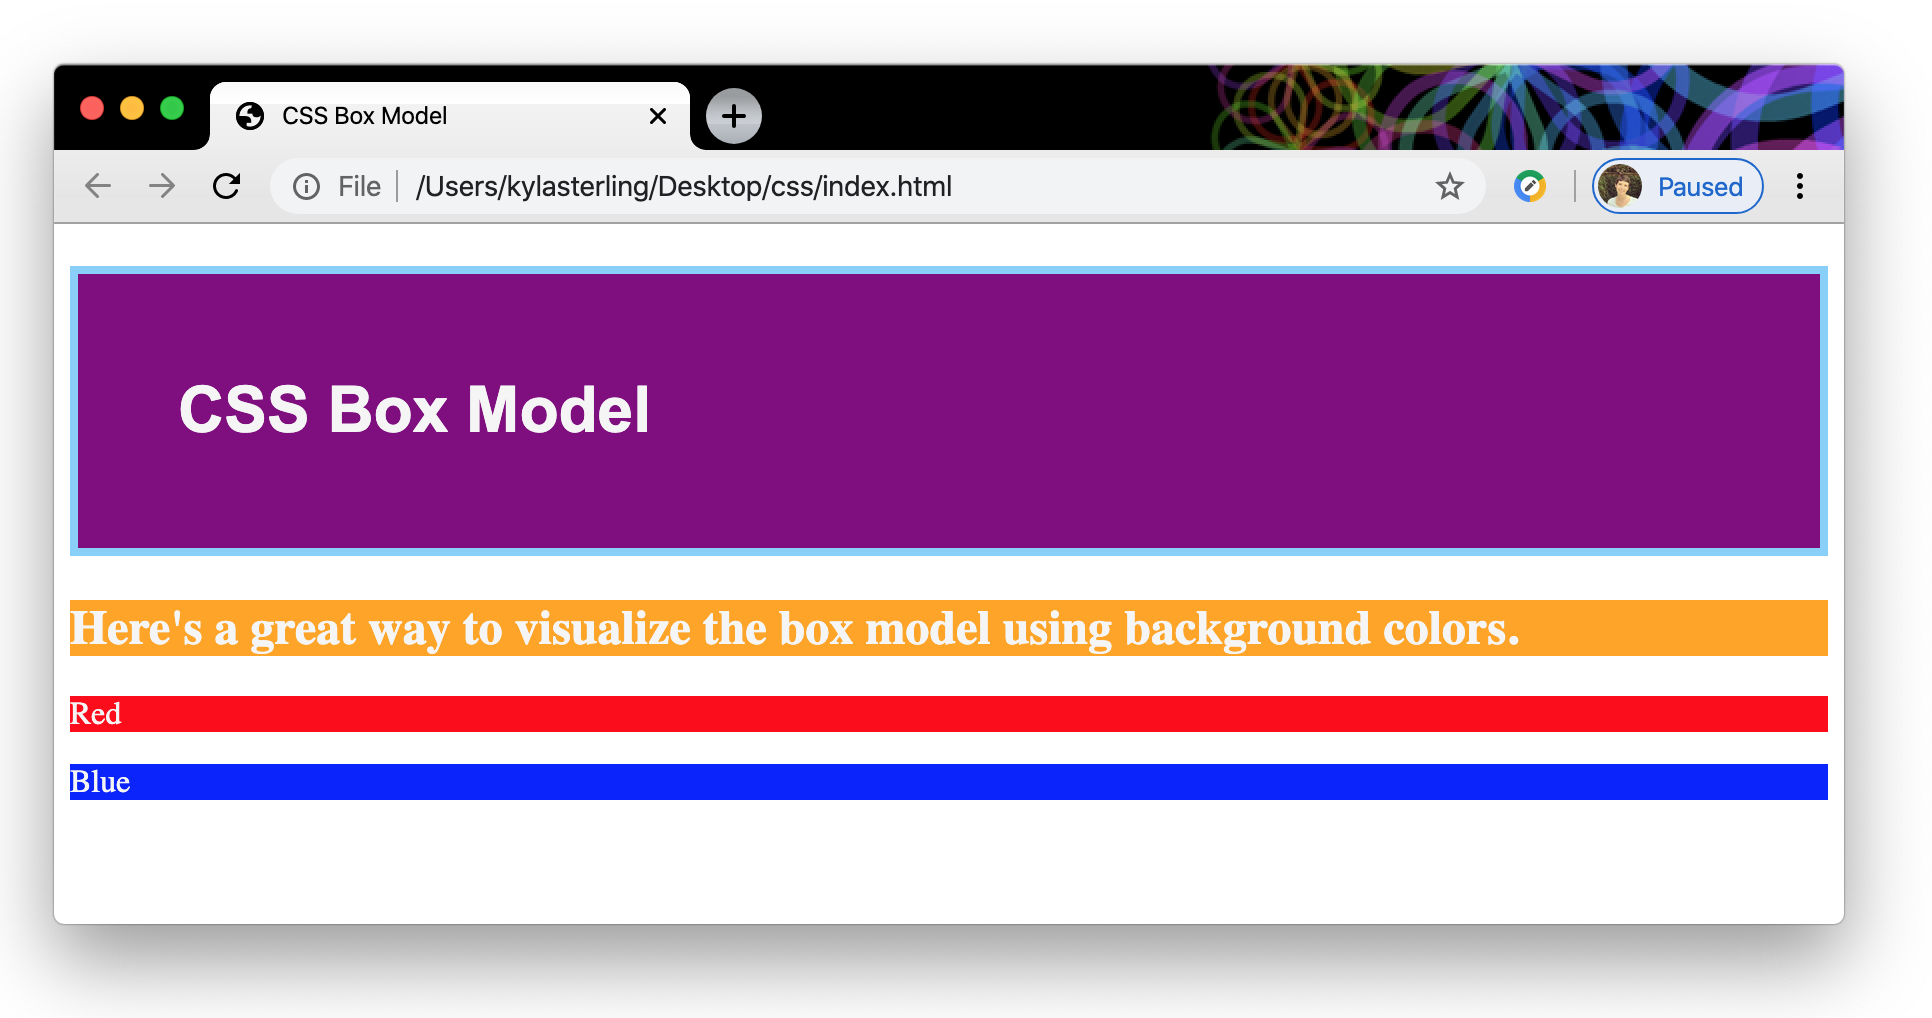
<h1> element. In this example, we have added 50px of padding to the first box. We have also added a light blue border around the box.
What’s important to note here is that the added space created by the padding surrounds the content and is inside the border. It’s also helpful to note that the padding retained the purple background color.
The margin here is the white 1 space around the block that separates it from the other blocks. It’s outside of the border.
Styling Padding and Margins
To add padding or a margin to your block elements you can either apply it to the entire element like this:
 p {
    padding: 50px;
}
Or you can add a padding or margin amount to each side of the block individually. This is especially handy if you want different amounts of space on certain sides.
p {
    margin-top: 30px;
    margin-right: 15px;
    margin-bottom: 35px;
    margin-left: 10px;
  }
There’s even a shortcut to set up your padding and margin amounts more quickly. You can actually omit the top, right, bottom, left so that your CSS looks like this:
 p {
      margin: 30px 15px 35px 10px;
  }
It’s important to note that the four values are interpreted clockwise, starting with top, then right, then bottom, then left. If this feels like it might be hard to remember you can always stick with the first method of just writing the full declaration out. The results will be the same.
You can also use this shorthand for just two values:
p {
    padding: 15px 30px;
  }
In this case, when only two values are provided, the first value (15px) will be applied to the top and bottom and the second value (30px) will be applied to the right and left. Again, it’s your call if you want to use this shorthand!
Styling Borders
Styling a border is pretty easy. You can pick the color, weight, and style of the line. What do I mean by the “style” of the line? You can decide if you want your line to be solid, dotted, dashed, or a number of other properties. You can set these properties individually like this:
h1 {
    border-color: magenta;
    border-width: 4px;
    border-style: solid;
  }
Or you can use some shorthand and include them all in one declaration:
h1 {
      border: magenta 4px solid;
  }
Be aware that when you combine the styles into a single line they no longer need semicolons between them; in fact, they should just have spaces.
Another fun trick with borders is to give them rounded edges. Check out how to add a border-radius here.
Your Mission
The CSS box model is important to understand; it’s a powerful tool that lets us modify the whole layout of our website. To fully understand the box model concept and to get some good practice implementing it, check out the CSS Box Model Tutorial on Interneting is Hard. The direct link to the tutorial isn’t cooperating consistently, so it might be easiest if you visit Interneting is Hard and then click “HTML & CSS Start Here.”
Then scroll on down until you see the Box Model and click that link.
There you go! This is a great tutorial because it asks you to follow along by creating your own HTML file and CSS style sheet. You’ll get the most out of it if you actually do the steps!
But be aware! This tutorial references a code editor called Atom. This is not a big deal— there are many great code editors out there! When you see a reference to Atom, just mentally swap it out for Visual Studio Code and keep moving forward!
When you finish the tutorial you should have a good understanding of how inline and block elements work2, and you should know how to modify padding, borders, and margins to effectively alter the layout of your html document. With these skills you’ll be well on your way to creating beautiful webpages!
actually, it’s transparent! This can be helpful if your content is on top of an image or pattern↩
We talked about these briefly in a previous lesson. You can get a quick refresher on inline and block elements here↩