When you’re learning a new skill—like, say, oh, I don’t know, front-end web development—, it can be immensely useful to conduct artist’s studies along the way. What’s an artist’s study?
In art, a study is a drawing, sketch or painting done in preparation for a finished piece, or as visual notes. Studies are often used to understand the problems involved in rendering subjects and to plan the elements to be used in finished works, such as light, color, form, perspective and composition.
https://en.wikipedia.org/wiki/Study_(art)
In this course, a study is a small exercise you undertake simply for the goal of better understanding a thing you’re learning. It’s informal and directed by your curiosity.
Let’s work through an example together. Let’s say that you’re interested in learning more about styling text with CSS. Maybe you’ve completed a few FreeCodeCamp lessons, or maybe you’re getting ready to start work on Project One.
For this study, let’s spin up a little throwaway project folder, called scratch. You can save this on your Desktop, in your Dropbox, wherever. Since you’ll likely just delete it when you’re done, it doesn’t really matter.
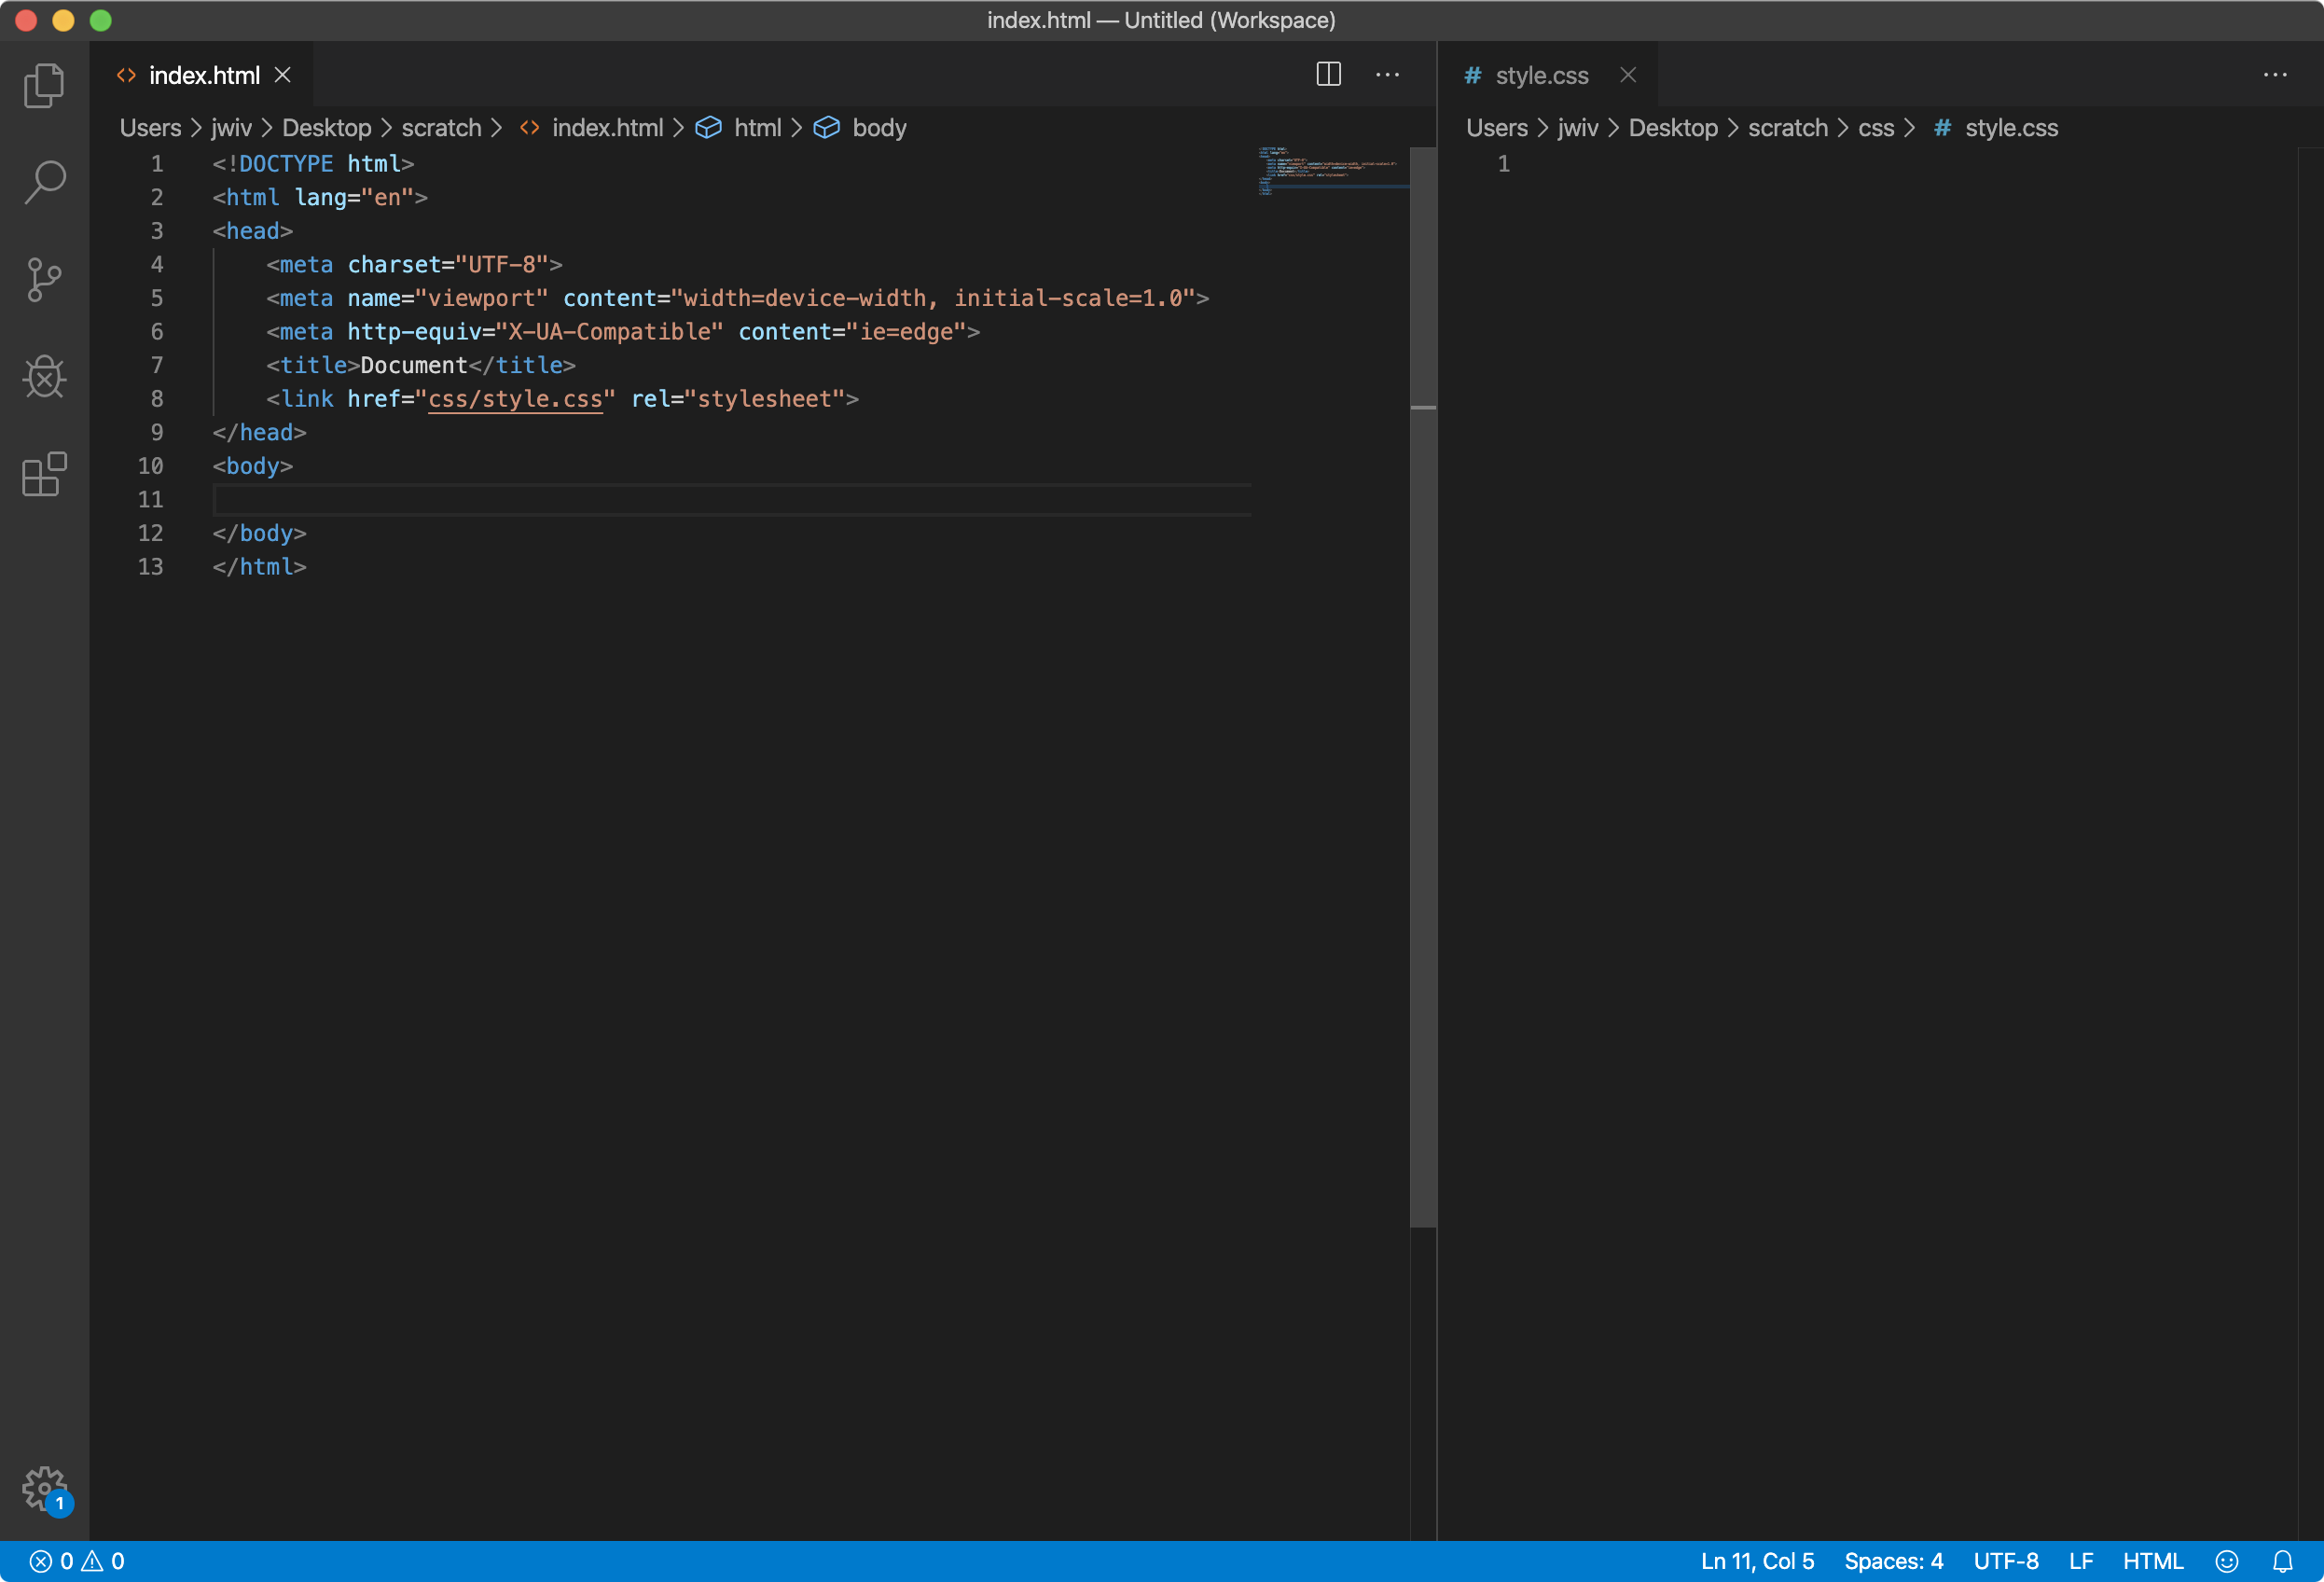
In your new scratch folder, make a second folder called css. Then, fire up Visual Studio Code, create a new file, and save it as index.html inside your scratch folder. Then, open up a vertical split view, and in your right pane, create another new file, this one named style.css, and save it in your css folder within your scratch folder. Finally, back in your index.html, use the html5 Intellisense complete to drop in your HTML boilerplate. Finally, add <link href="css/style.css" rel="stylesheet"> to your <head> to link your stylesheet to your HTML file. When you’re done, you’ll see something like this:

Let’s throw in a couple paragraphs of hipster ipsum, so that we have this:
<!DOCTYPE html>
<html lang="en">
<head>
    <meta charset="UTF-8">
    <meta name="viewport" content="width=device-width, initial-scale=1.0">
    <meta http-equiv="X-UA-Compatible" content="ie=edge">
    <title>Document</title>
</head>
<body>
    <p>Lorem ipsum dolor amet biodiesel pickled whatever, butcher echo park lumbersexual raclette drinking vinegar salvia brooklyn sriracha freegan. Photo booth trust fund small batch palo santo disrupt kombucha pickled plaid. Succulents portland blue bottle, live-edge austin selvage food truck literally squid mumblecore. Cloud bread twee swag, meggings tbh kale chips whatever activated charcoal.</p>
    <p>Trust fund whatever DIY edison bulb YOLO mlkshk, vinyl photo booth cold-pressed. Yuccie YOLO food truck gluten-free, banh mi man braid poke mustache try-hard cold-pressed listicle woke. Pinterest cold-pressed blue bottle meditation vegan godard, fanny pack humblebrag offal edison bulb wayfarers seitan tilde keffiyeh.</p>
</body>
</html>
Now that we have our materials set out, so to speak, it’s time to start playing around. Disciplined play is an essential component of a study. Play in the sense of relaxed, unconstrained, and curious, disciplined in the sense of careful, diligent attention to what you’re doing.
What might your next steps be?
- Apply anything related to text-styling from FreeCodeCamp
- Google “CSS text styles” and try what you find, especially maybe with resources from w3schools or MDN
- Try some things we discussed in class
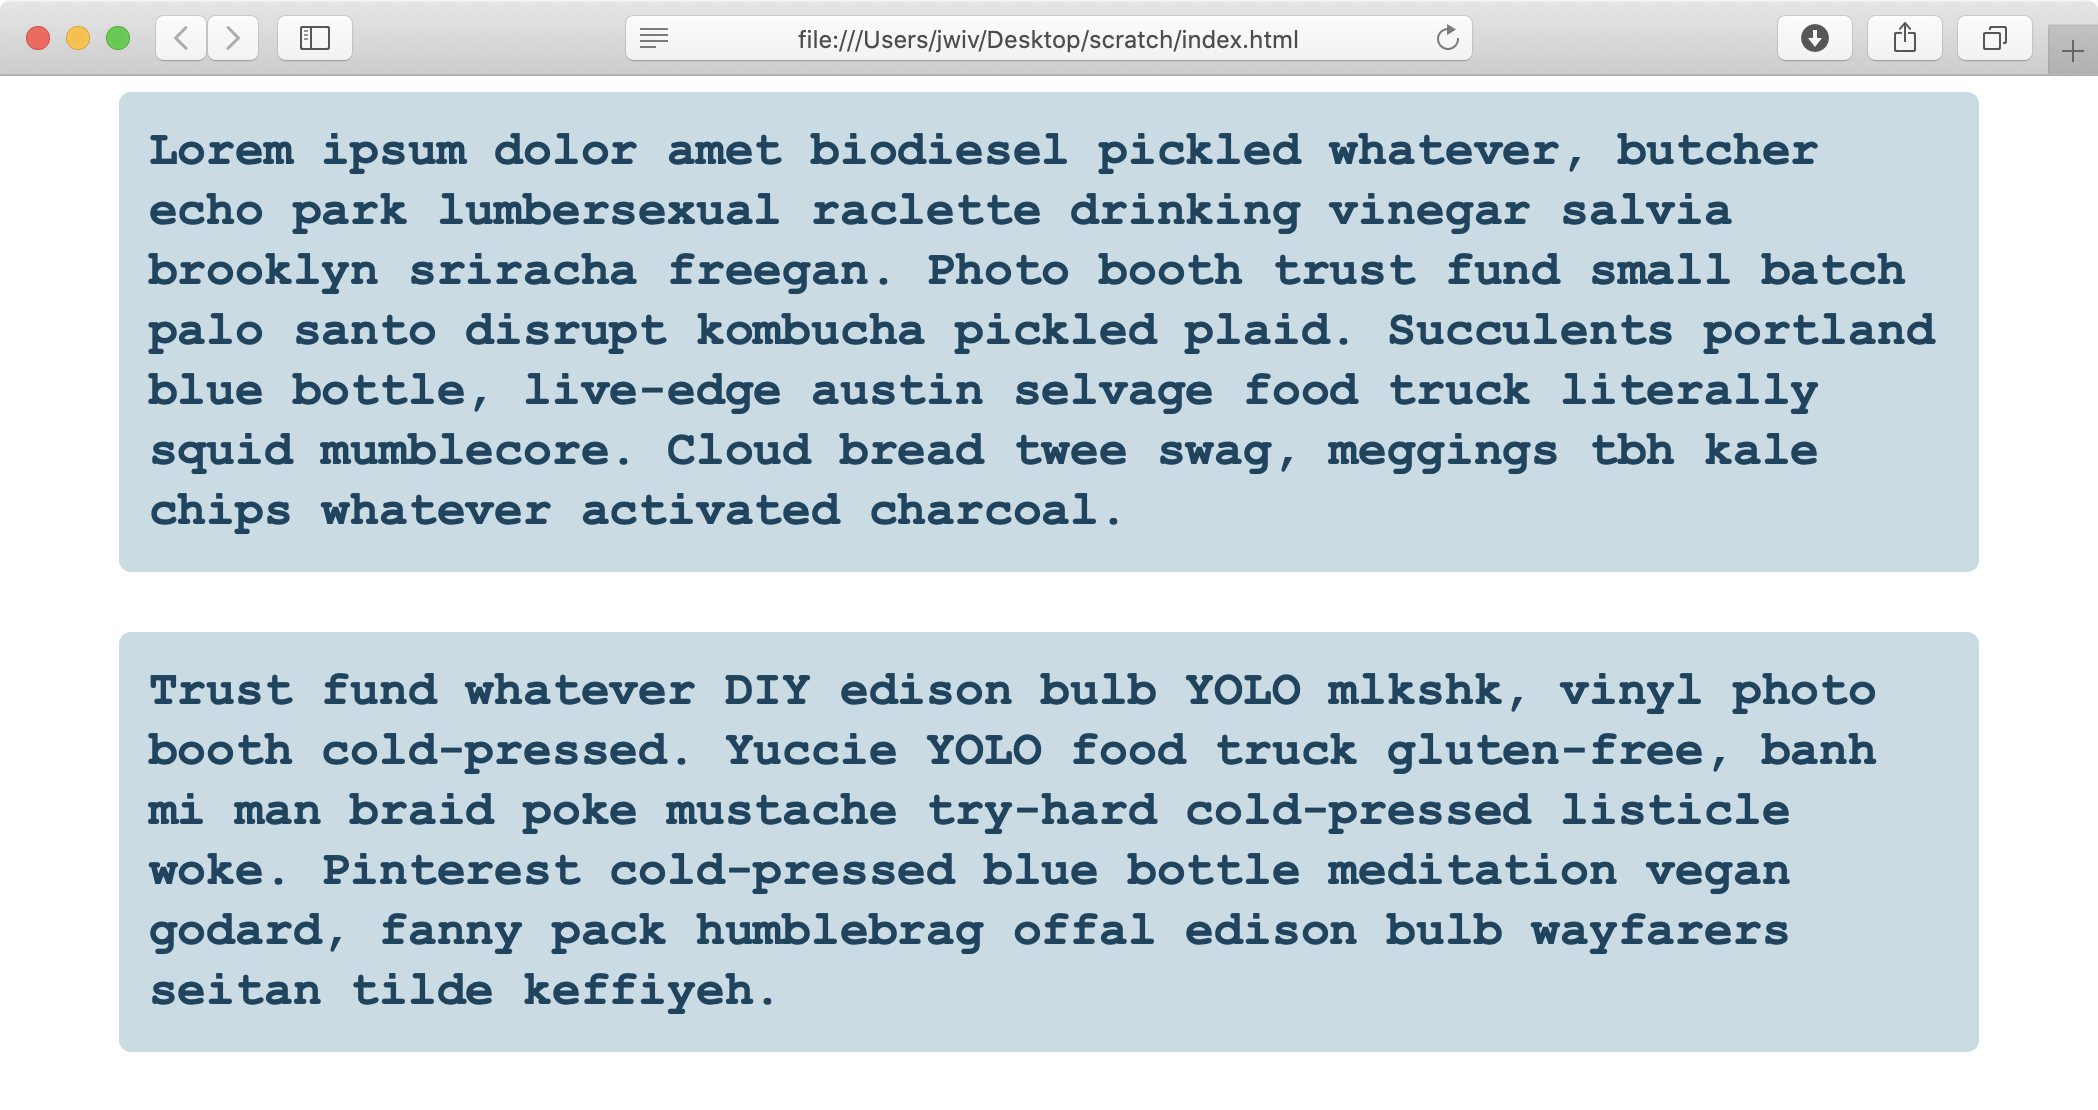
- See if you can achieve a particular design goal—something like “24-pt monospaced bold text in a dark blue color against a translucent pale blue background with a line-height of 30px and a maximum of 80 characters per line in paragraphs that are left-aligned, centered on the page, have some margin between each paragraph, have a bit of padding within each paragraph, and that have rounded corners.” You know, something that will look like this:

As you work through any or all of the above, some key principles to keep in mind:
- Change only one variable at a time. You’re a scientist, trying to isolate and understand each ingredient in your formula.
- Predict your outcomes before verifying them. That is, add a single CSS style, save your CSS stylesheet, and then pause. Think about what effect you imagine the style will have on your HTML, and only then go to your browser to see if you were correct.
- The Inspector is a great friend in trying to figure out why your predictions aren’t coming true.
The specific study workflow detailed above can be generally translated to anything: customizing a Bootstrap theme, trying new plugins in WordPress, etc.