Pros and Cons
So you want to save money by hosting your website for this class on Github, or maybe you already are a Github user who likes the simplicity of being able to easily publish your work to a repository and possibly even share it with your teacher. IF so, you should be aware that standard web hosting accounts, such as the one that we recommend at Reclaim Hosting, offer features such as a CPanel for managing your account, and PHP/MYSQL that allow you to host WordPress on your site, that are not offered by free Github hosting. If you don’t need a Cpanel and/or WordPress and don’t mind learning how to use Github at a basic level, this tutorial will help you to launch a free website that you can use to host your work for this class.
Getting Started
- Make sure you have a GitHub account. Take note of your username. Once things are set up properly, yourname.github.io will link to your website and/or can be used to set up a custom domain.
- If you want a custom domain, follow the next steps to set up your domain. Otherwise, you can skip to Setting up GitHub Pages.
- Go to Google Domains, or Namecheap.com and buy a domain. Basic domains are 12/yr. at Google. If you REALLY want to save money, domains with weird suffixes such as yourname.online are available for as little as one dollar for the first year. Be aware however, that Namecheap bumps up the price after the first year, so take a look at the year two price if you plan to use the domain for more than 12 months.
Setting up Your Domain on Google Domains
- Go to the side menu and click My Domains.
- Select the domain you are using for this course.
- Navigate to the side menu and select DNS.
- Change the following:
- Host Name: nmi or something else if you want to use a subdomain. Otherwise add www for the host name.
- Type: CNAME
- TTL: 60
- Data: githubUsername.github.io.
Setting up Your Domain on NameCheap
- Log in to your Namecheap account.
- Click on the “Domain List” button and select the domain you want to redirect.
- Click on the “Advanced DNS” tab.
- Scroll down to the “URL Redirect Record” section.
- Click on the “Add New Record” button.
- Select “URL Redirect Record” from the dropdown menu.
- In the “Host” field, enter the domain or subdomain you want to redirect. Enter www if you want to redirect the whole domain. Put something else such as nmi if you want to redirect a subdomain instead.

- In the “Value” field, enter YourgithubUsername.github.io (not literally!, use your actual username! It pains me to have to write this BTW).
Setting up GitHub Pages
- Refer to the following tutorial.
- Login to Github via your browser and create a new repository for your website by clicking the “New repository” button on your GitHub dashboard and name it YourgithubUsername.github.io . Mine, for example, is named emuel.github.io.
- At that point YourgithubUsername.github.io should be active.
- To add content to your website, you’ll need to create HTML, CSS, and JavaScript files and upload them to your repository. You can do this using the web interface on GitHub, or by cloning the repository to your local computer and using a Git client to upload your changes.
Adding your Custom Domain
- Enter your repository and go to settings.
- Click on the Pages tab on the left-hand side.
- Scroll until you find Custom Domain
- At that point add your domain as shown below with www if you are not redirecting a subdomain. Otherwise, add your subdomain such as nmi.normaltown.store.
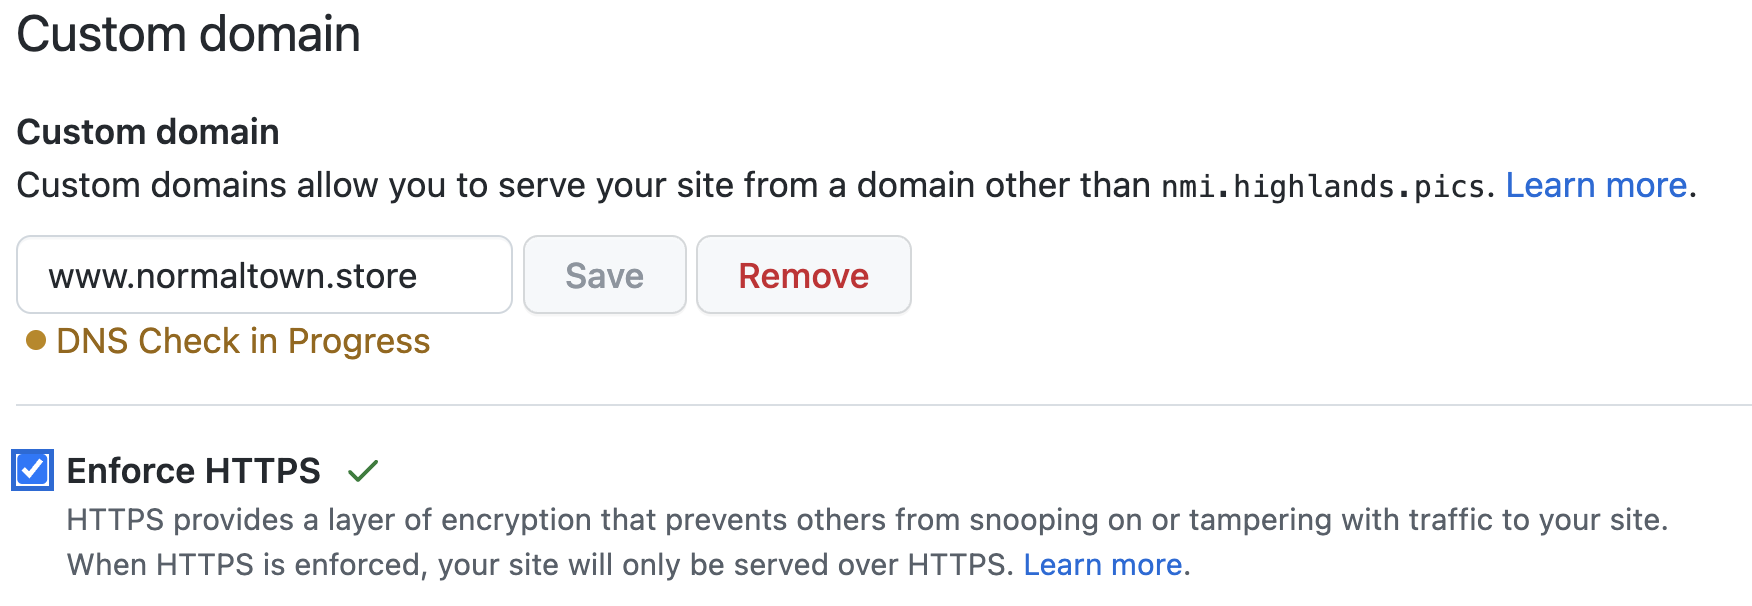
- Hit save. The DNS check should begin, and it should soon turn green.
- Check the box that says Enforce HTTPS.
- Congratulations, your site is now live at your custom domain!
Using your Site
- Open GitHub, and open your repository. Using GitHub Desktop makes this process far more convenient than using the website.
- On the main page, there should be an option labeled Open the repository in your external editor.
- Make sure your preferred editor is selected, and click open. ex: Visual Studio Code
- This should open your repository in the text editor from where you can edit like normal.
Update your Site
- After saving your work on your editor, reopen GitHub Desktop.
- On the left-hand side, you should see the name(s) of the changed files.
- If only one file has been changed, a summary will not be required, though it is suggested.
- If multiple files have been changed, a brief summary is required before you are allowed to commit.
- Hit commit.
- At the top of the page, you should now see a button that says Push Origin. Click this button to push changes to your site.
- Now, if you go to your website and refresh, your changes should appear. This may take an extra minute or two to load. If you do not see your changes, one of two things has happened:
- You need to clear your browsing data to help speed up your updating.
- Go to the three-dot menu in the top right corner of Chrome, select More Tools, and then select Clear Browsing Data.
- This should bring you to Chrome Settings where you can clear one hour of browsing data. Refreshing your website should now show the changes.
- There may be a problem with your HTML/CSS/JS.
- The first VScode extension in the next section can remedy this issue, so I would suggest checking it out!
- You need to clear your browsing data to help speed up your updating.
Helpful VScode Extensions
Live Server
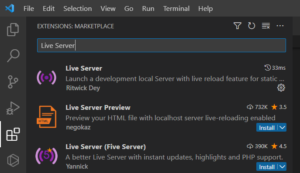
This extension shows your work updating in real-time, every time you save your file. This is very useful for this hosting method since it allows you to use fewer commits and saves time as your website can be slow in updating.
- Click on the fifth symbol on the left-hand side nav bar. This will bring you to the extension page.
- From here, type in Live Server and install the first extension.
- Now you should be able to right-click on any HTML file in the left-hand side Explorer window and choose Open with Live Server.
- This will cause a new tab to be opened on your browser with the result of the HTML page that you have opened. It will update every time you save the file.
- When you have the page working completely, you can make a single git commit and push rather than committing between each smaller change, which should save you a significant amount of time and clean up your commit history.