We use Reclaim Hosting for domain registration and hosting in this class. To get started, head on over to ReclaimHosting.com.

Click the blue “Sign Up” button to head to this page:
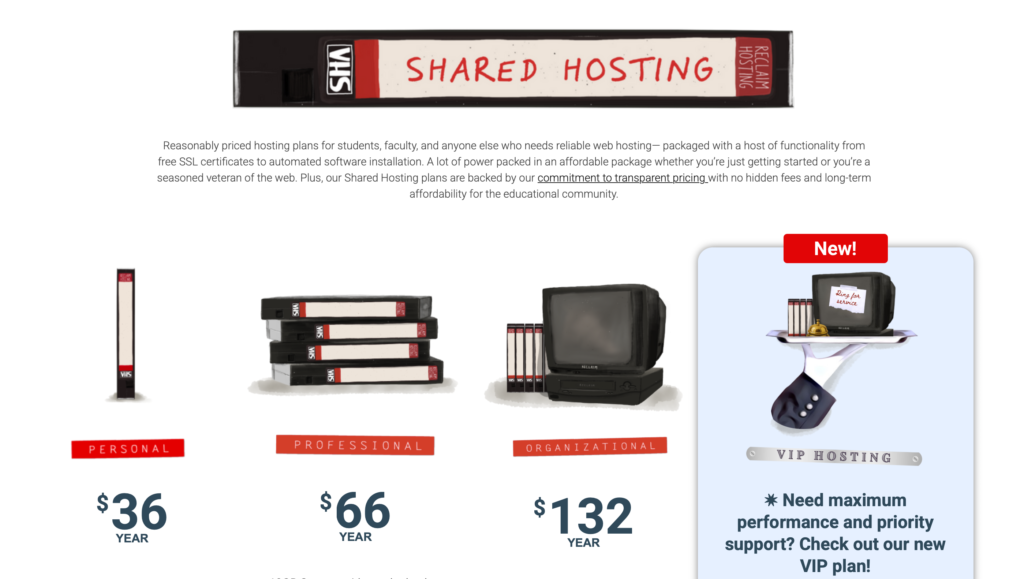
Here, click select the $36/year “Personal” plan. Be aware that you’ll actually be paying $55/per year for a new domain.
On the next screen, enter your preferred domain name. Some common examples include (if your name is Herbert Hoover):
- www.herberthoover.com
- www.hhoover.com
- www.hooverportfolio.com
Choose something semi-professional because this website will most likely serve as your portfolio for your New Media journey and beyond.
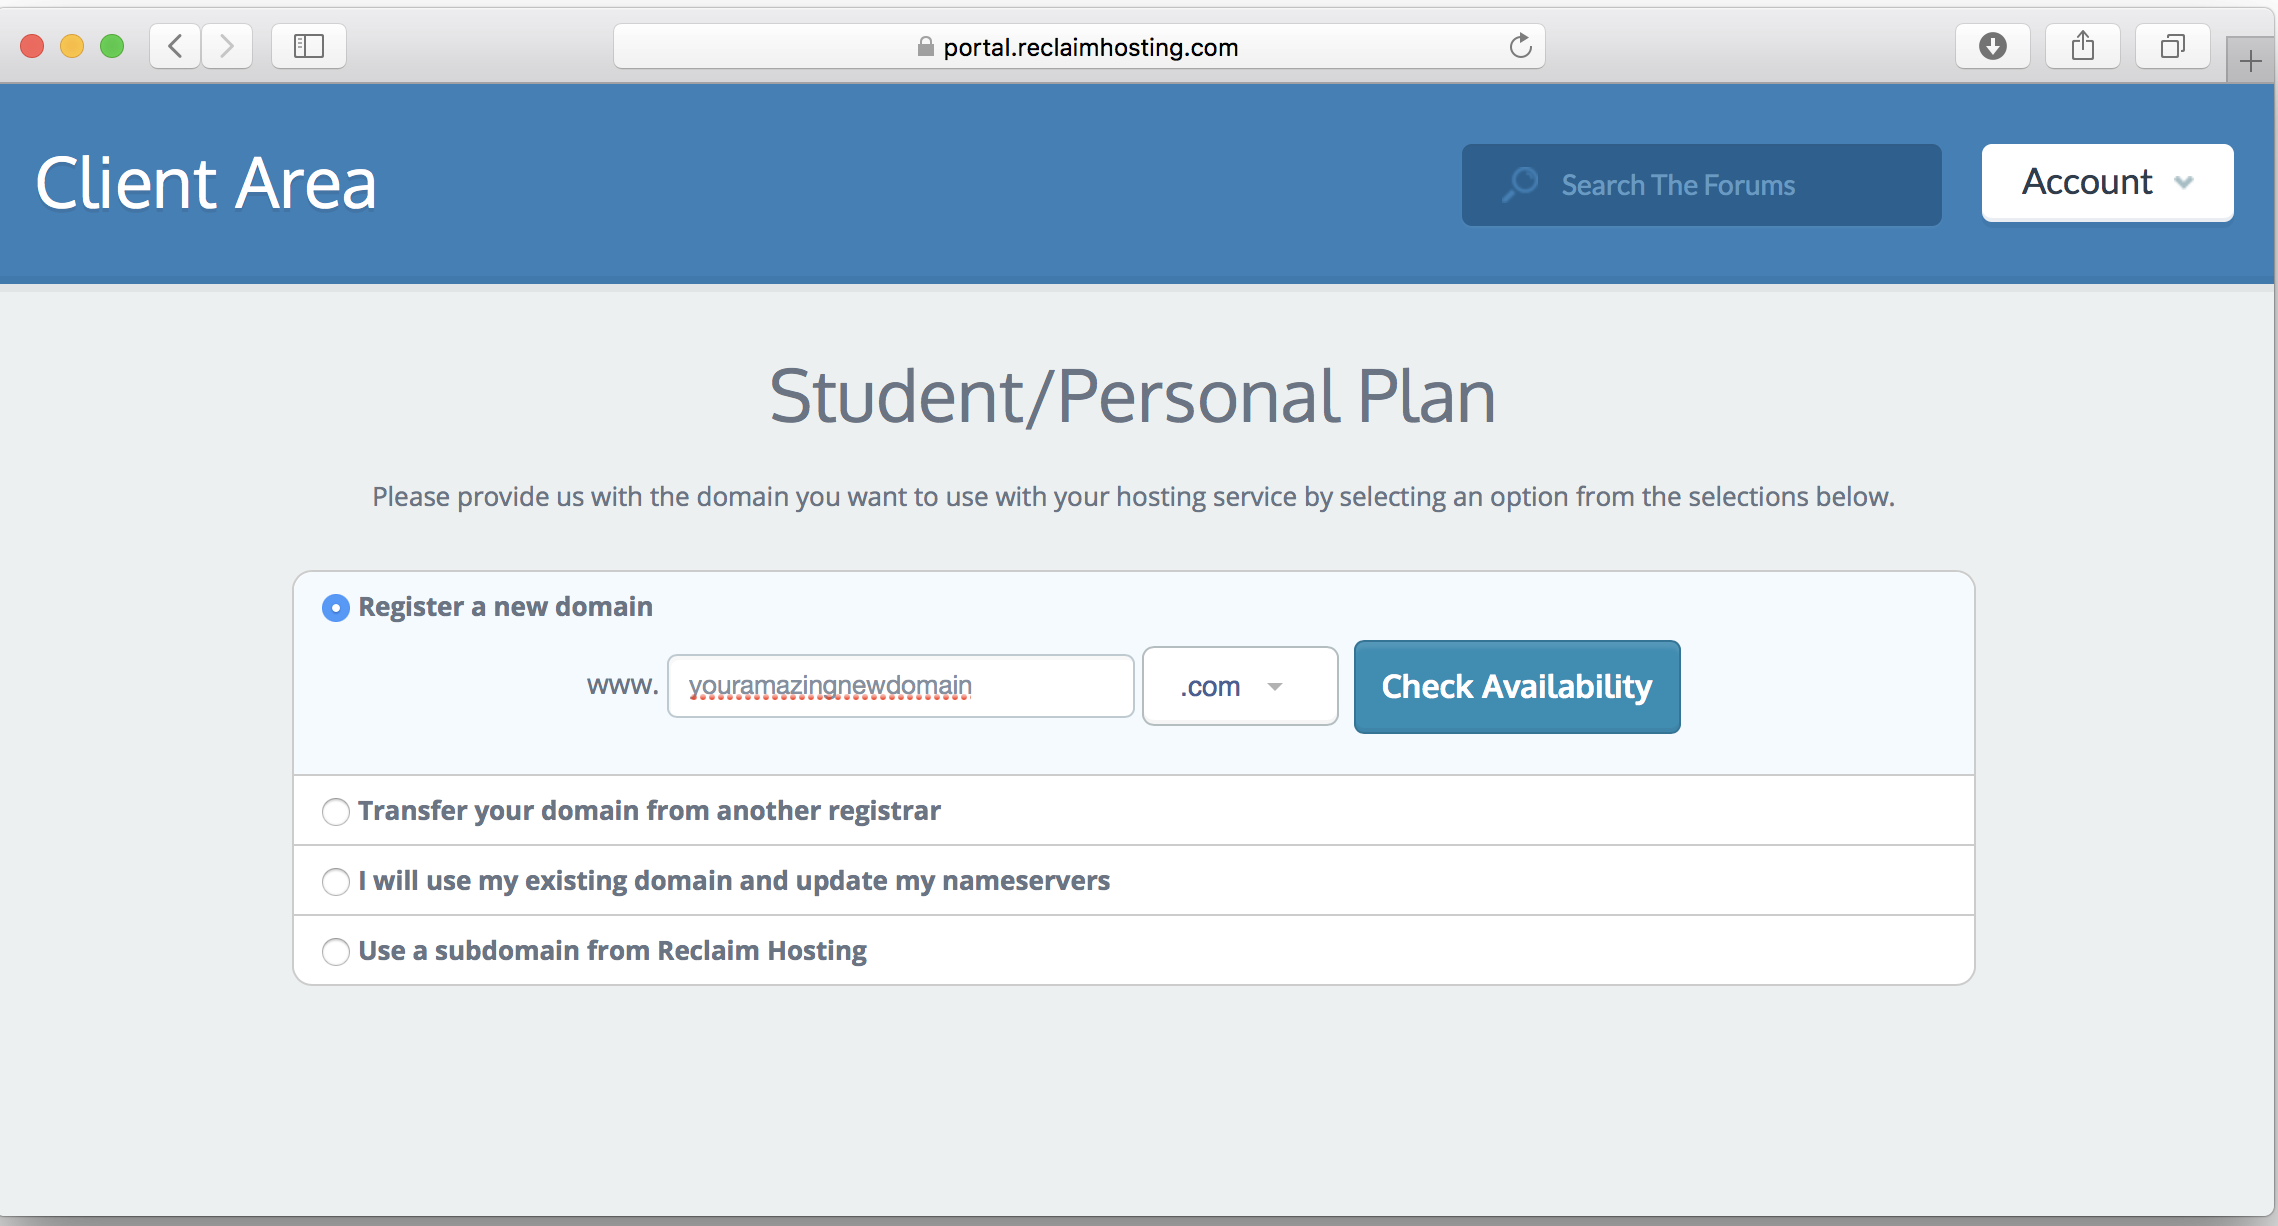
Note: be sure to leave the default Whois Privacy Protection, included free, turned on when you’re registering your domain.
You might want to use a non-UGA email address so that you won’t have to update your account after you graduate. Also, be sure to take note of your password, as managing it (and all of your other passwords for this course) is entirely up to you—NMI faculty don’t have access to any of these accounts.
After completing checkout, you’ll receive several emails from Reclaim Hosting (if you don’t see any of these messages in your primary inbox, be sure to check your Promotions and/or Spam folders):
- One of the emails will include a verification link. Be sure to click it to confirm your email address and activate your account.
- Within anywhere between a few minutes and a few hours of verifying your email address, you should be able to visit your new domain name in any web browser and see the default Reclaim Hosting landing page. If you can’t see your site this way, contact your instructor for help.
- Another will be titled “Set your data use consent preferences.” You don’t have to do anything with this one—it’s basically a chance to opt into marketing—who wants that?
- The Backpack Email: Another will look like this and include your cPanel & SFTP Login Credentials:
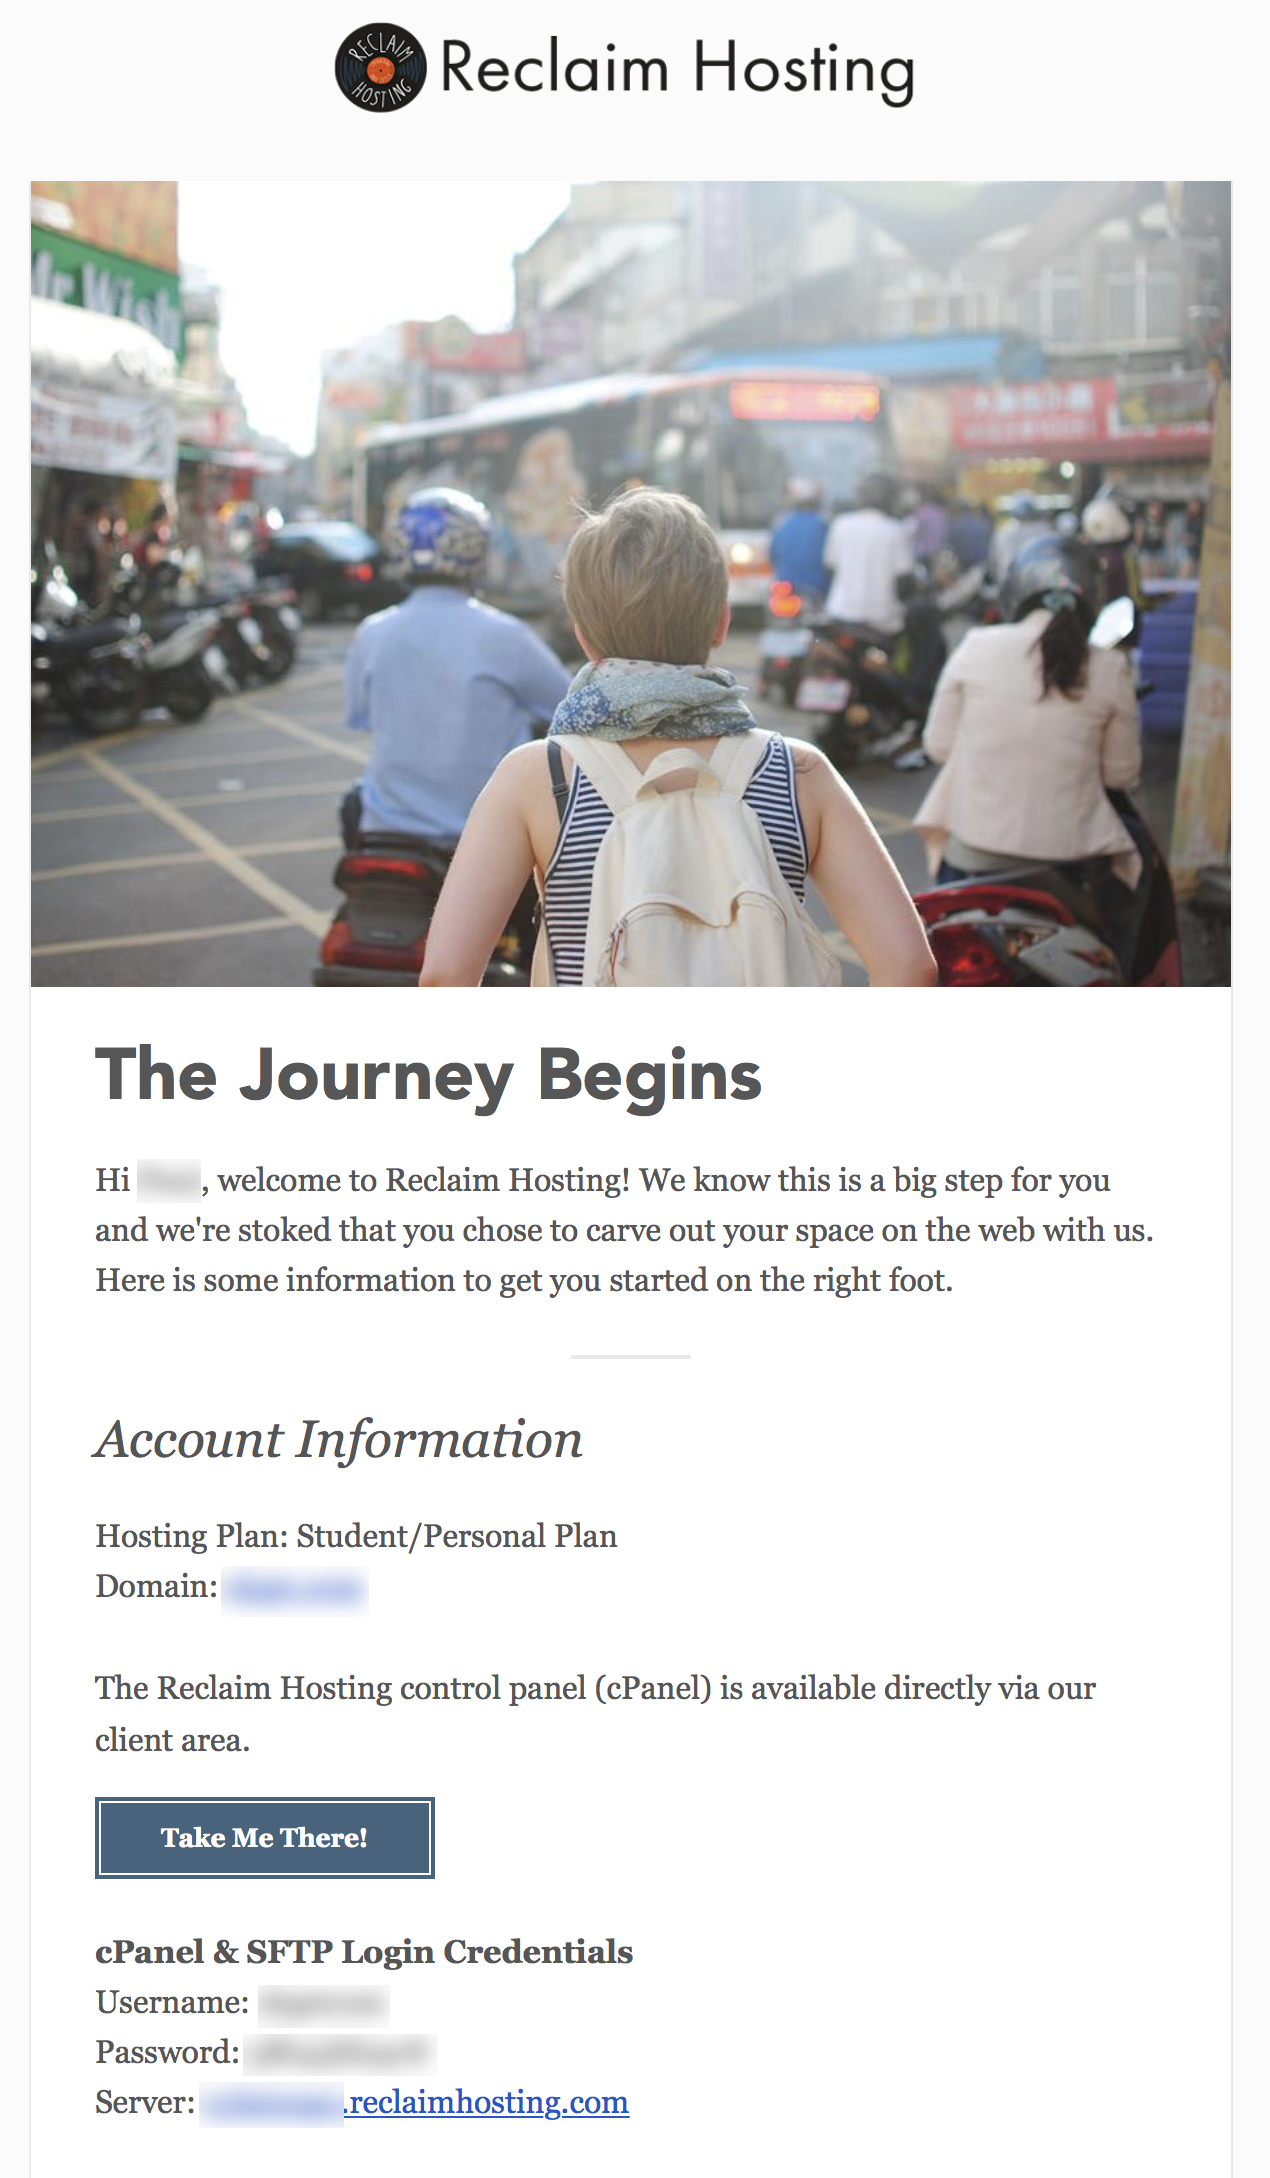
You’ll need these for our next steps, so keep them handy. You will want to copy and paste that password! Do not try to type it by hand.
This particular email (the “backpack email”) is very important because it contains required login credentials. Save this email: flag it, take a screenshot, keep it somewhere where it is easy to find!
Also, keep it open and handy because we will use it in our next step.
CONFIGURE YOUR FTP CLIENT
You’ve downloaded Cyberduck to your desktop, right? If not, you should do so now! Head to cyberduck.io and download the current version.
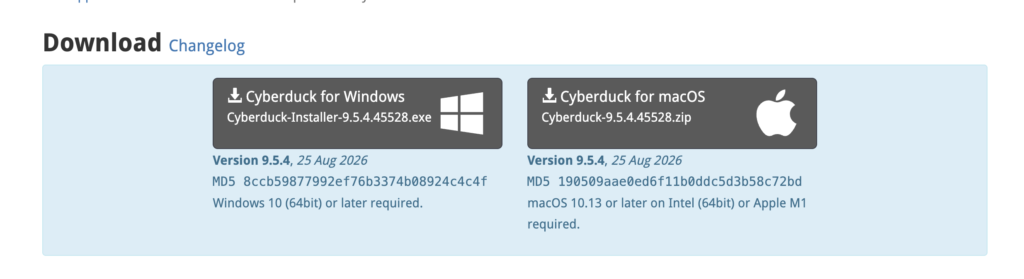
Once you’ve downloaded your duck, you should see it’s delightfully cute face on your desktop.
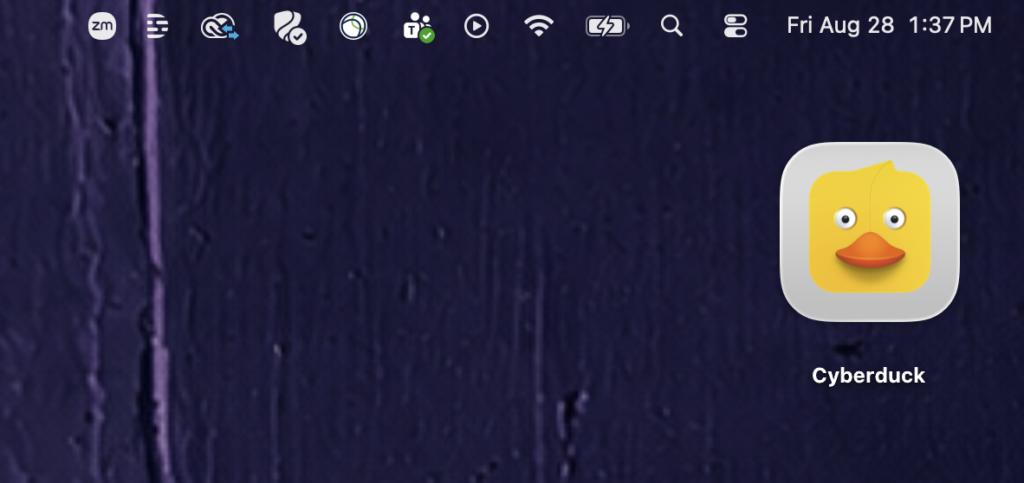
Double click the icon. If your computer asks you if you are sure you want to open it click “open.”
Click “Open Connection” from the top nav.
- Change FTP (File Transfer Protocol) to SFTP (SSH File Transfer Protocol)
- Return to your Backpack email that Reclaim Hosting sent you. It’s time to copy and paste your credentials. Again, don’t try to copy these by hand- that password is tricky.
- Server
- Username
- Password
- You can leave SSH Private Key as “none,” leave the Path area blank or with “folder” visible, and leave “add to keychain” checked.
- You should see Port 22
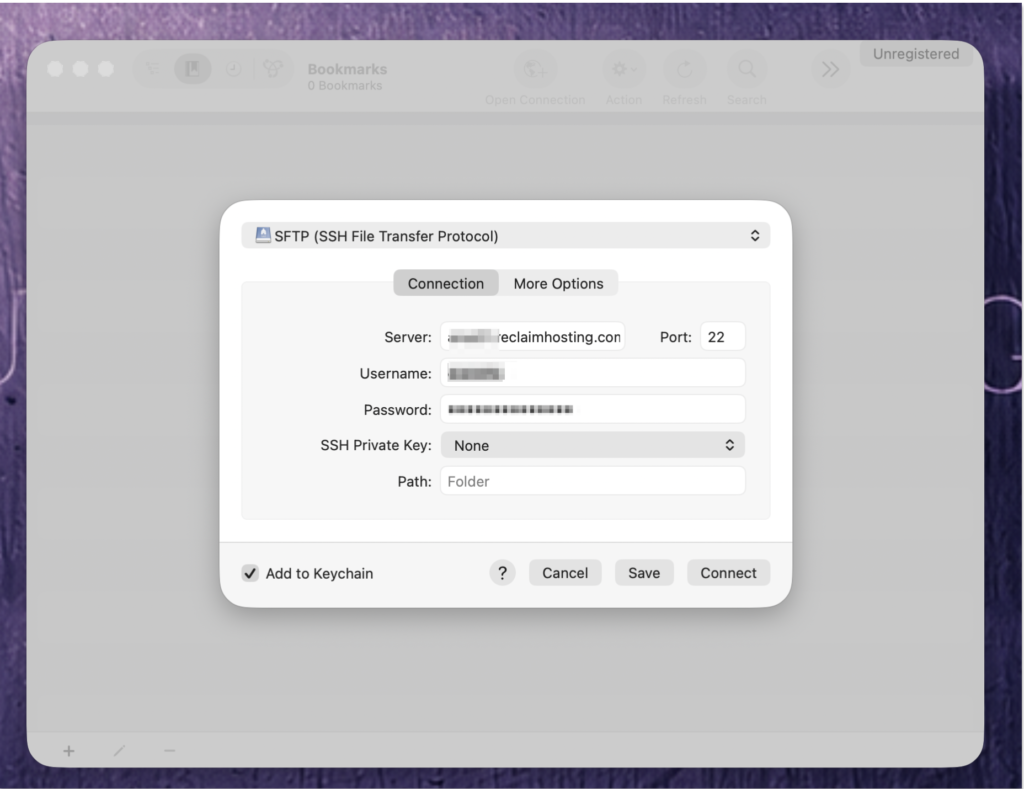
Once you have entered your info, click “Connect.”
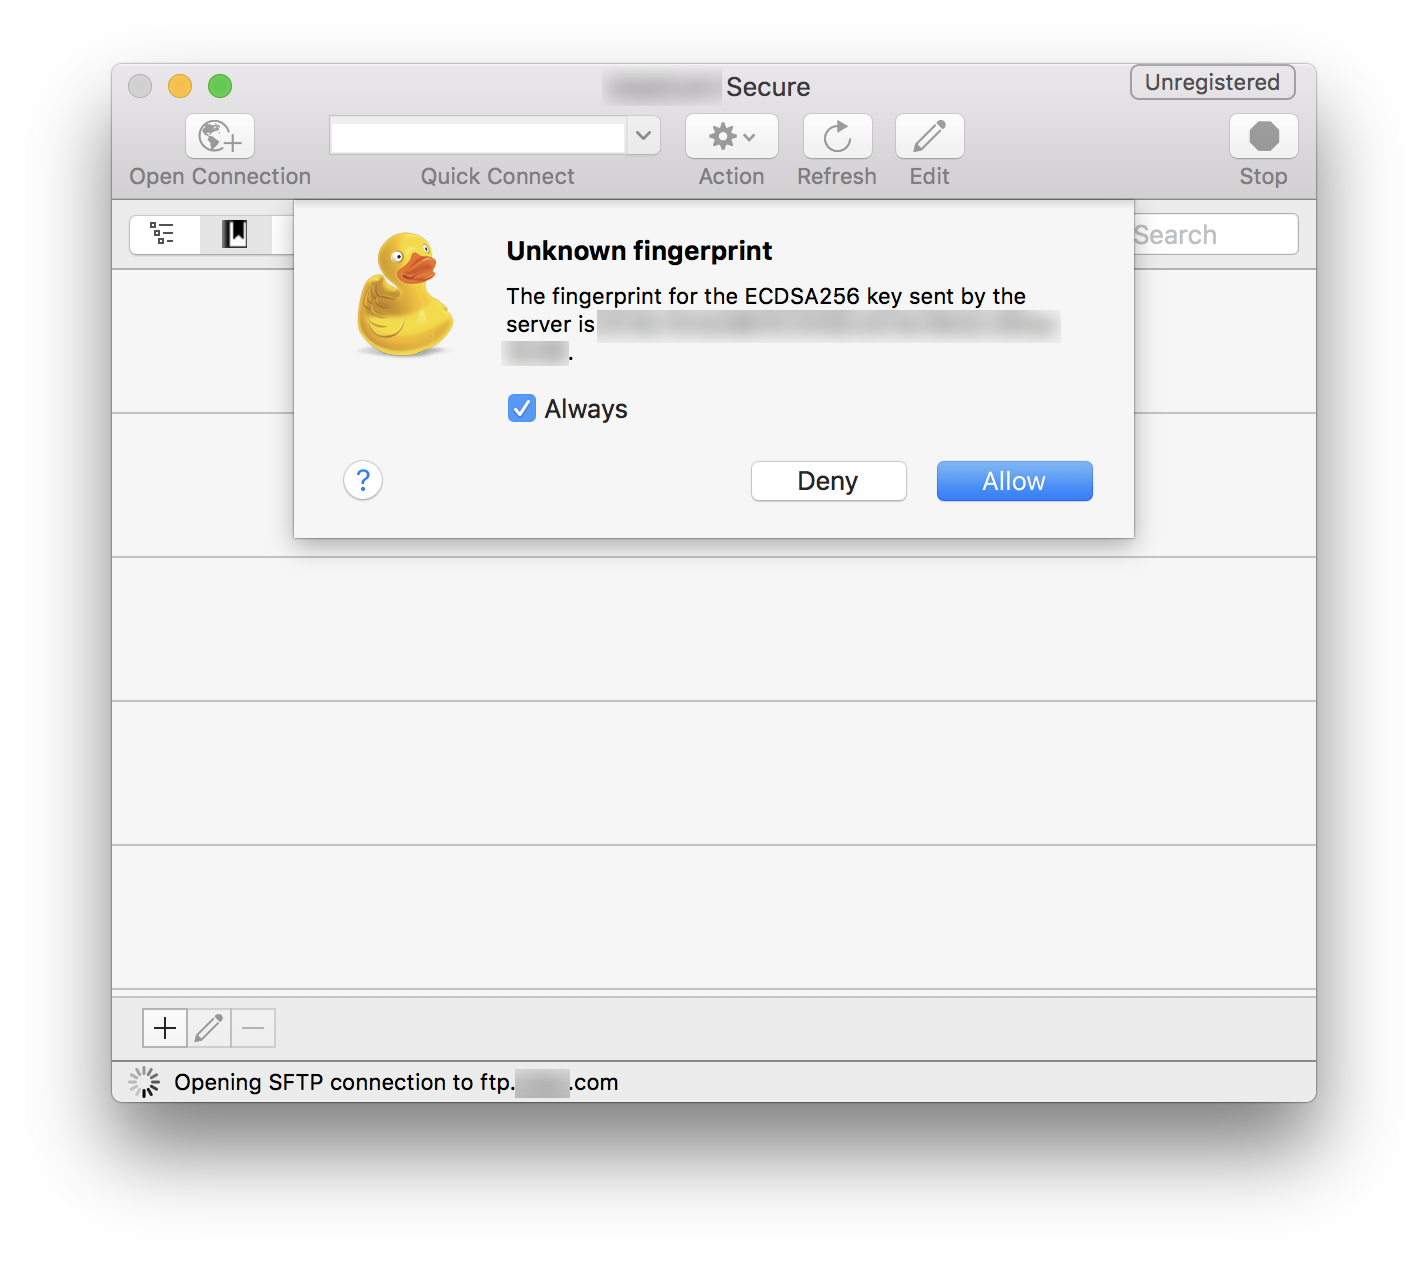
During this login process, you might see a message about “Unknown fingerprint.” If you do, just check the box for “Always” and then click Allow.
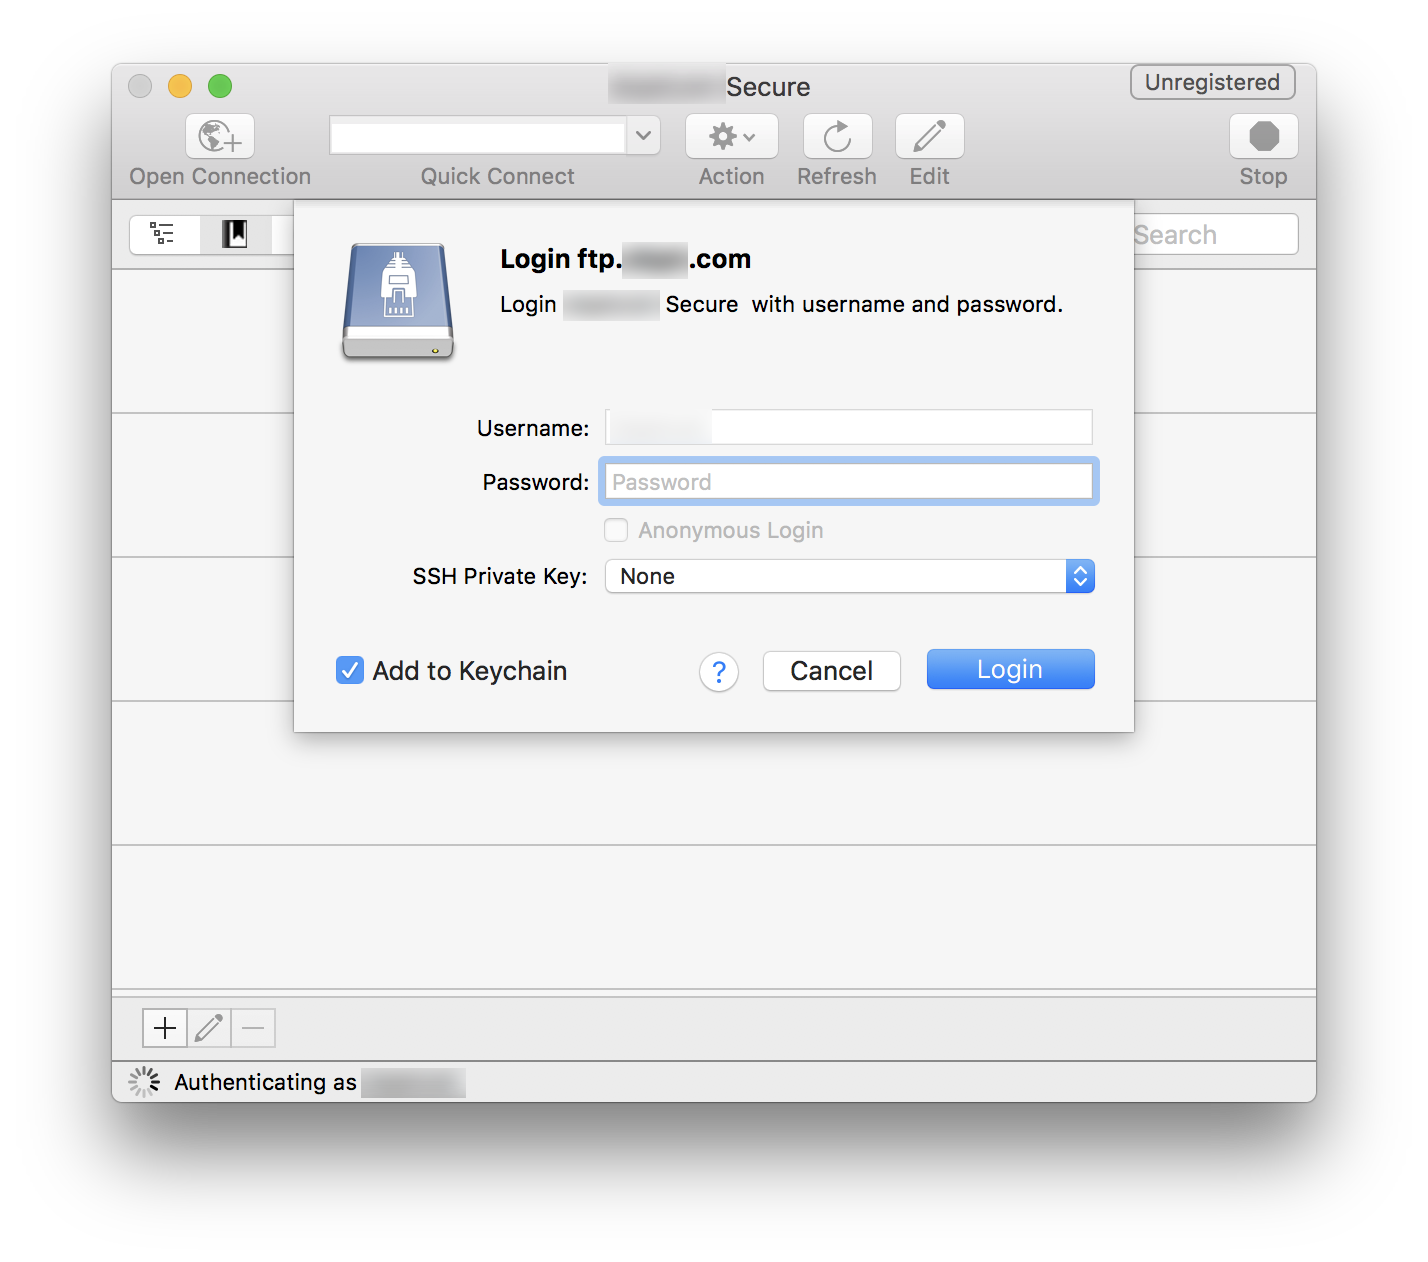
If you get asked for your password again, you’ll want to enter the username and password from your backpack email.
Note: Errors are common at this stage of the process! Don’t panic. Whether it’s a miss-typed password, unsafe connection, or just a bad day for the duck – we can figure it out! After a short amount of Googling and troubleshooting, send a screenshot of the error message to your instructor.
You might also need to submit a ticket with Reclaim Hosting. The Explore your Client Area + cPanel steps lower on this page will show you how to do that, so keep calm and keep reading.
Meet your Public_HTML folder
Okay, if all went well you have connected to your server! You should see something that looks like this:
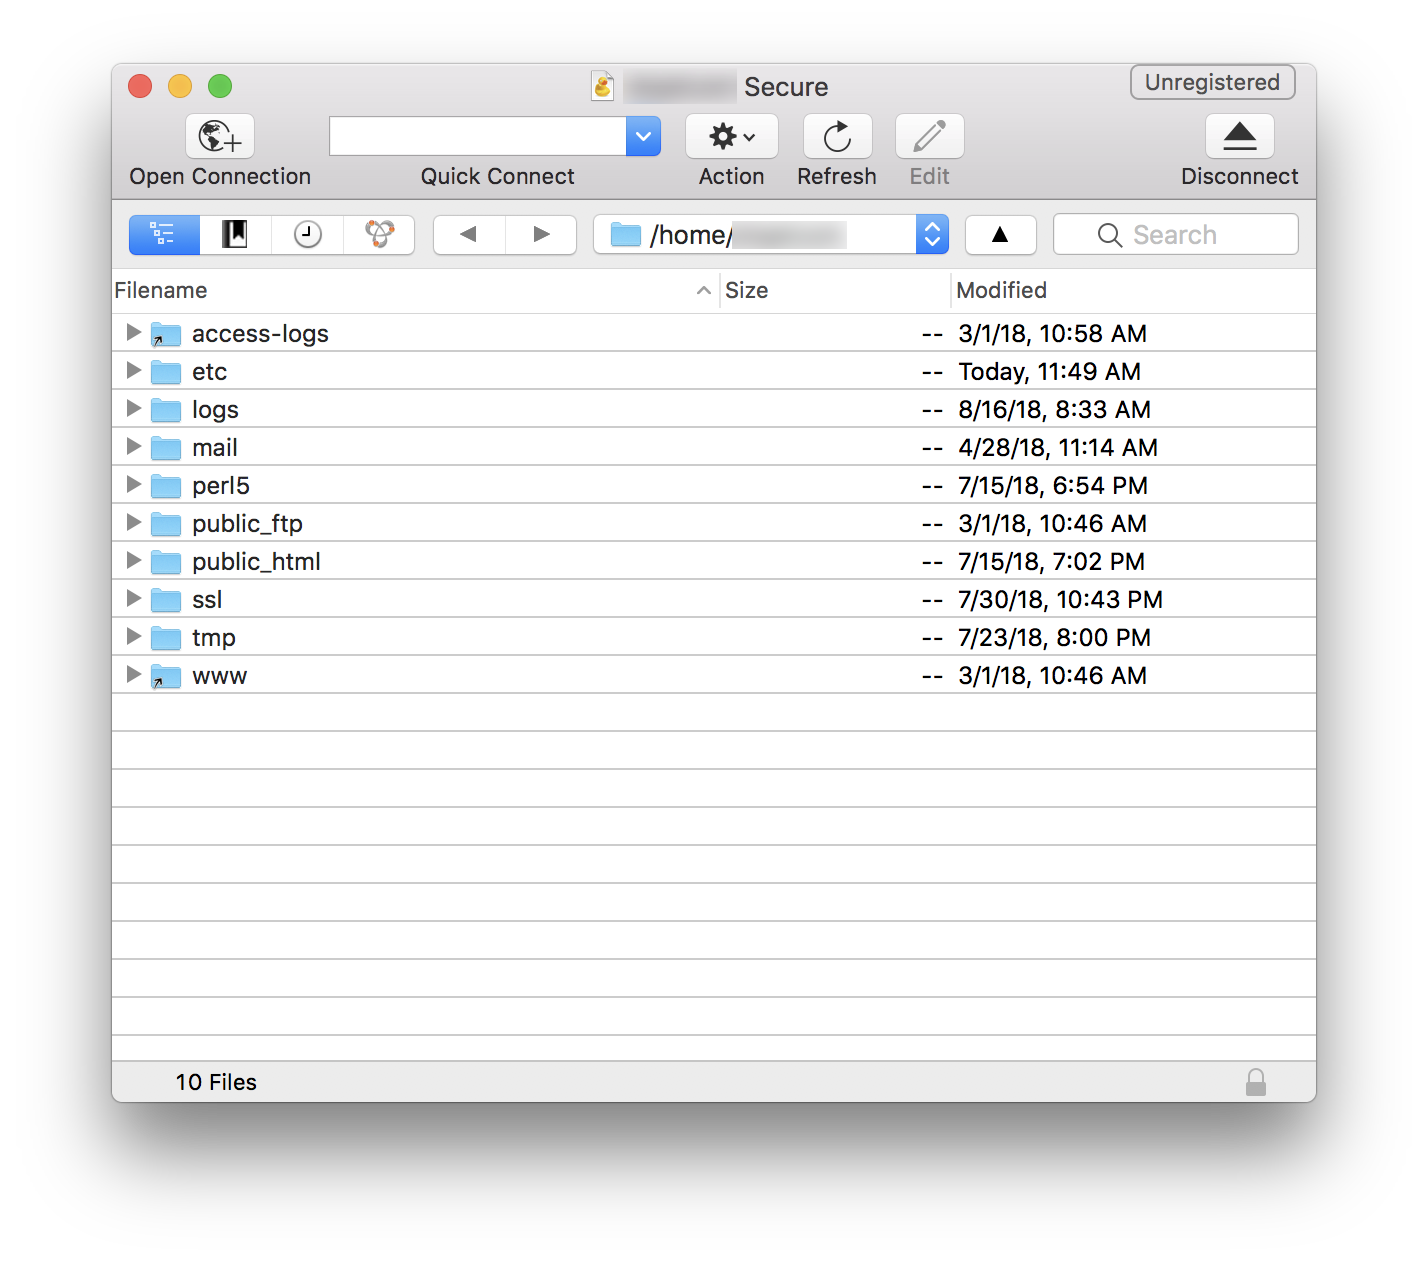
When you connect to your server, you’ll see a bunch of folders already here. These are used by your hosting account to handle things like logs, email, security, and other behind-the-scenes server stuff.
Good news: you can ignore almost all of them! For this class, there’s only one folder we need to care about: public_html.
Think of public_html as the folder your browser can see. When someone visits your domain, the browser looks inside public_html to find the files that make up your website.
Anything you want to make available on your website will eventually live inside this folder (or inside another folder within it).
Your public_html folder is also called your website’s root directory.
Root directory: The main, top-level folder of a website. Think of it as the starting point for everything on your site.
So, for our purposes:
Your computer → where you build your websitepublic_html → where you publish your website
Your browser → where you see your website
Let’s take a moment to set up our public_html folder, so that we are ready to go!
Double-click on the “public_html” folder. Reclaim Hosting may have already placed a few default files and folders inside it. You might see things like:
cgi-bindefault.html- a Reclaim Hosting logo
- a
staticfolder
For this class, you can delete everything currently inside public_html. We want to start the semester with a completely empty root directory, ready for the websites we’re going to build.
⚠️ Before you delete anything: Double-check that you’re inside public_html. We’re cleaning out the contents of this folder, not deleting the public_html folder itself!
Next, let’s Bookmark the public_html folder so it’s easy to jump right to this location of our server.
Click the Bookmark icon (second from the left in the icons in the top left corner next to “Open Connection”) to see a screen like this:
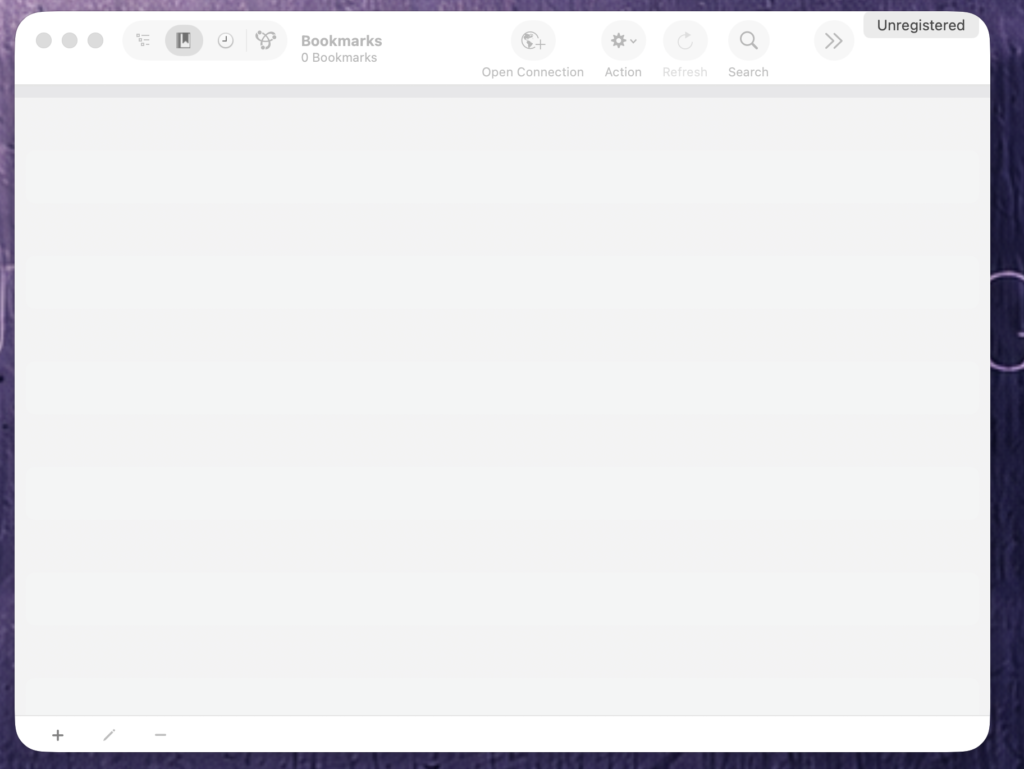
Click the “+” icon in the bottom-left corner to open another window like this:
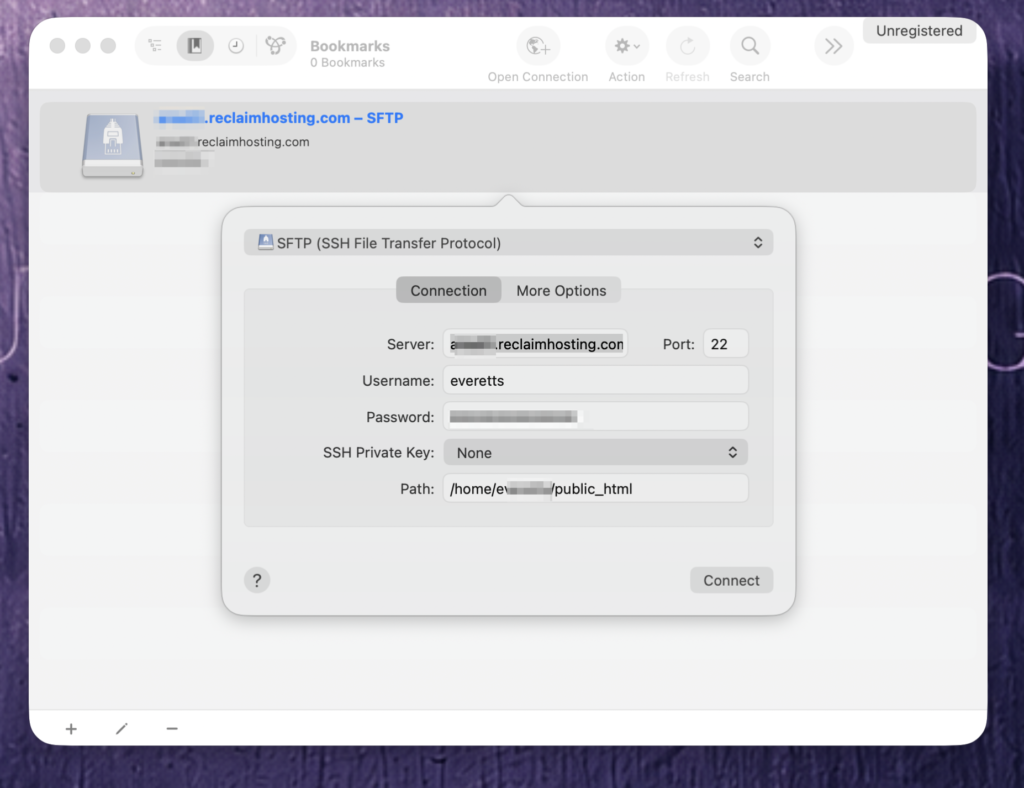
In the new window, the only thing you’ll likely want to change is the Nickname. To access it click “More Options” (next to connection) and just choose something clear and descriptive, like your URL or your name. Then, close the window where you updated your nickname to be left with a screen like this:
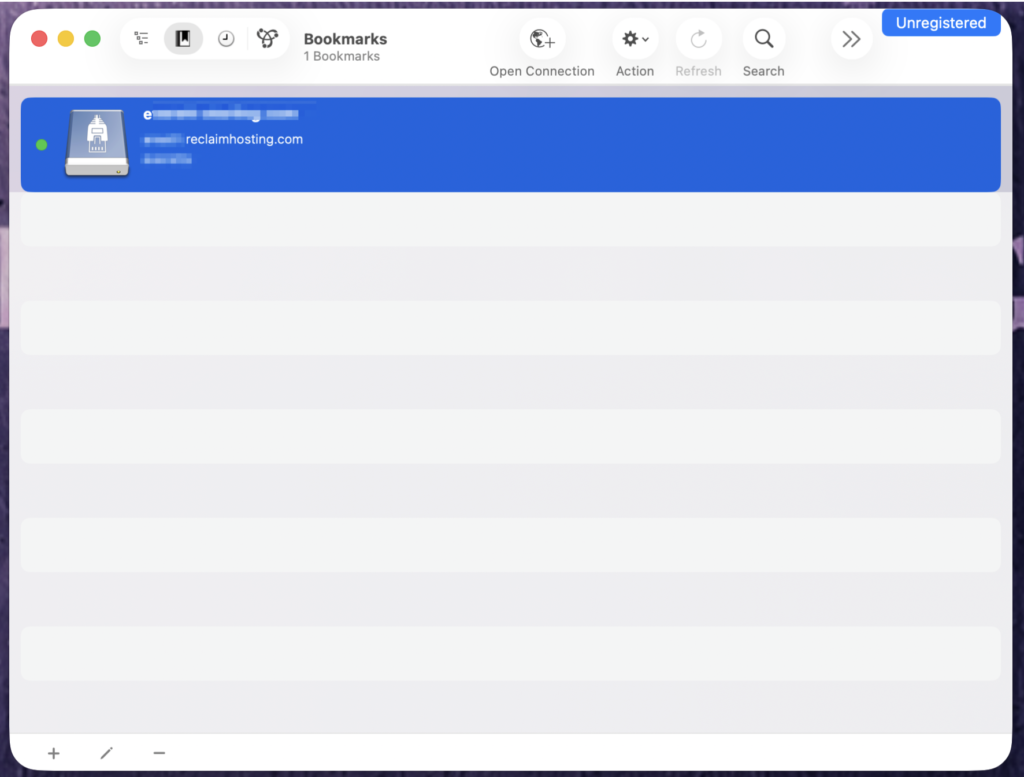
Now, to access your site via FTP, you’ll just need to double-click that bookmark! If you use another computer, you will complete these same steps to be able to upload to the server.
A Small Side Quest: TroubleShootING Cyberduck
Sometimes a weird error happens when you are trying to connect to your server.
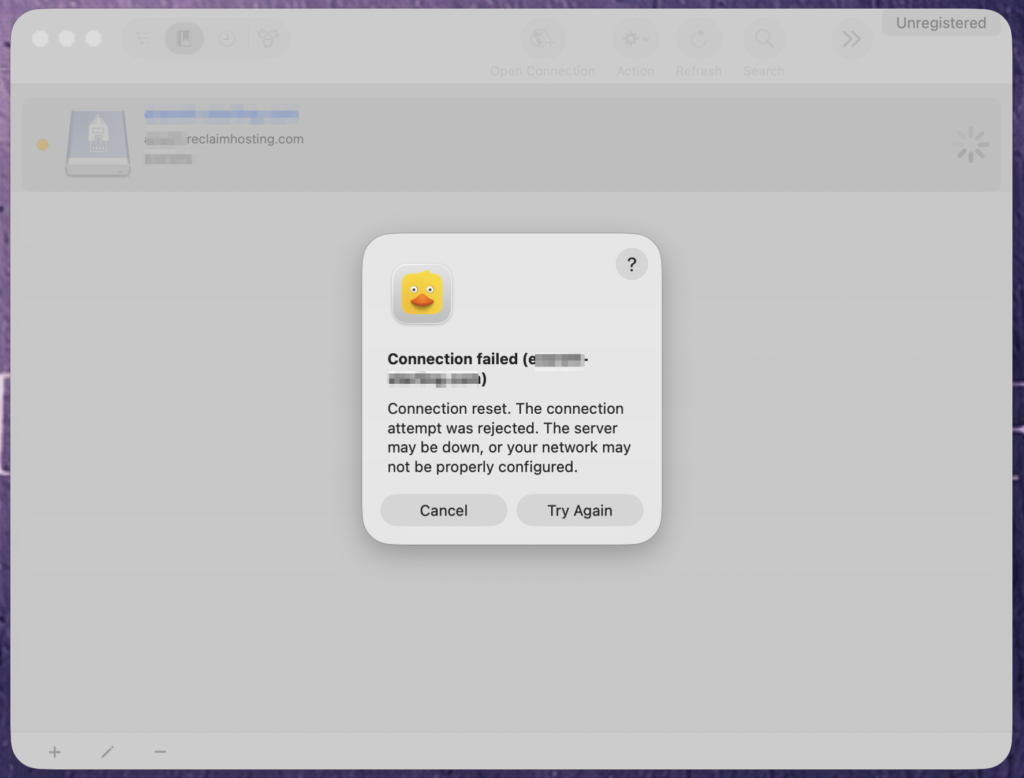
Don’t panic! Connection errors happen sometimes, and they don’t necessarily mean you did anything wrong. Try these quick fixes first:
- Read the error message. It may give you a clue about what went wrong.
- Try again. Sometimes the connection just needs a second (or third, or fourth) attempt.
- Check your internet connection. Make sure you’re actually online.
- Double-check your connection information. Is the server address, username, and password correct?
- Quit and reopen Cyberduck. The ancient troubleshooting ritual works surprisingly often. 🦆
- Still stuck? Take a screenshot. Send it to me or include it in a Reclaim Hosting support ticket so we can see exactly what you’re seeing.
Tip: When asking for help, always share the error message you received. “Cyberduck isn’t working” is much harder to troubleshoot than a screenshot of the actual error.
Explore The Client Area + cPanel
Let’s hop back over to Reclaim Hosting and take a minute to explore your cPanel. To access your cPanel click “Client Area Login” on the main nav. The login info will be the account info that you created when you just registered your Domain –> not the credentials from your Backpack email.
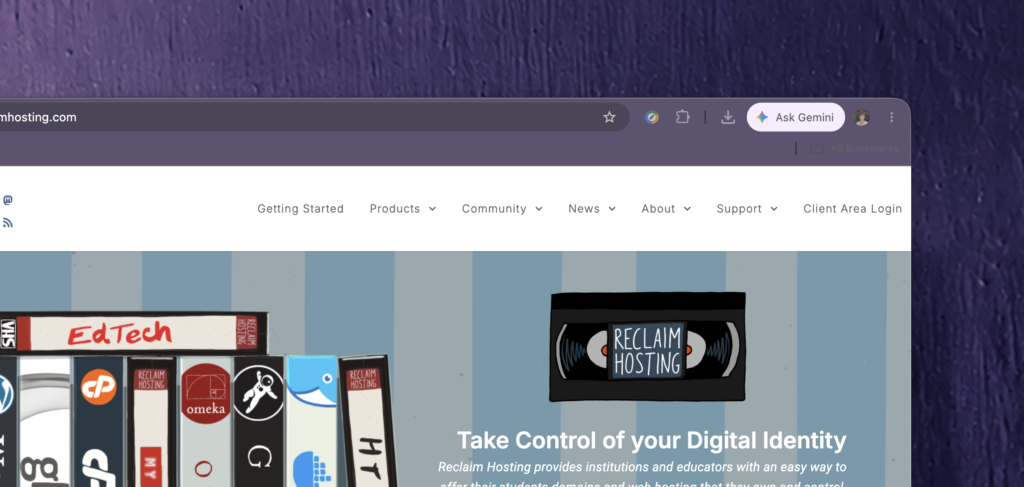
First, you’ll enter the Client Area, and from here you will be able to do a couple things:
- Access your cPanel
- View invoices and billing details
- Submit support tickets.
Here’s what it looks like:

We’ll dive into the cPanel with a little more depth later in the semester, but you should know that your login info for your cPanel are contained within your…. (you guessed it!) backpack email.
Think of cPanel as the control room for your web hosting. It’s where you can manage the files, software, databases, and other tools that make your website work. You won’t need most of what you see here, but later in the semester, we’ll use cPanel to install WordPress.
Support Tickets with Reclaim
Okay, let’s take a quick moment to chat about Support Tickets with Reclaim. It’s very possible that you might hit a snag this semester that we can’t solve in class because it’s a server-related problem.
When you’ve tried some basic troubleshooting, but you’re getting confusing error messages with Cyberduck or having other issues configuring your FTP Client or uploading your files, you may need to submit a support Ticket.
Once you are in your Client Area you can do that either by clicking the “Open New Ticket” button in the middle of the screen or by clicking Support in the nav area.
When you need help from Reclaim Hosting:
- Be specific about the problem. Instead of “My website isn’t working,” explain what you were trying to do, what you expected to happen, and what happened instead.
- Include the exact error message. Copy and paste it if you can.
- Attach screenshots. Screenshots are extremely helpful, especially if they show the error and what you were doing when it occurred.
- Explain what you’ve already tried. This keeps support from asking you to repeat troubleshooting steps.
- Include your domain name so they know exactly which site/account they should investigate.
- Loop in your instructor. If the problem is complex or you need additional support, it’s always a good idea to message your instructor.
The basic rule of thumb: give Reclaim enough information that they can understand and recreate the problem without having to email you back for more details.