
Because a) we’ll be doing all of our WordPress work on our server, not locally in this class and b) WordPress isn’t just a set of files, but a set of files plus a database, it’s important to back up WordPress.
Unlike the static websites we’ve built so far, WordPress stores much of your content and configuration in a database. That means simply downloading your WordPress files through SFTP won’t give you everything you need to restore your site. A complete backup needs to include both your files and your database.
Server-side back-ups
Because Reclaim Hosting is a nice company to work with, our WordPress starter steps should automatically configure server-side back-ups. However, it’s always a good idea to verify that your backups are working as intended.
To create a backup, log in to Reclaim Hosting, open cPanel, and click on WordPress. Locate your WordPress installation and click the Backup button. Follow the prompts to create a backup of your site.
To check your automatic backup schedule, open the installation’s Edit/Settings controls and look for the automatic backup settings. Ideally, backups should be scheduled at reasonable intervals, such as one weekly and one monthly.
You can also visit My Backups in Installatron to see your available backups.
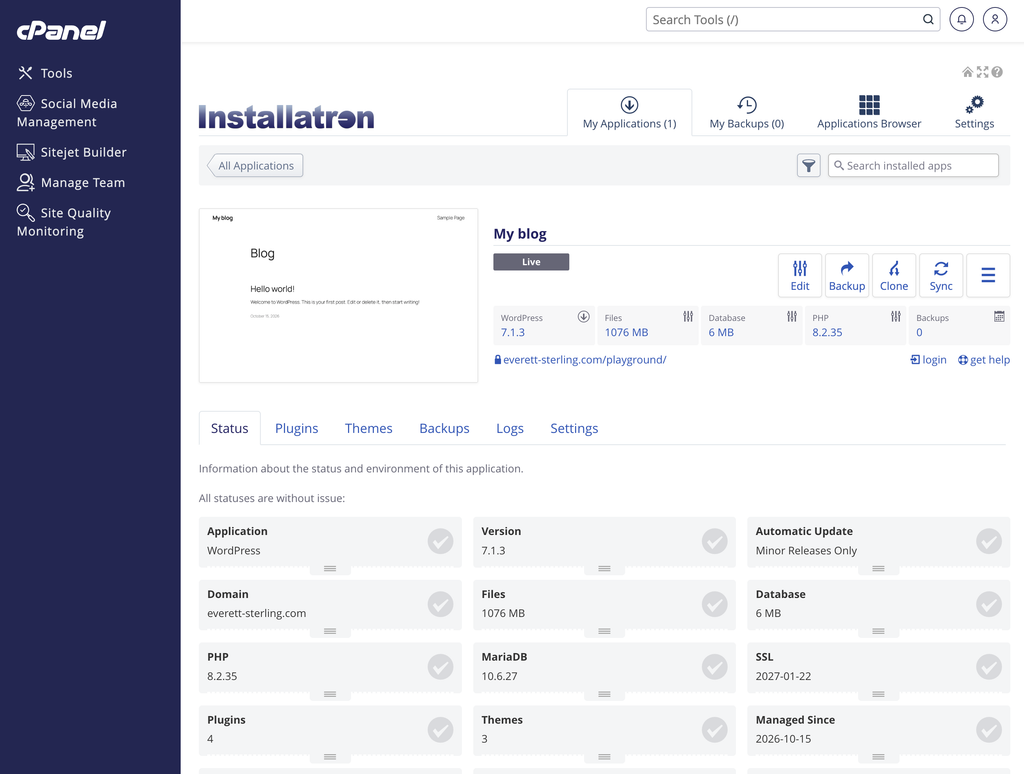
Scroll down and click “Backups” to verify that back-ups are enabled on a reasonable schedule, such as 1 weekly + 1 monthly:

A Note About Backup Limits
Reclaim Hosting may limit the number of Installatron backups you can store. For example, your account might allow only two backups per WordPress installation.
If you reach that limit, Installatron may automatically remove an older backup to make room for a new one. This process is called pruning.
That’s another reason it’s important to download and store your own backups outside your hosting account. Server-side backups are convenient, but they aren’t intended to be your only long-term copies.
Local back-ups
Completing the above steps to verify that your remote, server-side backups are working is a great first step. But, it’s not sufficient. If something goes wrong with your server, you’ll have no way to restore your WordPress site.
(The thing that most frequently goes wrong with student servers, by the way? Forgetting to renew your hosting after your initial year passes. Reclaim Hosting is a great company, but they’re not a charity, and all the data on your server will be deleted if you don’t pay annually for hosting.)
Thankfully, simple tools exist for creating remote back-ups of a WordPress site. A great one is All-in-One WP Migration and Backup. Though billed as a migration tool (for moving a WordPress install from one place to another), it’s also a great back-up tool.
Install and activate it as you would any other plugin. Then, once it’s active, click on it in the menu bar and select Export To > File:

Wait a bit, then click the obnoxiously bouncing Download button when the file’s ready and store the .wpress file somewhere safe.1
You’ll want to repeat this process periodically, especially after you’ve made major changes or addition to your site.
Troubleshooting: What If Your Backup Won’t Download?
Occasionally, All-in-One WP Migration will successfully create your backup, but clicking the Download button won’t actually download the file. If this happens, don’t panic! Your backup may already exist on your server.
First, try a couple of simple fixes:
- Open your WordPress dashboard in a private or incognito browser window and try downloading the backup again.
- Try a different browser. For example, if Chrome isn’t working, try Safari or Firefox.
- Check your browser’s download settings or temporarily disable extensions that might interfere with downloads.
If those steps don’t work, you can try downloading the backup directly through cPanel:
- Log in to Reclaim Hosting and open cPanel → File Manager.
- Navigate to the folder containing your WordPress installation.
- Open
wp-content/ai1wm-backups/. - Locate the
.wpressfile created by your export. - Select the file and use File Manager’s Download option to save it to your computer.
Remember, a backup stored on your server is not the same as a backup stored on your computer. Make sure you’ve actually downloaded your file!
Restoring
Should you find yourself in the position of needing to restore from a All-in-One WP Migration backup, get your new WordPress install up and running, install the plugin as above, and this time choose Import, and upload the .wpress file you exported earlier.
Be careful! Importing a backup can overwrite the destination WordPress installation’s existing content, settings, and database. Make sure you’re importing into the correct location on your server.
You may also encounter a file-size limit when importing a .wpress backup. These limits depend on your hosting configuration and the migration plugin’s capabilities. If your file is too large, you may need to adjust your server’s upload settings or use an alternative import method. Don’t assume that installing another plugin will automatically resolve the problem.
We’ll explore how this same export-and-import process can be used to move a WordPress website in Moving WordPress lesson.
You are backing up your local machine, too, right? ?↩