As you dig into WordPress you’ll find that there’s a lot to explore! This exercise is designed to provide you with an introductory tour of WordPress as a spring board for your own discovery.
Throughout the semester we’ve stressed that the best way to get familiar with new technology is to play around with it. WordPress is no exception! Follow along with the steps below, but feel free to detour to do some exploring on your own.
Before we get started…
Before we jump into our WordPress Playground exercise, make sure you’ve spent some time reading our Intro to WordPress lesson. This will help you get the lay of the land before your dig in.
Next, you’ll need to make sure that you’ve completed the WordPress Starter Steps lesson. This will walk you through installing WordPress on your server and is a necessary first step!
Your WordPress dashboard
All right! The first thing we are going to do is log in to our WordPress account. To do that, you’ll simply type the URL of your WordPress installation in a Google Chrome browsers window and enter wp-admin at the end. Here’s an example:
www.YourDomain.com/playground/wp-admin
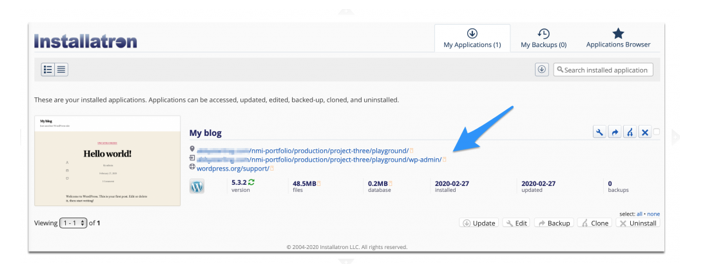
Keep in mind that your WordPress installation might be installed in a slightly different location depending on what directory you used during the WordPress Starter Steps. If you’re really stuck here and can’t remember where you installed WordPress, you can log in to your cPanel on Reclaim Hosting, click the WordPress icon, and then click “My Applications” in the Installatron view. That will take you to a page with both the URL of your WordPress install and a the URL of your admin page. Click the link with wp-admin at the end to access your dashboard.
Okay, now that you have navigated to your WordPress dashboard, we want to point out a couple of handy things.
The first is the black bar that stretches across the top of your screen. When you see this bar you know you’re logged in. The second in the dashboard menu along the left side of the screen. We’ll want to fully explore that menu, but right now we’re going to concentrate on the link for “Pages.”

Exploring your home page
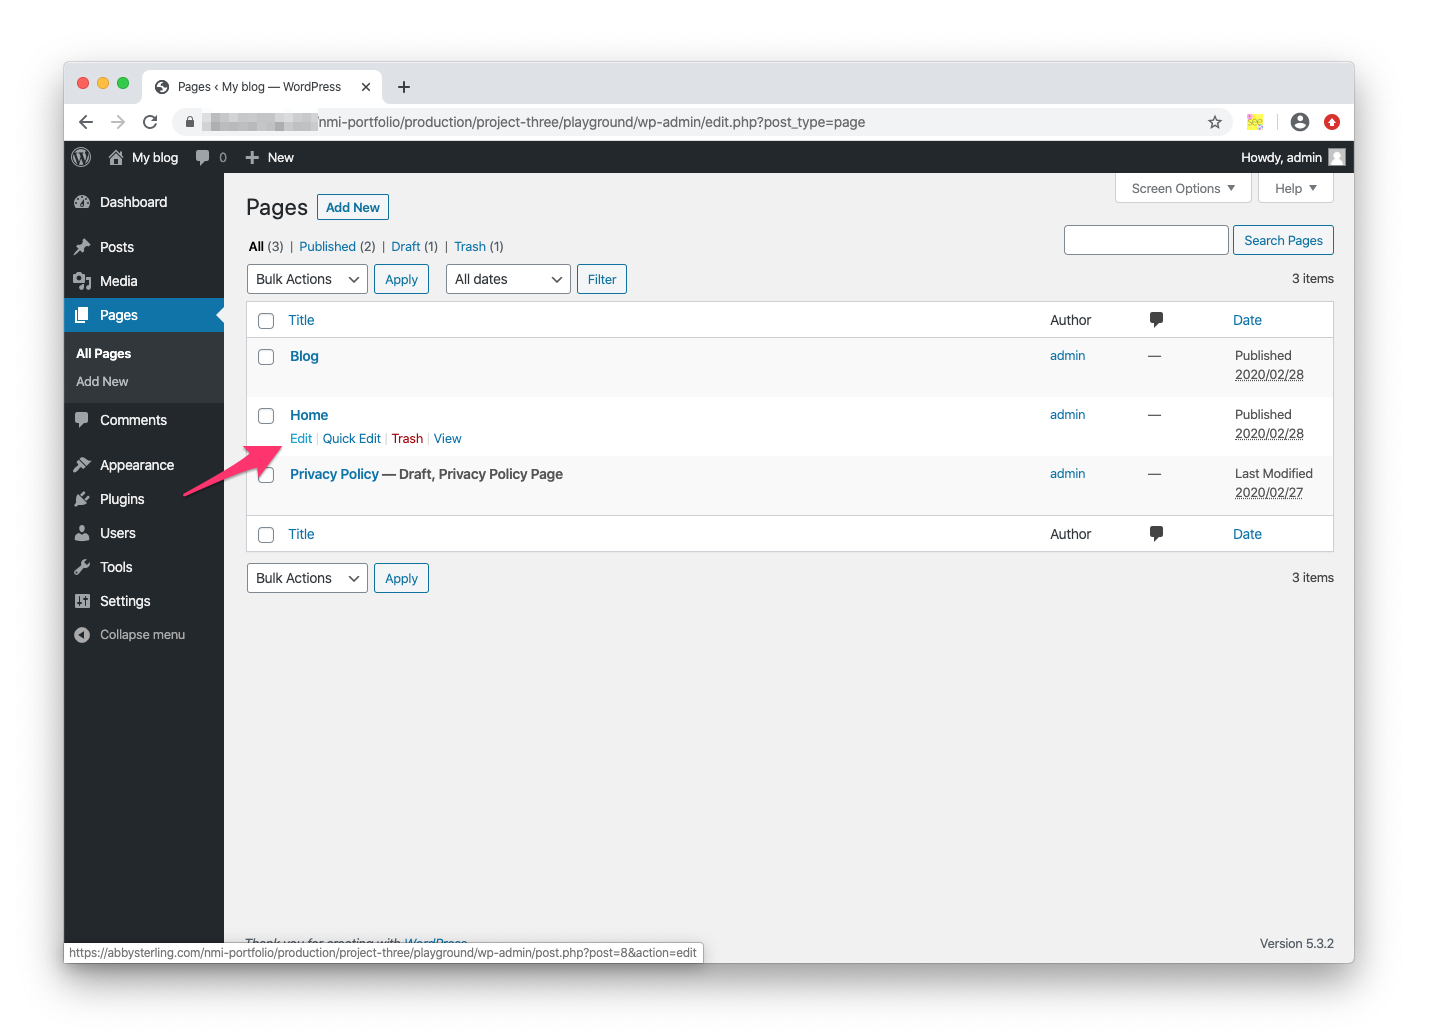
Click on the Pages link on the left side of your dashboard menu. When you completed the WordPress Starter Steps you created two new pages: a Home page, and a Blog page.1
Hover over the Home page and click “Edit.”
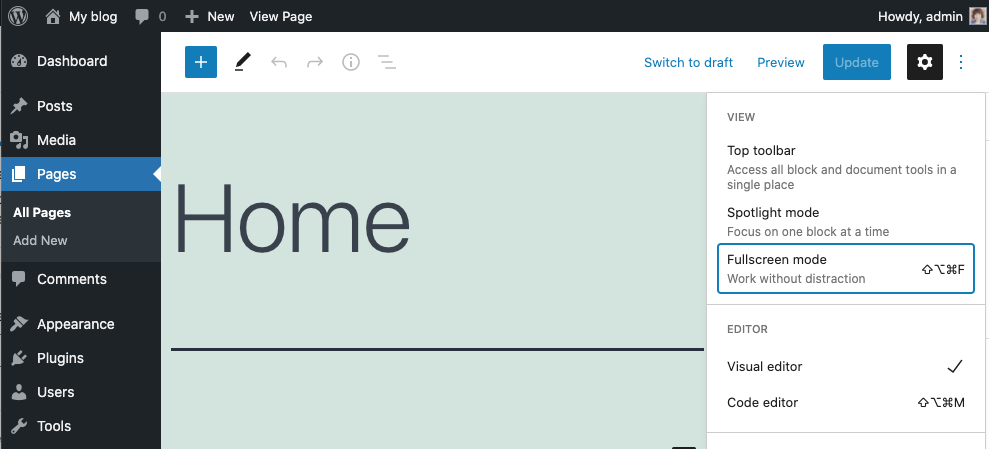
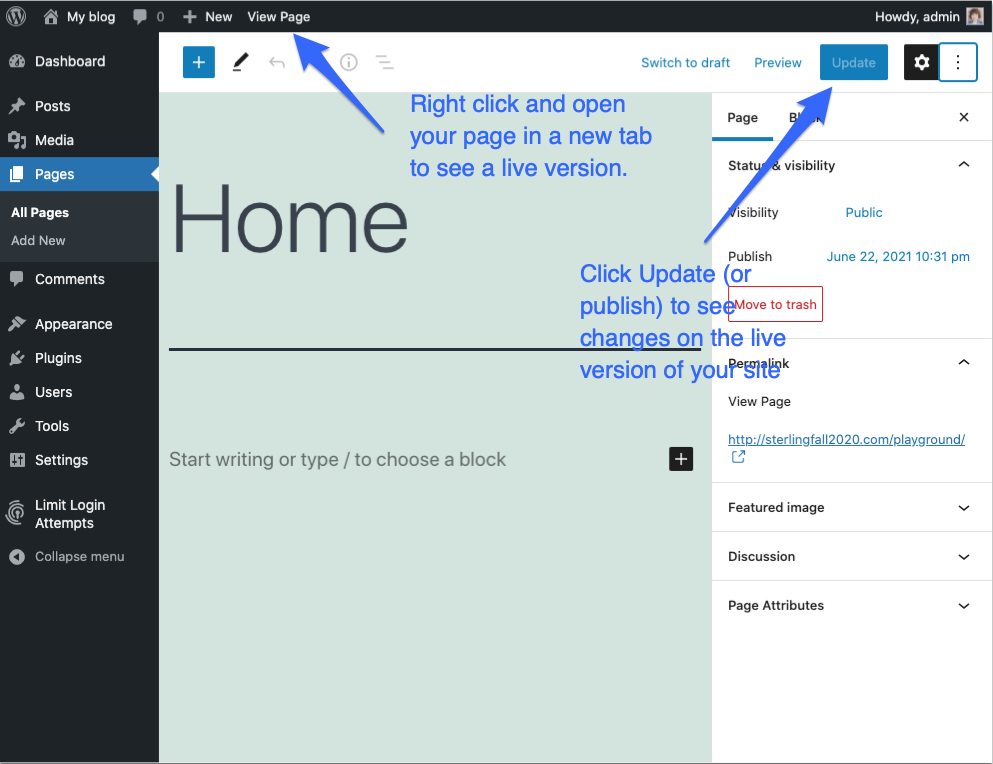
A few things to note at this point! If we right click the three dots at the top right of the screen we will have the option to uncheck “Fullscreen mode,” which will allow us to see the menu while we work. If you click “View Page” and open it in a new tab, we’ll get a live view of what the page will look like to an outside user.
To see any changes we’ll need to make sure to publish/update the page we are editing and then refresh the live page. It’s handy to have both the editable page and the live page open at the same time so you can check your progress. 2
Block Editor
Okay, now we’re going to play around with WordPress’s block editor. You can (and should!) read more about the block editor here, but for now, it’s enough to know that we can add all sorts of content to our WordPress page using blocks.
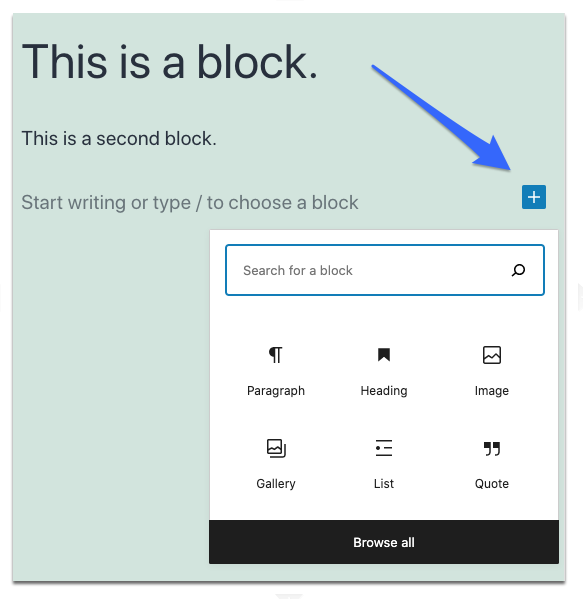
Go ahead and type some text into the first block (right where it says “Start writing or type / to choose a block”). When you start typing, you should see some options pop up at the top of the text box, like this:
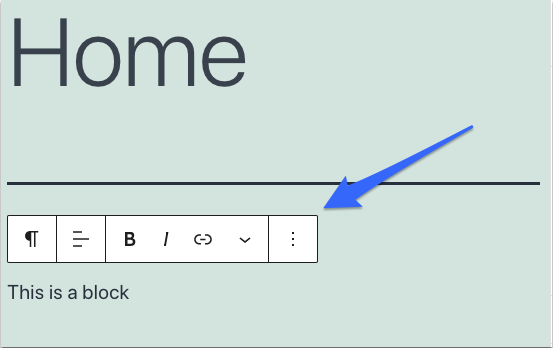
Notice that symbol that looks like a fancy backwards “P”? That symbol is actually called a pilcrow and is commonly used by editors to denote a new paragraph! The pilcrow tells us that we’re using a paragraph block. If you click the pilcrow symbol you’ll see that you can transform the block into a heading, list, or all sorts of things. You should also notice that from here we can easily set the alignment of the paragraph, bold the text, italicize, add a hyperlink, and more.
In fact, if we click the three dots at the end of the toolbar, even more options become available to us.
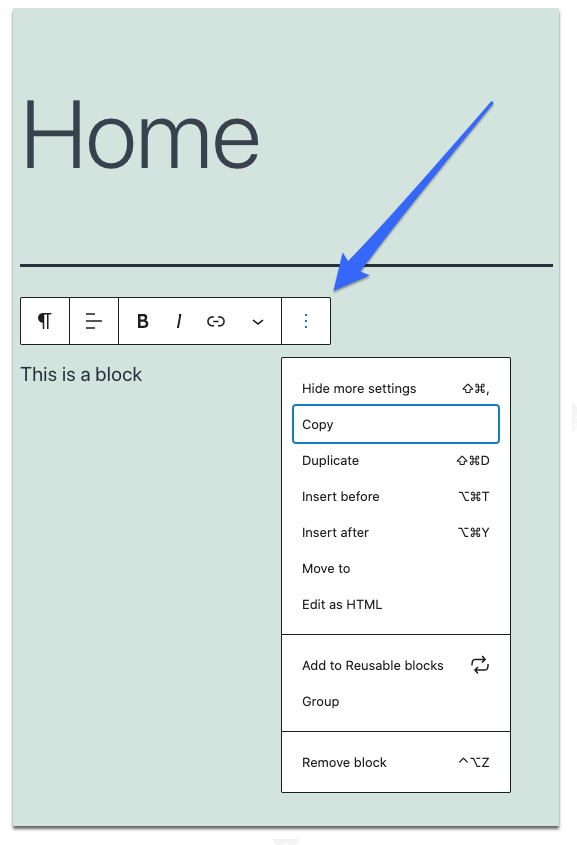
These options are pretty self explanatory, but it’s really good to know where to find them! The “Remove Block” option at the bottom of the list is sure to come in handy when you want to get rid of a block.
Okay, let’s add another block. You could either select “Insert After” from the dropdown list above, or simply press return/enter on your keyboard.3
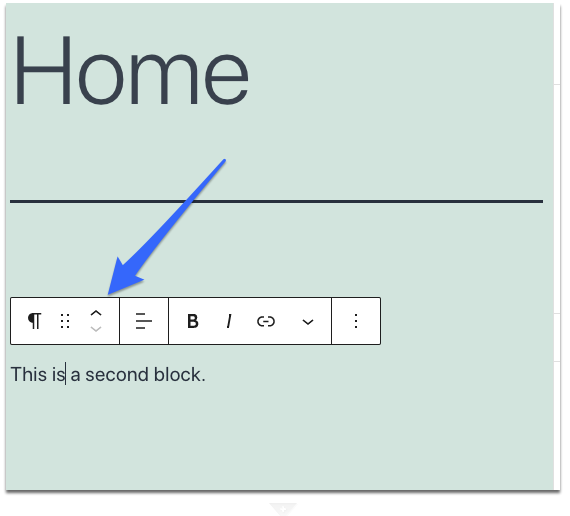
Type some additional text into that new block. By default, WordPress has given you another paragraph block. We should also notice that some arrows have appeared on our toolbar. We can easily move the block up or down in the vertical block stack by clicking those arrows, or we can click the dots next to the arrows to drag the block to a new location.
Try playing around with the arrows for a few seconds to get a feel for them. Then, go ahead and change your top block from a paragraph to a <h2> heading.4 The font for your new heading should have increased in size and weight.
Adding an Image
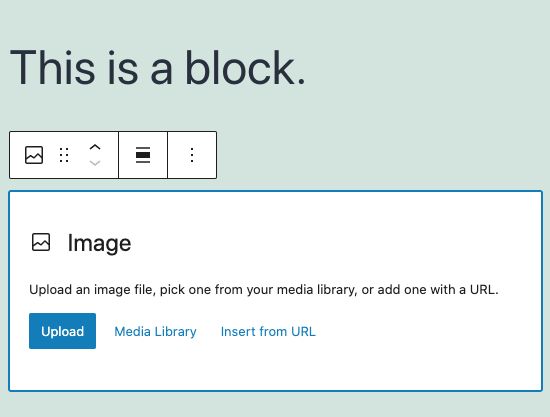
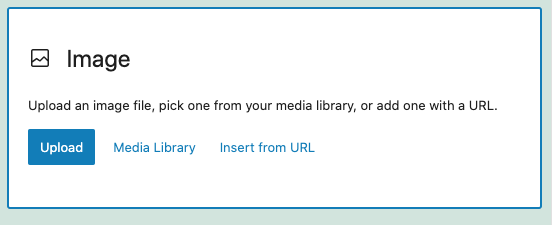
Next we’re going to add one more block, but this time we will make it an image block. As you explore WordPress, you’ll learn that there are usually a few different ways to reach the same goal. One way to add an image is to hit return to start a new block and then click the plus sign to the right. You’ll see a few common block types to the right of the block, including a heading, image, and gallery. Click image.
It’s incredibly easy to add an image to our page with WordPress! All we need to do is find an image.
Let’s visit our favorite place for free images, Unsplash, and download any image that’s calling your name. Once you’ve got an image downloaded to your computer click upload, and select your image.
It’s really as easy as that! Again, at the top of the image block you’ll see some options to align the photo, edit the image, add a hyperlink, etc.
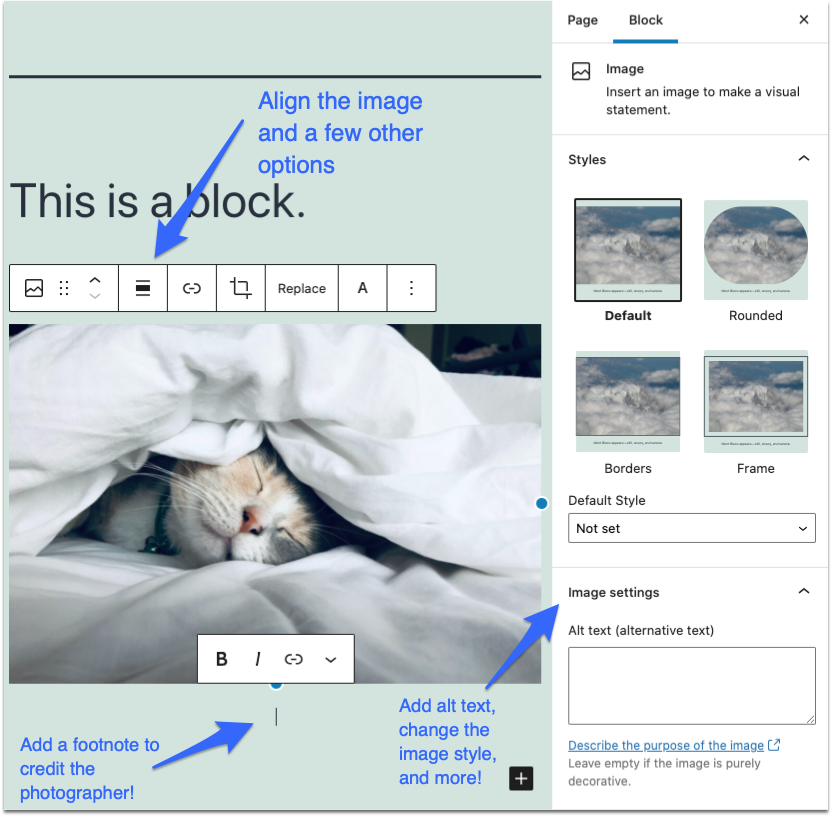
You probably have also noticed that there are a few more settings you can play around with on the right side of your screen. These setting will change depending on what type of block you’re working with and let you change some basic styles of your elements. For an image, we can (and should!) add alt text. We can also make changes to the image size/dimensions, and even add a circle mask if we want to (click “Style” to try out the mask).
Media Library
One of the great perks of using a CMS like WordPress is the way it manages and organizes all of the images and other media that we integrate into our website. To give you a better idea of what’s going on behind the scenes save your work by clicking “Update” (or Publish) in the upper right corner of your screen, and then click Media and then Library in the dashboard at the left of your screen.
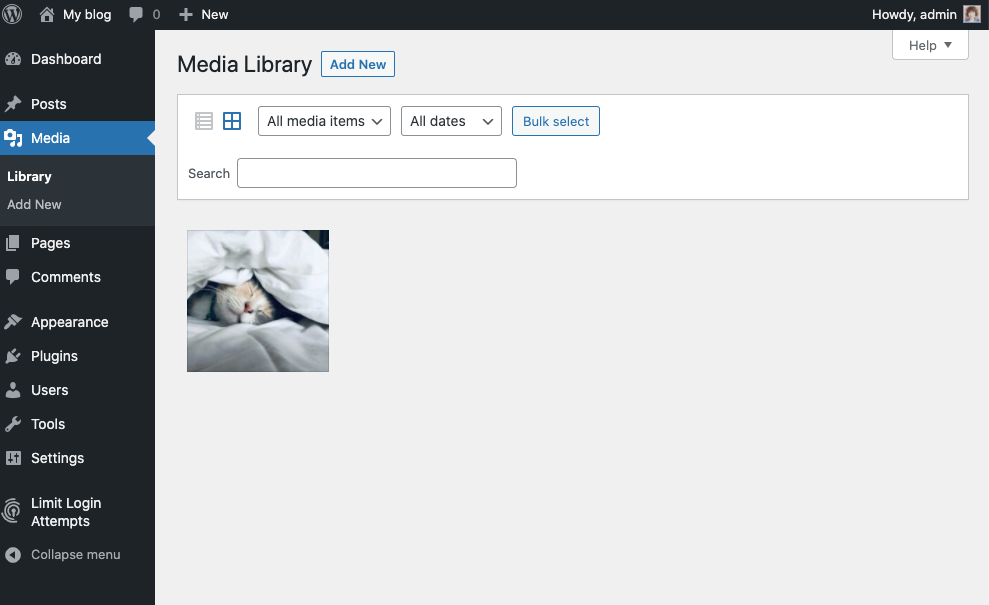
You’ll notice the image that you just downloaded is already saved in the media library for your site. WordPress automatically added it for you. If you click on the image you’ll see some additional information and options, including a place to add permanent alt text, a caption— even the option to edit the image.
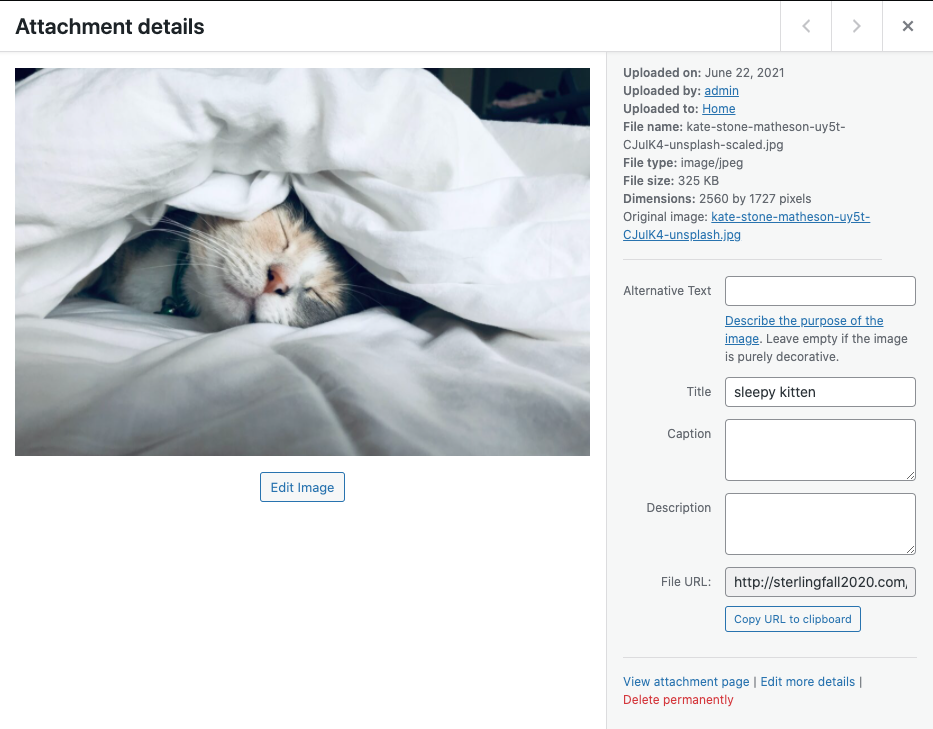
The Media Library is a great tool, because every image (or other form of media) that you upload to your site is saved an available for reuse. If you wanted to add another image block with the same picture of a sleepy kitten, all you would have to do is select Media Library when WordPress prompts you.
What about my server?
At this point, you might reasonably wonder: What about my server? Don’t I have to upload the images to my server too?
WordPress actually does this for you so you don’t have to worry about it! Let’s take a quick detour to prove it. You can follow along with these steps if you like, or just observe this bit.
First, I’m going to open Cyberduck and navigate to the folder that I created when installing the WordPress playground. I’ll click the playground folder to see all the files and folders that were added to my server when I installed WordPress. It’s a lot, right?
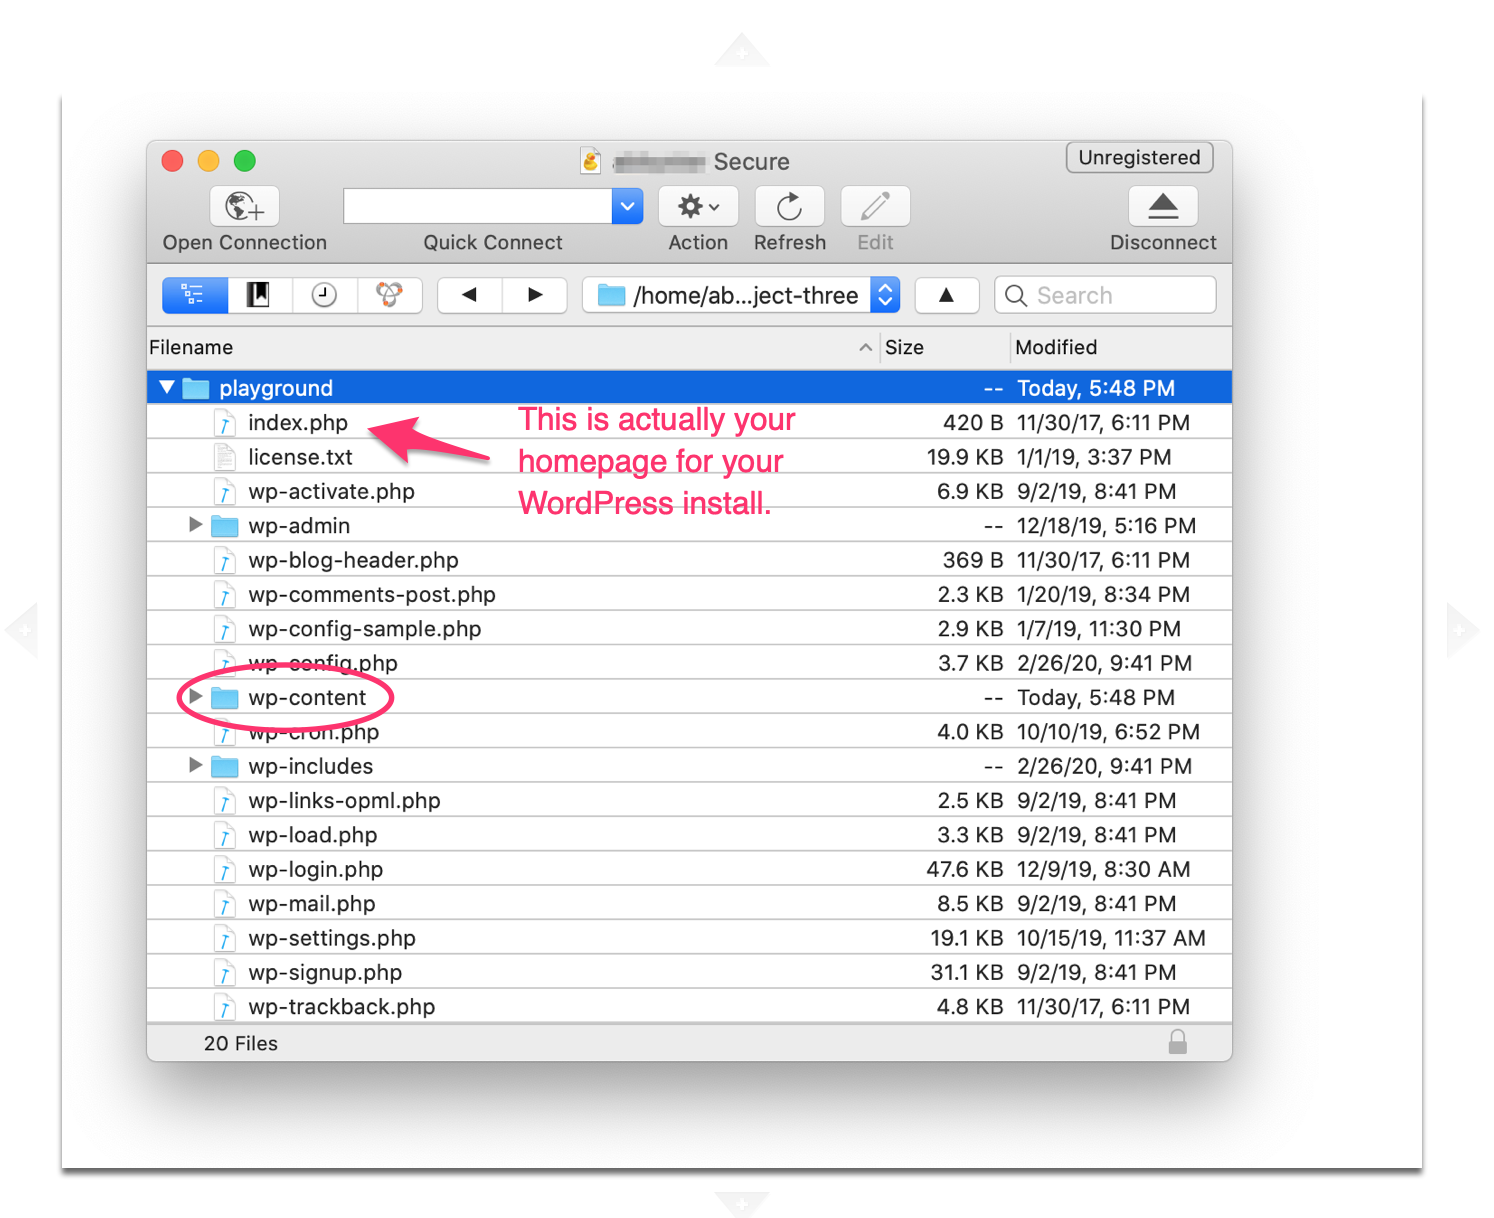
There’s a lot going on here and we don’t need to get too into the weeds. One interesting thing to note is that index.php is actually your homepage for your WordPress site, just like index.html was the homepage for your earlier projects.5 What we’re actually going to look at though is the wp-content folder.
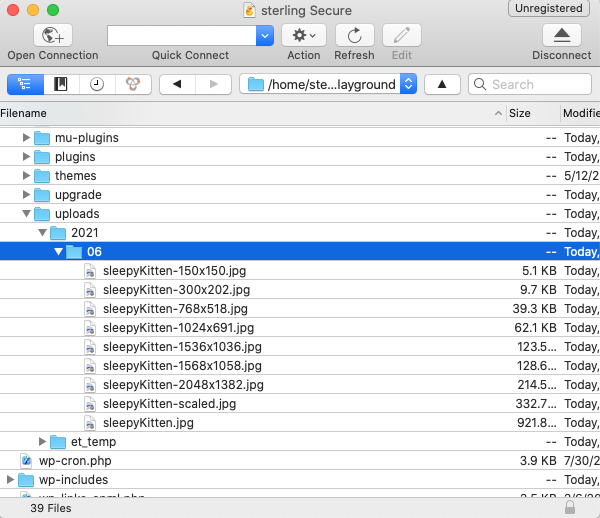
When we click into the wp-content folder we can go to uploads, then 2021, then 06.6 Inside the 06 folder we’ll see the photo that we uploaded. In fact, we’ll see that not only is the original image saved, but WordPress has saved resized versions of the same image if we should need them.
This quick server detour should illustrate two points. First, we’re not abandoning the processes we learned earlier in the semester; all our files and folders still need to be uploaded to our server in order to be accessible to folks browsing the internet. The second point is that you should be starting to see just how much WordPress simplifies the process of front-end web development. When you’re working on a WordPress site, you’ll never have to upload files to your server manually; WordPress will take care of all of that for you behind the scenes. No wonder it’s so popular!
Next up, we are going to take a very quick look at WordPress themes!
Themes
You’ve already had some experience with themes during our Bootstrap module, but it’s time to revisit them in WordPress. The rules we previously discussed are still important— in fact, they even more important, so please take a few moments to refresh yourself.
Head back to your WordPress dashboard and click “Appearance” and then “Themes.”
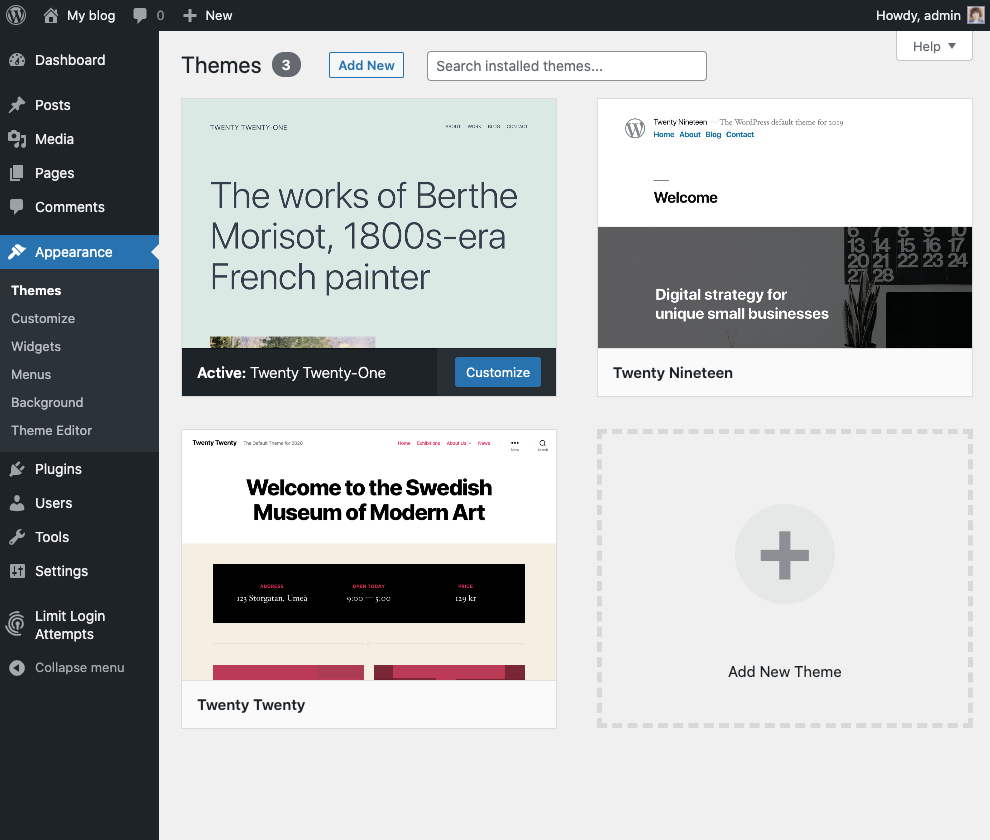
You’ll likely see three default themes that have already been installed for you. Each year WordPress comes out with a new default theme and what you’re seeing are the three most recent. As you might expect, the active theme for your site is the most recent: Twenty Twenty-One.
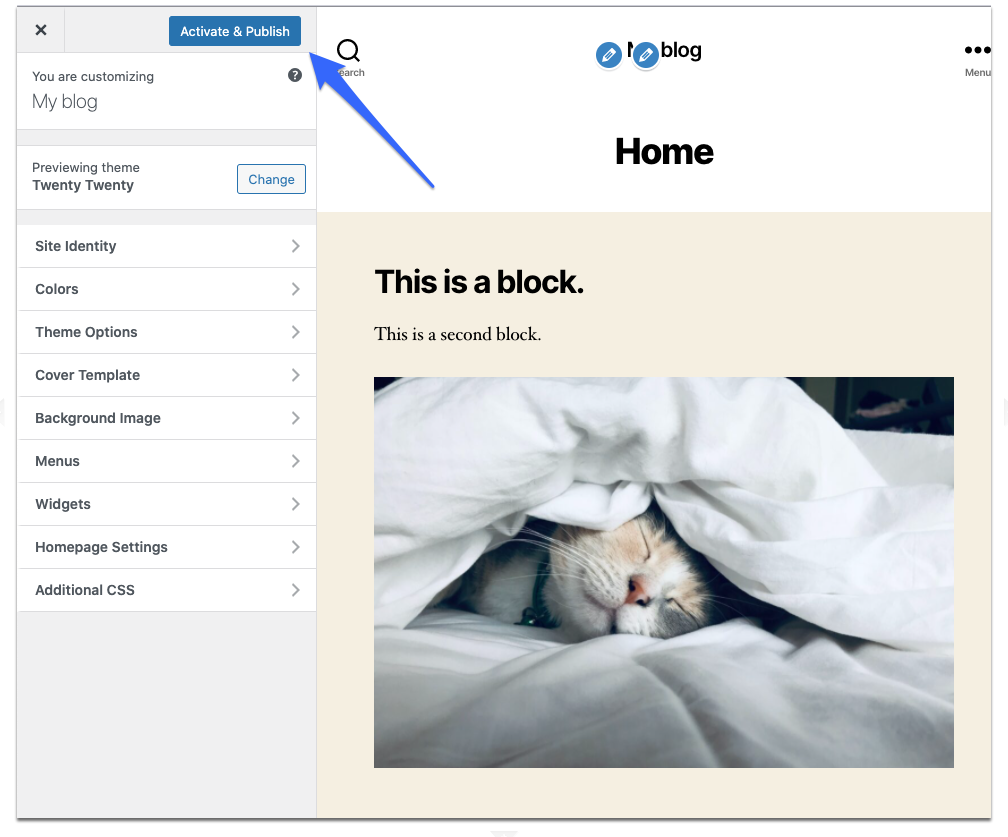
You can test out one of the other installed themes by hovering over it and pressing “Live Preview.” This is a great way to get a quick look at how your site will change if you change the theme. If you decided that you liked the new theme and wanted to activate it, just click “Activate and Publish” in the top left corner.
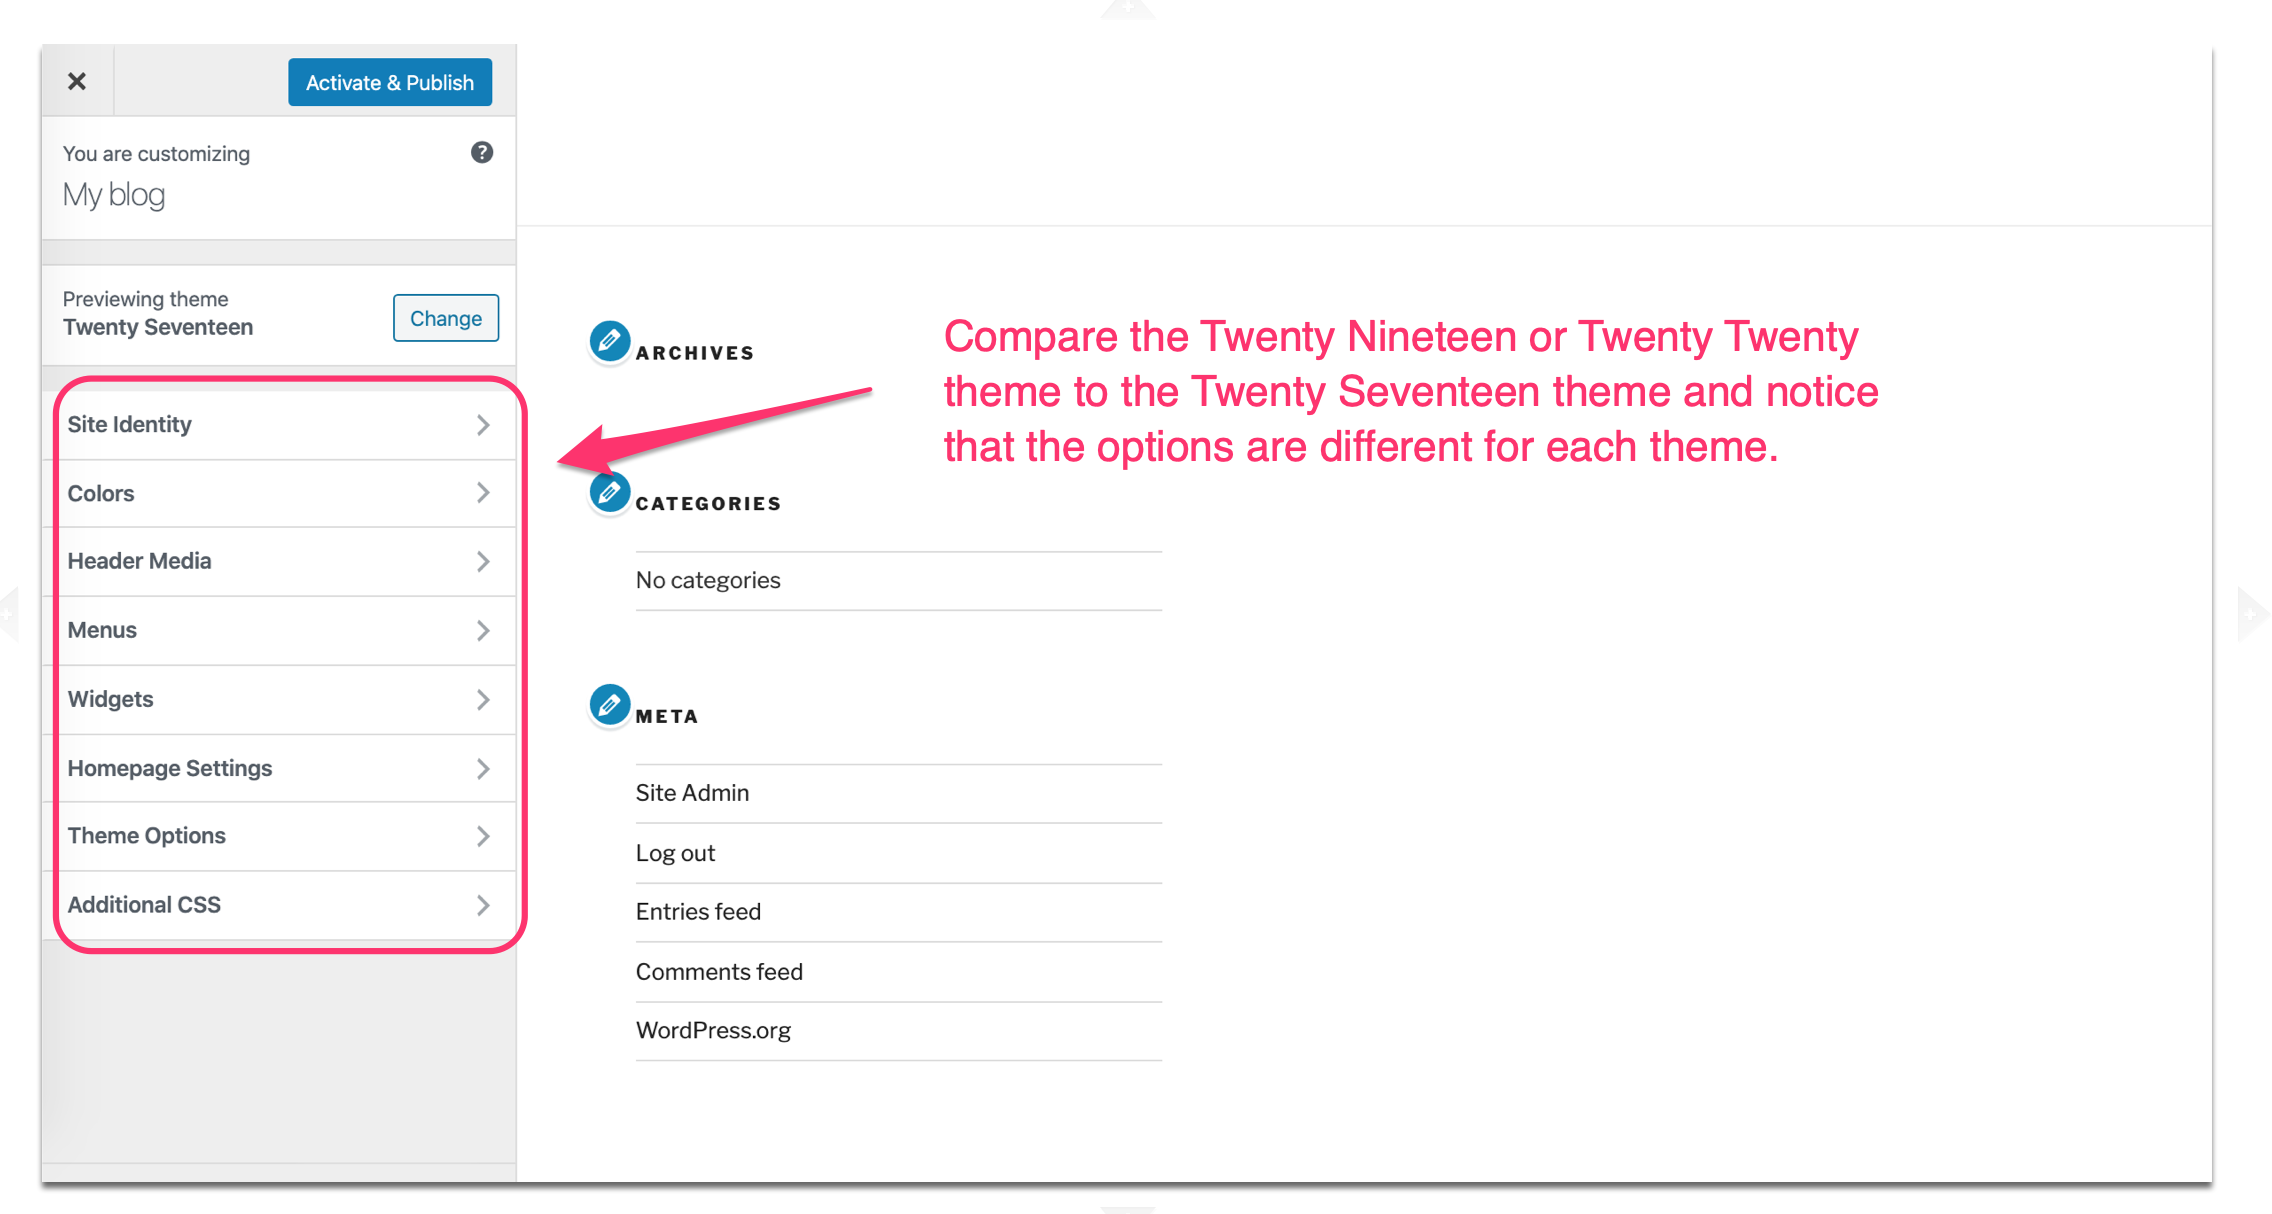
A few important notes before we fall too deeply into the theme rabbit hole. In WordPress themes actually have a much bigger impact on the functionality of the site than they do with Bootstrap. Themes might come with certain widgets preinstalled, require certain plugins, or have specific menu options predefined. This isn’t something that we need to worry too much about while we’re working on our WordPress playground, but it’s a good thing to be aware of. In fact, as you explore a few different themes, pay extra attention to the differences that you’ll note in the themes menu.
As part of the playground assignment you should spend some time trying on different themes. There are four preinstalled themes for you to investigate, but those aren’t the only options that you have.
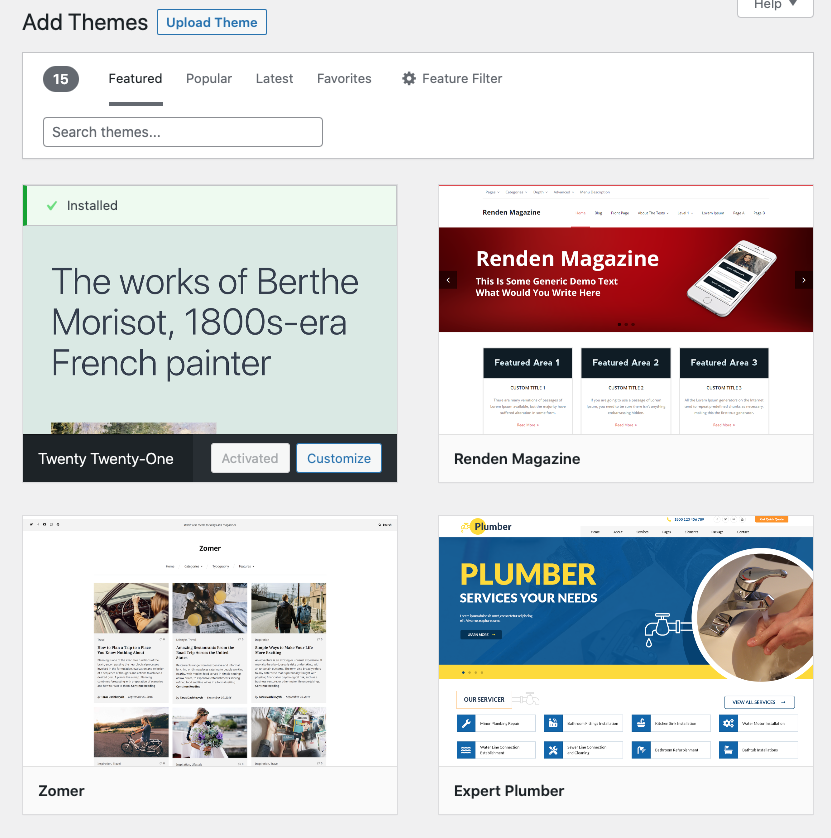
Back in the main theme page, click “Add New Theme.” You should see fifteen additional “Featured” themes that you can experiment with— but, if you click “Popular” or “Latest” you’ll have access to thousands of different themes.
There’s a lot to explore with WordPress themes and the point of the Playground assignment is to try out a few different themes and start to evaluate how they function. There’s a wide range in the quality of these free themes so it’s a good idea to think critically about ratings and functionality. Also, be aware that some themes will reference page builders like Elementor, Divi, and others. As we discussed in shopping for a theme, page builders or other tools that mimic WordPress’s core functionality are best avoided in the context of this class.
To try out a new theme from the theme library you’ll have to first install it7when it’s installed you can do a live preview8 and then activate it.
Okay! That’s a lot of ground that we covered! What’s next?
Your mission…
By now, you’re starting to see how powerful of a tool WordPress can be, but fully utilizing WP’s functionality takes practice. Spend some time on your own exploring WordPress and building out a low-stakes website that gives you a chance to learn about WordPress’s interface and functionality.
This is a practice site, not a project, so spending your time exploring! As we move through lessons in class, test out what you’re reading and learning in your Playground. Keep exploring the Dashboard, the Block Editor, and the Site Editor. The checklist below includes really common actions you’ll do when you’re building a WordPress site. I strongly recommend working through this checklist because it will get you familiar with the action steps you’ll take to complete Project 3.
Exploration Checklist
Pages: Design and layout 2 pages – for example, your Home and About pages, using 3-4 Blocks and a pattern or two.
Posts: Build or recreate a news article/blog post with images, text, and either video or audio. Play around with Widgets and different layouts to get a feel for what you can do.
Style Editor:
- Change the background color of your site.
- Customize the text for your Headers, Paragraph text, and Links.
Block Editor: Dig into a type of block, e.g., a Button, a Pull Quote, and manipulate its styling.
Navigation: Identify where and how to edit your navigation bar links and styling (Hint: It’s not all in the same spot.)
Templates: Figure out how to apply different templates to your pages. Troubleshoot the limitations of applying templates based on your Theme or Reading settings.
Test out a few different themes and find one that you like besides the default Twenty Twenty-Five theme. In order to get the hang of WordPress you need to poke around and build things and break them and build them again. Once you feel like you know your way around WordPress a bit better make sure to save your work and hit publish!
One thing to be careful about that is worth mentioning: you cannot move a WordPress site around on your server by dragging it and dropping it like you could with earlier projects. This is due to the way WordPress stores data on your server. If you try to drag and drop a WordPress site you will break it and lose all your work. ? For this reason, it’s a VERY GOOD IDEA to save a local backup of your WordPress site after you spend any significant time working on it. Seriously!
If you haven’t created those pages yet, check out Step 7 in the Starter Steps to make them!↩
There’s also a preview function that you can use, but sometimes it can get a little glitchy when you’re working with specific themes.↩
you could also click the plus sign that appears in the bottom center of the existing block when you hover over it— WordPress gives us lots of ways to reach out goal!↩
Use the dropdown next to the paragraph symbol and select “heading.↩
You can learn a bit of introductory information about PHP back in the WordPress intro reading↩
WordPress organizes our uploads by year and month!↩