Customizing style in WordPress can seem a bit intimidating or confounding, but once you get the hang of it, it’s actually relatively simple and incredibly powerful.
Where to customize style in WordPress
Reading: How to edit a WordPress site: a comprehensive guide for beginners
The above reading supplies a solid foundation for approaching customization in WordPress. While it does include some references to customization WordPress’s Classic Editor, it also covers basic customization tasks that you can accomplish using the Site Editor.
Once you’re ready to dig into customizing Blocks, WordPress.org provides a hearty collection of Customization support articles to help get you started.
Between the Site Editor and Style Panel (not sure what that is? Read about it!) provide a lot of opportunities to customize your website. But what if the Style Panel doesn’t offer the styling you’re looking for. That’s going to require adding additional CSS.
Applying Custom CSS
Reading: Applying Custom CSS
It’s not at all obvious at first, but WordPress actually provides a surprisingly simple method for adding additional CSS to a block. As the reading points out, the Style Panel includes a way to add additional CSS at the Block-level.
The catch? Any changes you make to a Block or Template part, such as a Header, using the Styles Editor will display site wide. Sometimes you want to customize an element, like a background color or header image display, on just one page or post – not sitewide. That’s going to require targeting pages and posts and adding additional CSS to your Style Book.
Targeting Pages and Posts
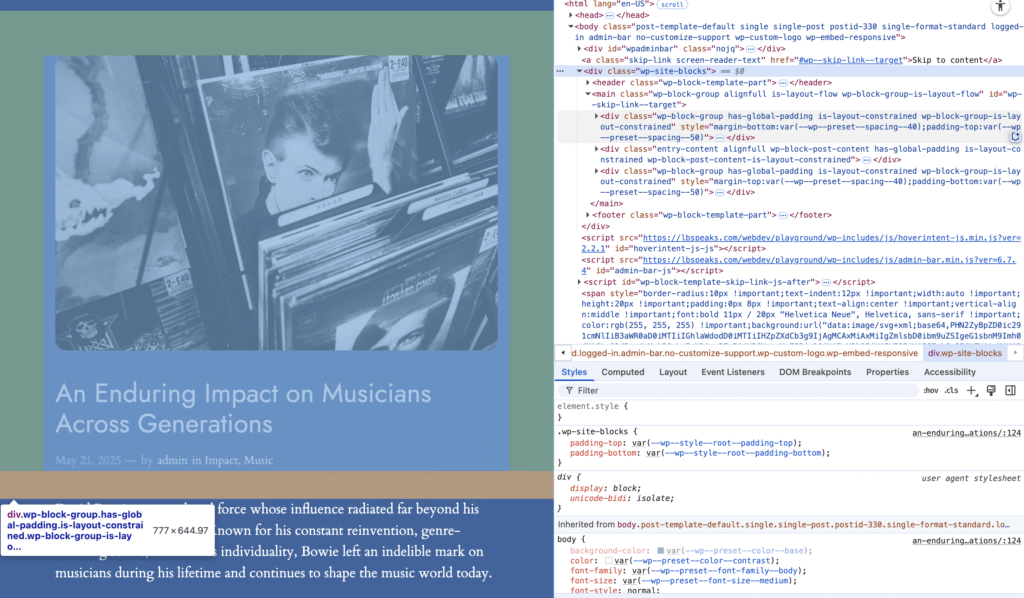
Think back to the process we used in our Bootstrap module to target an element and style class or id so that we could customize a few things. It starts with knowing the element on the page that we want to customize. In this example, we want to change the background color on one of our posts.
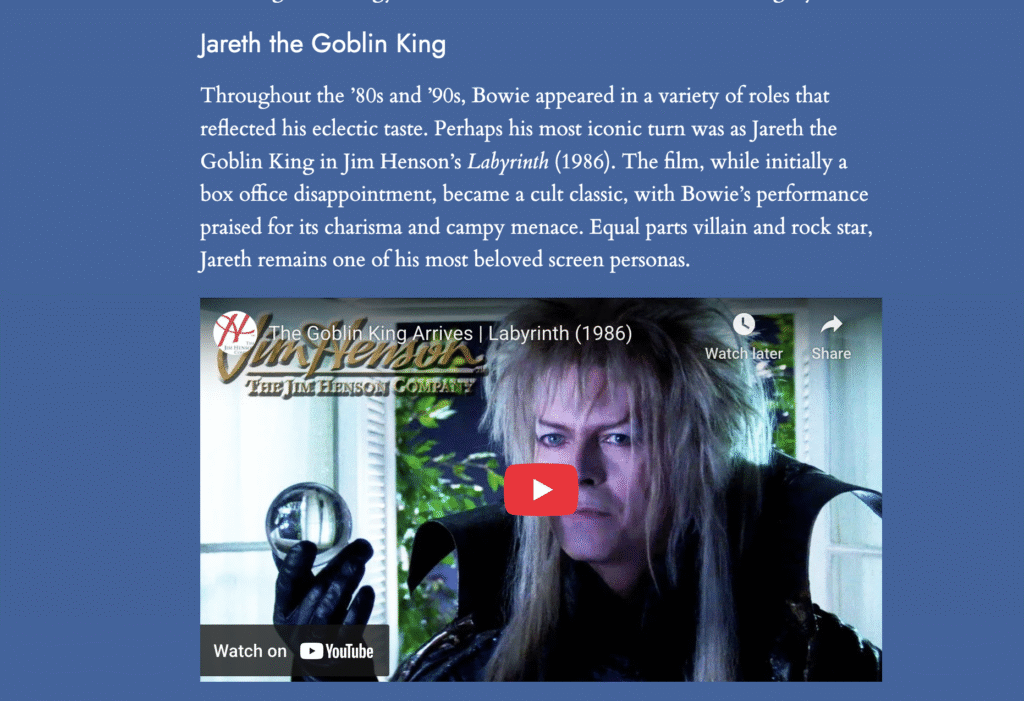
We’ve set our global background color style to this lovely medium blue.

WordPress adds a unique class to every post and page on your site. You can find this unique class in the body tags of the page or post, or you can find the class in the page or post’s URL when you click on “Edit Post.”
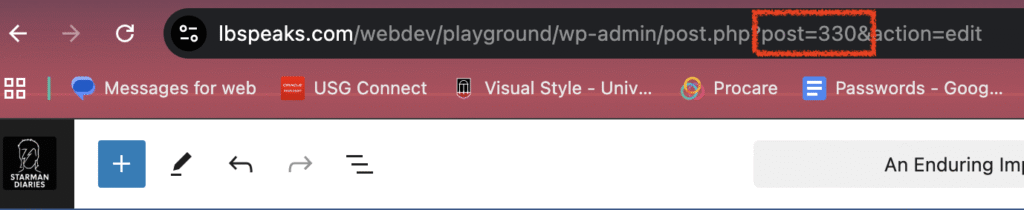
In the image above, note this part of the URL: “post=330.” This is the post’s class. To change the background color of this post and no other posts, you can add additional CSS rules to the website’s style.
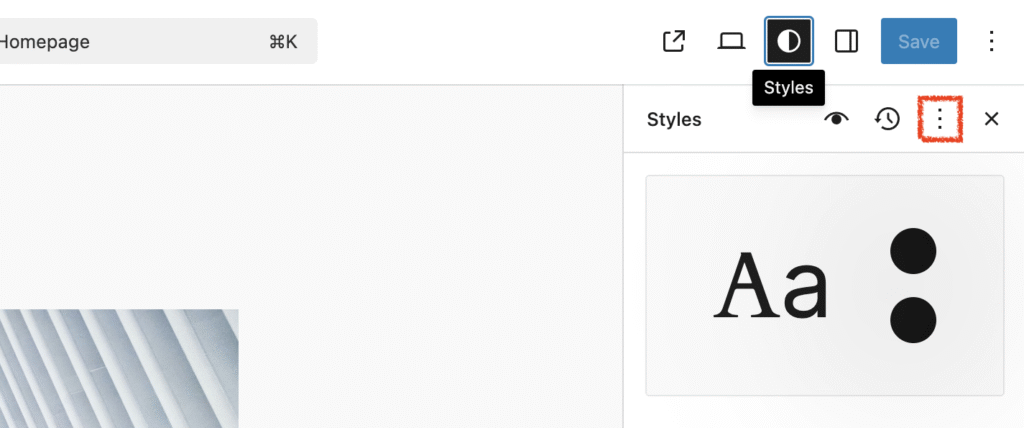
To add your custom CSS, head to Appearance > Editor > Pages > then, click into the Page in the viewing window. In right-hand Settings sidebar, click on Styles icon (the black and white circle icon). Click on three vertical dots and elect Additional CSS.
From there, you will use the following class to declare a custom background color (dark hot pink!) for the post.
.postid-330 {background-color: #D90166;}Hit Save, and ta da! Our targeted post background is now dark hot pink, and the rest of the post pages remain our lovely blue color.

Custom CSS for a block
Let’s say that you want to customize a particular block on a particular page or post, for example – a cover block. As in our last module, we will turn to the Inspector tool to target the class we want to change.
Whoa. If you’re thinking, that’s not how I remember my earlier websites looking, you’re right! On WordPress sites, themes, builders, and plugins all wrap your HTML in layers of <div> tags and dynamic classes, so it’s easy to get lost – and lose track of the element you’re targeting.
Luckily, the skills you’ve built understanding how elements and classes work together and using the Inspector tool will help us find the class we need amid the WP noise.
Select the Cover Block on the page to pull up its HTML code in the Inspector Elements window. The block’s HTML code is highlighted.
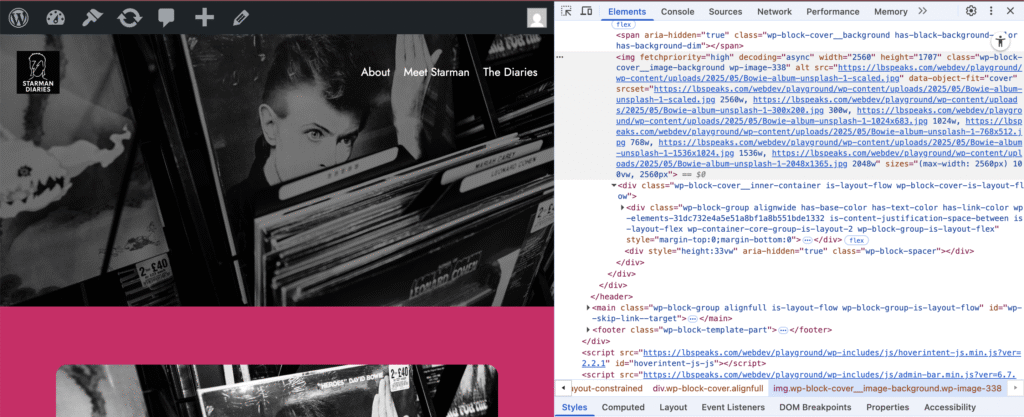
WordPress has common naming conventions for Blocks, so you will want to look for this class:
.wp-block-cover .wp-block-cover__image-backgroundThis class appears a few times in the Cover Block’s code, and the <div> tag that contains the cover has the “wp-block-cover” class. We’re on the right track. Since we are wanting to remove the cover image from this post page, it makes sense to look for code that defines how an image is displayed.
Notice that the <img> tag include the class, wp-block-cover__image-background. Now it’s time to look at the Styles panel to see what styles are declared for this class.
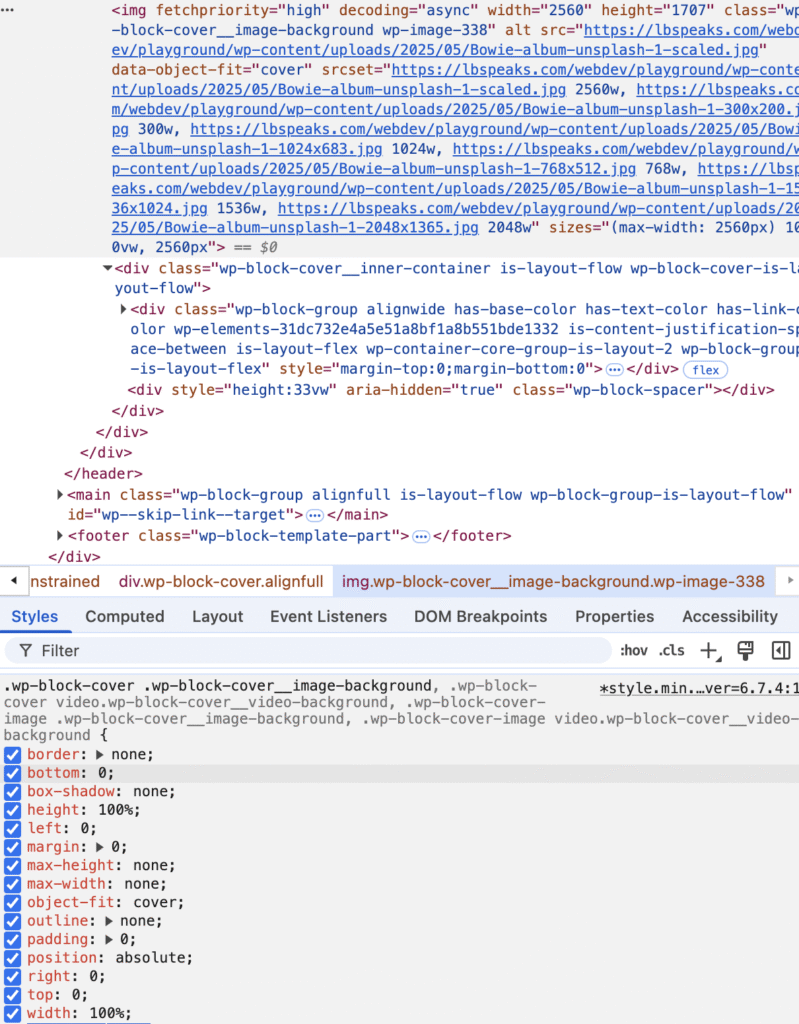
These declarations are definitely determining how the cover image is displayed. One way to check if your hunch is correct is to uncheck a box such as “object-fit” and see how the image display changes. Another great thing you can do with the Inspector tool is you can live-edit your CSS right inside the Inspector to preview the change before adding any CSS to your Style Book. So, let’s add the declaration:
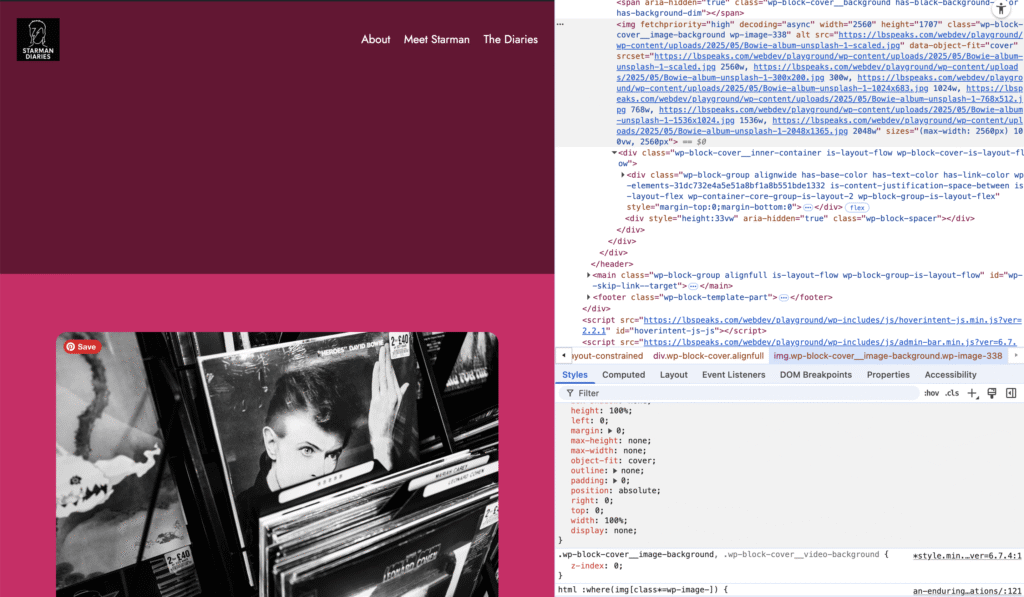
display: none;The image is gone. We’re left with a dark magenta block (that’s related to the black overlay on the cover block.).
So, now you know the class and declaration you need to add as Additional CSS in your site. There’s more styling you’d need to do the block to make it look good, but now know the steps to target and customize the block.
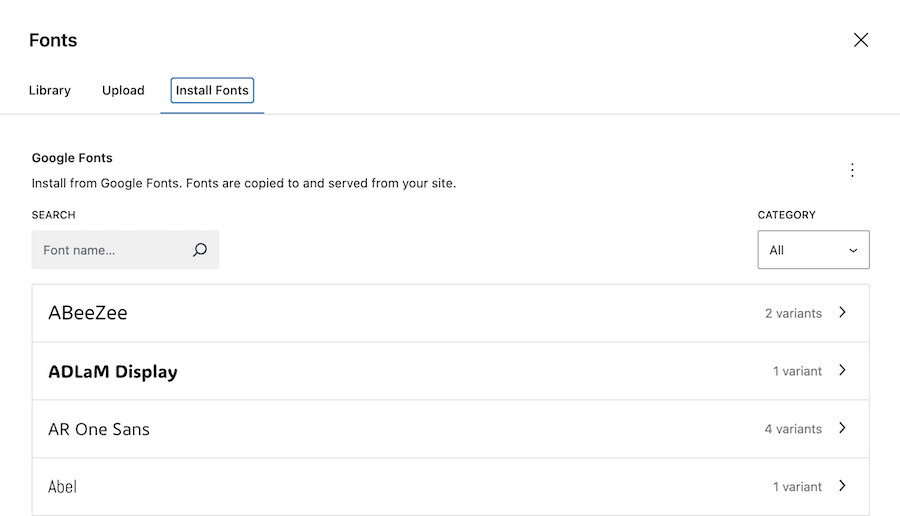
Adding a Google Font to your website
While there are several plugins that help you add fonts of your website, it’s surprisingly simple to add a Google Font (or two!) to your WordPress site using the Style Editor.
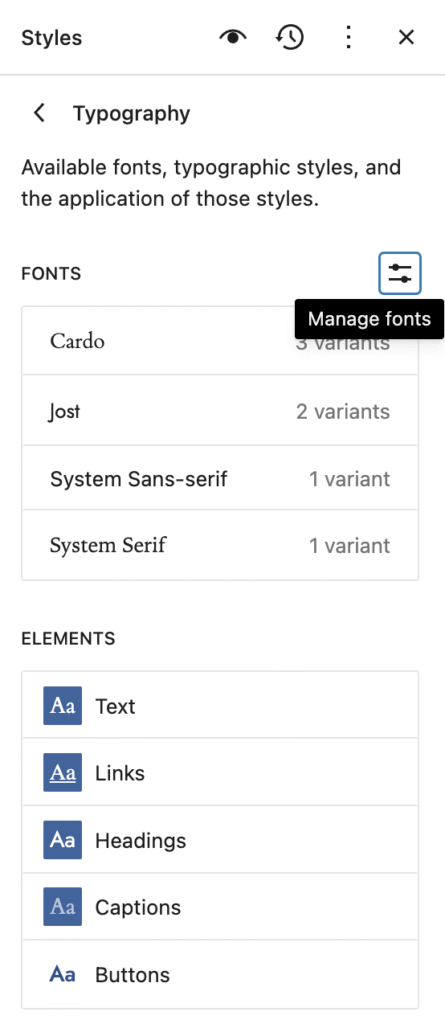
Navigate to the Style panel in the Editor again and click on Typography. You’ll see the Theme’s active fonts listed below. Click on the icon to the top right of the Fonts heading to Manage Fonts.
In the Fonts window, click on Install Fonts. Simply search for the font you want to add to the Style Book, click through to select the variants you want to add, and click Install. Done!