This week’s assignments are drawn from the three chapters that you worked on in the textbook last week; hence the title, Three in one. For these exercises, create a link on contentView to each part.
Part 1 Navigation Bar customization
- Create a new swiftUI project named week12.
- Create a new swiftUI file named listStyle and link to it from ContentView.
- Create a new list in listStyle. You can use any list that you want, including one that you created previously, but DON’T use the list from the textbook. Make this part as easy as possible, because the point of this exercise is not the list itself, but how to format the NavigationBar and back button.
- Find the section titled Configuring Font and Color in Chapter 11 of your textbook. Now create a title for your Navigation Bar and customize it. Drastically! But don’t just copy the code from the book and use it as is. Make yours look different.
Part 2 Back Button Customization
- Link the items in your list to ‘something.’ Keep this part simple as well. Your goal here is to generate a back button that you can change the look of.
- Find the section in the book titled Back Button Image and Color. Customize that back button by changing the image and color. BTW, the book demonstrates how to customize the button with SF images. You could also add a picture of your corgi instead if you had one!
Part 3
Create a new list in another view. You are welcome to use exactly the same list! Now follow the crumb trail in Chapter 12 of your textbook and create a modal view that will display when a row of data in your list is clicked. Exactly as the lesson in the book, make sure that it your modal view has the following characteristics.
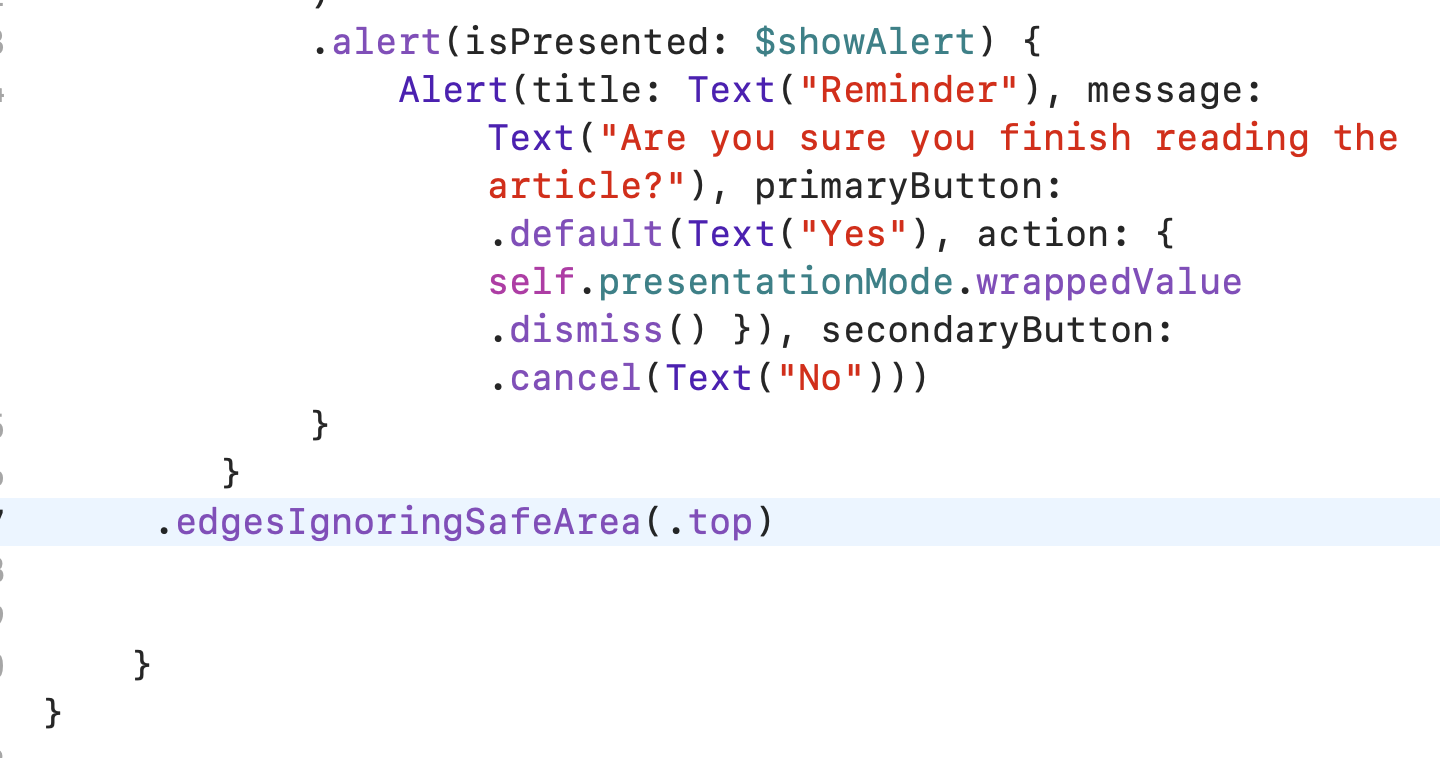
- A floating button for dismissing the modal view. Feel free to borrow code from the textbook and follow their approach.
- An alert that displays when the floating button is clicked. When the book says to “Next, attach the alert modifier to the ScrollView like this:” You will need to place the alert modifier inside of the Scrollview at the bottom as shown below.
